Disclosure: this post may contain affiliate links, which means I may make a commission if you decide to make a purchase through one of my links, at no cost to you.
This post may contain affiliate links. This won’t change your price, but may share some commission. Read my full disclosure here.

It’s time to kick off summer with this DIY charred wood s’mores tray — perfect for outdoor entertaining! In this tutorial, I also show you how to do one of the latest woodworking trends taking over Instagram: shou sugi ban.
If you’re looking for more fun woodworking ideas after this tutorial, be sure to check out this backyard drink station or this roundup of easy woodworking ideas.

I hope those of you in the U.S. had a lovely extended weekend! As for myself, I got a little more done on the new wood deck and put the first pieces down. There’s still a bit more work to do before I can reveal that to you. So today, I’m celebrating the official start of summer with a brand new DIY project, using the ancient Japanese technique of “shou sugi ban.” This new s’mores serving tray will be perfect when we have friends over for our bonfire hangouts!
This tray features a unique interior—it’s all charred wood! My inspiration for the idea first came from learning about shou sugi ban on Instagram. For those that don’t know, shou sugi ban, or yakisugi, is a traditional Japanese method for wood preservation. Shou sugi ban is a technique commonly used on cedar for weatherproofing. It involves charring the surface of the wood.
If you’re looking for some inspiration on the technique, I highly recommend giving shou sugi ban a cursory search online. Be forewarned: it’s a rabbit hole that you will get sucked into! Some of these projects, like my pal Jonny Builds on Youtube, are so cool to watch. Shou sugi ban is a fire-resistant technique that you can even use on the exterior of your home’s wood siding! Since the 18th century, carpenters have used the method for wood treatment and preservation—and the wood turns out GORGEOUS.

How to Get Started with Shou Sugi Ban
Sponsored project in collab with Bernzomatic.
I wasn’t sure what I wanted to make using the shou sugi ban technique, but I got some inspiration from campfire + wood = s’mores! I figured a s’mores tray would be a perfect project to try my hand at wood charring. I just love the way the burning process brought out the woodgrain in such a pretty way.
Using the charred wood on the interior of my DIY s’mores tray instantaneously gives the tray that whole “use me for s’mores” vibe. I know my friends are going to love it when I’m entertaining around my backyard fire pit. It was incredibly easy to get the look of shou sugi ban with the Bernzomatic high heat torch. They’ve been a really awesome sponsor to work with this year (and not just because wood burning has re-awakened my inner Girl Scout!).

How to Make a DIY Shou Sugi Ban Wooden S’Mores Tray
Confession: I hate measuring when I do woodworking projects. I avoid measuring when I can. I prefer to cut things to size using the elements of my project as reference markers instead. I provide a few measurements for the sake of accuracy as you make this DIY wooden s’mores tray, but feel free to make this tray with custom dimensions!
Finished s’mores tray size: 32” x 15 7/8”
Tools:
- Bernzomatic TS4000 and Map Pro gas cylinder
- Miter saw
- Angle grinder with 80-grit flap disk
- Brad nailer
- Clamps
- Tape measure
Materials:
- 1 – 1” x 8” x 8ft (poplar, bottom of tray)
- 3 – ½” x 4” x 4ft (poplar, tray sides)
- 1 – ¼” x 2ft x 4ft oak plywood (tray liner)
- 2 – ¼” x 3” x 4ft (oak, tray dividers)
- Sandpaper
- Stain
- Food-safe finish
- Wood glue
- All-purpose glue (gel formula type)
- Stainable wood filler
- ⅝” Brad nails
- 2 – kitchen cabinet pulls
Step 1: Gather Your Boards and Cut
To make the shou sugi ban wooden s’mores tray, you’ll first need to gather your supplies. Start with a 1” x 8” x 8ft (actual dimensions ¾” x 7 ½” x 8ft) board in a species of your choosing (if you want a narrower s’mores tray, use a narrower board of the same length or cut a custom size of plywood).
For my s’mores tray, I went with poplar because it’s an easily accessible hardwood in my area, and I thought it would be a great contrast with the charred wood interior.
Cut the wood into two pieces, roughly 36 inches in length each. Don’t worry if the wooden pieces don’t match up perfectly; you will cut them to square as you’re assembling the s’mores tray.

Step 2: Glue the Wooden Pieces Together
With your two cut pieces of wood ready, glue them together side by side. These pieces of wood will serve as the bottom of your s’mores tray. I’ve found that even with two straight pieces, it’s good to use clamps to keep the boards together until the glue dries (about 24 hours).
Once cured, cut off both ends of the wood so your board is a perfect rectangle to make a nice base for your s’mores tray. I drew up a quick diagram to help visualize everything that’s going on in this step!

Step 3: Cut the Sides of Your S’mores Tray
Next, cut all four sides of the s’mores tray using the three pieces of ½” x 4” x 4ft poplar (one each for the front and back of the tray; one more to cut the two narrow sides).
To cut the pieces of wood, use a miter saw at a 45-degree bevel (tilt the back of the miter saw to “bevel” it to 45 degrees). To get the measurements right, I used the already-cut bottom of the tray and marked the ½” poplar where the tray ended. You can also use a tape measure to get the exact measurement and cut, but I find that I make fewer mistakes with my miters.

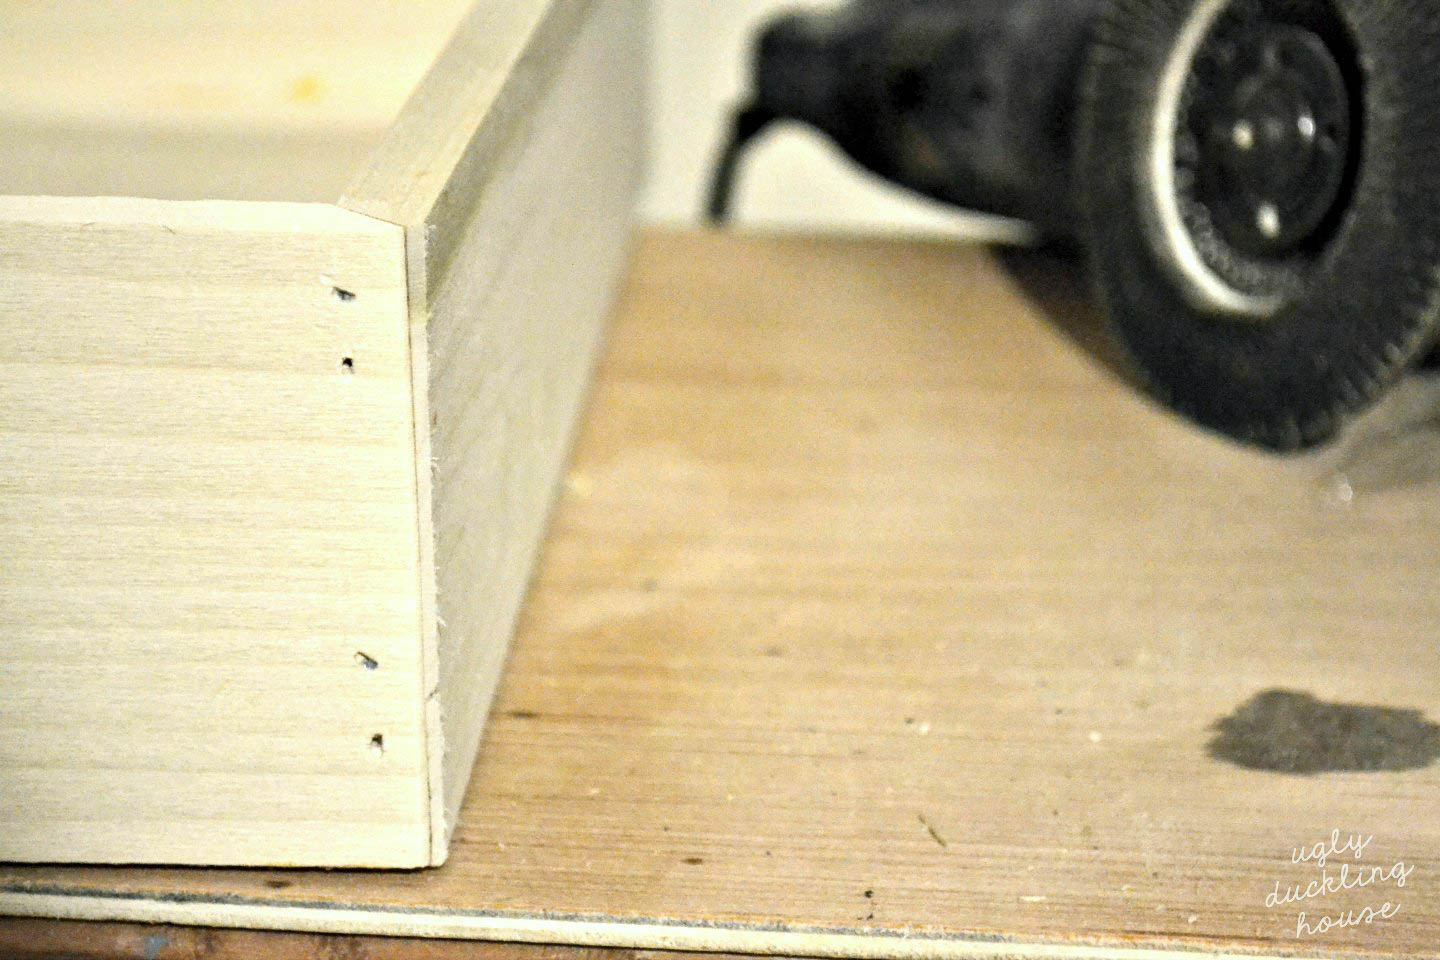
Step 4: Glue Each Side of the Tray
Glue each side of the wooden tray onto the bottom piece that forms the s’mores tray base. Add glue at each corner to create the shape of your tray. A brad-nailer will help you keep each side in place as the glue dries. When the glue cured, I used an angle grinder to add a small chamfer to all four corners. (FYI: chamfer just means that slight angle shaved off the corner.)
Step 5: Putty, Sand and Stain Your Tray
By now, your tray should really start coming together. You’re going to want to add wood putty to fill in any holes. Once the putty has set, sand it smooth and make sure there are no rough areas. (No one likes slivers in their s’mores!) After sanding, stain the tray any color of your choosing.

Step 6: Test Out the DIY Shou Sugi Ban Process
With the main part of the tray complete, the shou sugi ban burning can begin! The wood charring process is super fun and exciting!
I tried out my Bernzomatic TS4000 on a piece of scrap poplar to get the hang of the burning and wood charring process. I suggest you do the same, mainly because it takes a moment to get the hang of shou sugi ban. I quickly learned that the wood needs to char evenly on both sides to prevent it from curling and burning too much.
Remember safety first! I torched everything outside, right on top of the gravel area that surrounds my fire pit. If you don’t have a fire pit or gravel area in your yard, burn the wood on top of bricks or cinderblock in a well-ventilated area.

Step 7: Cut and Treat Plywood for the Inside of the Tray
Cut a piece of ¼” oak plywood to fit the inside of your tray. I liked the look of oak grain for this. I don’t recommend using glued-together boards… I tried it, and it fell apart at the glue seams once I heated it!

Let’s try the process again with a piece of oak plywood…much better!

The key to getting a beautiful, even shou sugi ban effect is to be steady with your torch. Apply the same amount of heat in each section and flip the wood regularly to keep the board from curling too much.

Step 8: Allow the Plywood to Cool, Clean, and Assemble Your Tray
Once you have a beautiful, even char across the wood, you will want to allow some time for the plywood to cool. Once it’s no longer too hot to handle, you can glue and nail the s’mores tray liner in place at the bottom of your tray.
Once the liner has set, you should wipe down the charred wood to remove as much soot and residue as possible. The cloth will definitely be black by the time you finish, but it will keep the residue from transferring onto your s’mores (or your guests).

Step 9: Cut Wooden Tray Dividers
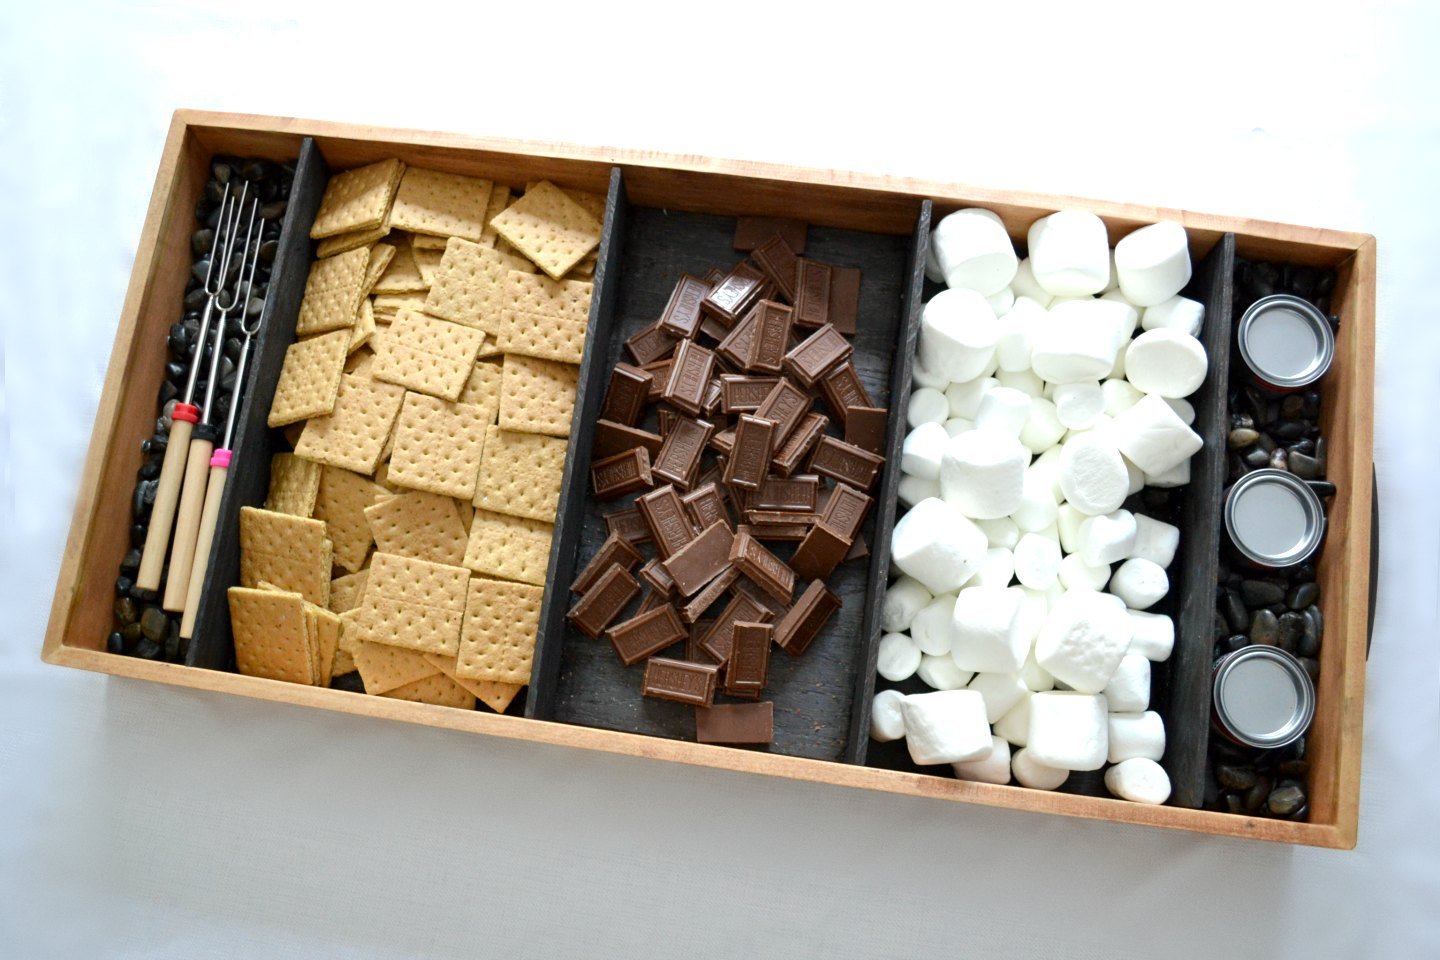
Now, you’ve assembled a serving tray—but remember, for this project, we’re making a s’mores tray! That means we need to create some compartments to hold marshmallows, graham crackers, and chocolate! Cut pieces of ¼” x 3” oak board to serve as your dividers. For my s’mores tray, I chose to cut four to create five compartments total.
Again, I find that marking the board against the tray itself makes for a more accurate measurement, but you can also measure and cut to length (in this case, 14 ½” long). Stacking the dividers together as you cut helps to keep the saw from splintering the thin pieces of wood.

Step 10: Give the S’mores Tray Dividers the Shou Sugi Ban Wood Charring Treatment
Do the same shou sugi ban wood charring process with the dividers as you did with the bottom liner. Keep in mind that thin pieces will burn and curl quickly, so move fast as you char the wood.
Step 11: Cool, Assemble and Finish Your S’mores Tray
Once again, you’re going to need to let your wooden divider pieces cool before you assemble your tray. You should wipe down each wooden piece and then glue them in place to divide each tray compartment.
To make the tray safe for holding food, you’ll need to apply a food-safe finish (such as salad bowl finish) to the entire interior of the tray, where food might touch. While holding s’more supplies would be considered “light” food use (compared to a plate, cup, or cutting board, etc.), you should still wait until the finish is fully cured and hardened before letting your tray come into contact with food. (In my case, that would be 30 days.)
An optional-but-nice touch to finish your shou sugi ban s’mores tray is to add handles. You can use drawer pulls or any handles you prefer. It makes it easier to carry around your tray and enjoy your yummy s’mores!

When I use my tray outside, the three middle compartments of the tray mostly hold s’more supplies. I filled the two narrower ends with decorative rocks to hold my extendable roasting sticks. When I use the s’mores tray inside, I use one of the compartments on the end to hold small Sterno containers! That way, I can still enjoy the delicious s’mores-y goodness, even when summer is over.


Using Your Shou Sugi Ban Charred Wood S’mores Tray
I couldn’t help myself. I decided to put my s’mores tray next to my fire pit as I was burning up some scrap wood. Doesn’t it look great? Staging only—of course! This tray wouldn’t be fireproof enough to sit on the lip of a firepit for actual serving purposes.
I’m looking forward to using my charred wood s’mores tray after Memorial Day when a few more outdoor entertaining spaces are complete. I think this tray will make an excellent new addition to my next summer party!

I’ve got a complimentary post about these marshmallow roasting sticks, too! The roasting sticks are a great little wood-burn design project that is bright and colorful. If you’re looking for cute marshmallow (or hotdog) roasters, don’t miss these!

I think my charred wood s’mores serving tray will make a great addition to the party vibe in the backyard once the new deck is in, don’t you?

Are you excited for summer? Got any big entertaining plans in the works?
(P.S., Bernzomatic wound up using this shou sugi ban s’mores tray in their summer project guide. The guide includes several other awesome ideas, including recipes and furniture builds. Check that out here!)


I am planning a shou sugi ban on my dinner table with surface burning only. My question is will the glued parts come off, though I have used biscuit joints on them? By the way its been two months the table top been finished. Please help
I haven’t done it myself, but I’ve definitely seen lots of furniture burned on YouTube. I would do a quick search on it (Jonny Builds has several tutorials). Good luck on your piece!