
Disclosure: this post may contain affiliate links, which means I may make a commission if you decide to make a purchase through one of my links, at no cost to you.
This post may contain affiliate links. This won’t change your price, but may share some commission. Read my full disclosure here.
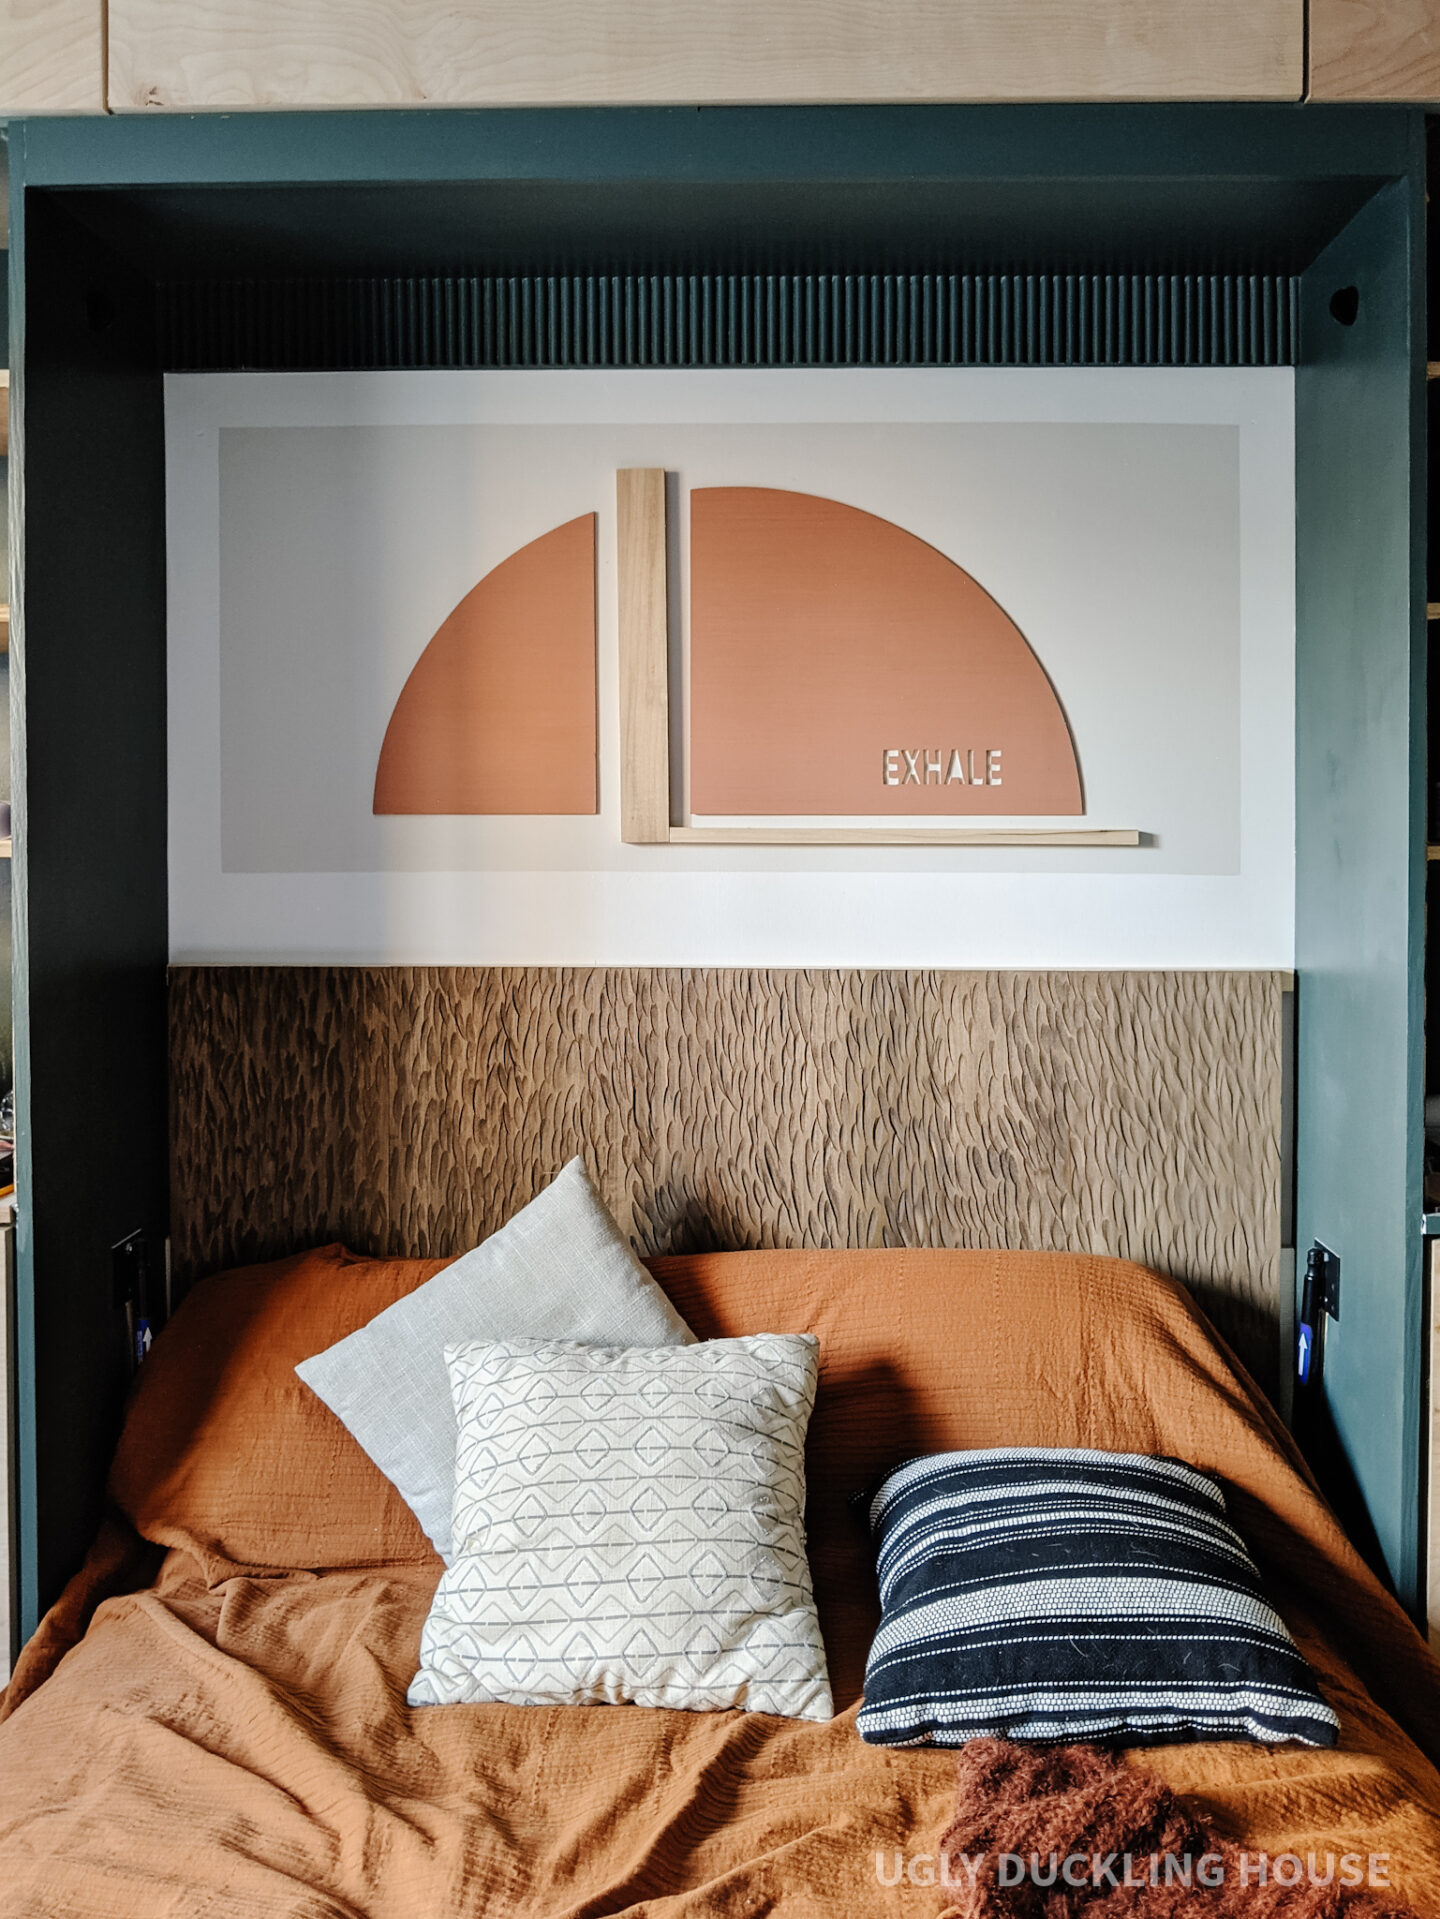
I finished something HUGE and I’ve been dying to share it with you: I completed the look for the inside “nook” area of the Murphy bed in the guest bedroom!
This post is sponsored by Minwax. All words & opinions are 100% my own.
A little background: as you might already be aware, little Ellis arrived six weeks early and totally derailed our plans to finish the guest room built-ins. The whole plan was that we’d finish the cabinets, finalize the Murphy bed, and get it all painted before the baby’s arrival so that K’s mother could have a cozy room to sleep in while she helped us adjust to parenthood. And that… didn’t happen.
Instead, my son and I had a few health issues that rushed his delivery, then had emergency surgery last month (more on that later), and we’re still kind of… trying to find some sanity in all this new chaos. I’m actually surprised I’m stringing these words together for you now, because my brain feels totally detached lately!
You may be wondering, “Given these events, why bother at all with this project (or anything that isn’t showering and sleeping)?” My answer might not make sense to everyone, but to put it simply: I need me time, and projects make me feel most like ME. I actually get more stressed out and tired when my to-do list is dangling. Working on both the wall art and headboard brought me a sense of accomplishment and something to focus on that wasn’t all spit-ups and sleep deprivation. I’m working on the whole “let’s not put too much pressure on the DIY right now,” but it could not make me happier to look at this little decorated space and feel like things make sense again. It instantly calms me to look at it.
Colors of Calm
Let’s talk about that for a second: calm. Naturally, the guest bedroom is a great place for that to be the “theme” of the room (assuming under normal, non-pandemic circumstances that we might have an actual guest from time to time). But when you think of calm, do any particular colors come to mind? For me, it is usually cooler hues like blue and gray. However, knowing I will eventually paint the entire built-in area a dark and dramatic green, I thought it might be fun to play around in some warmer rust colors to make some art above the headboard. It was totally outside of my comfort zone (and K had some input since this room is also his home office). I’m glad I gave it a try; I love it so freaking much now that it’s installed!
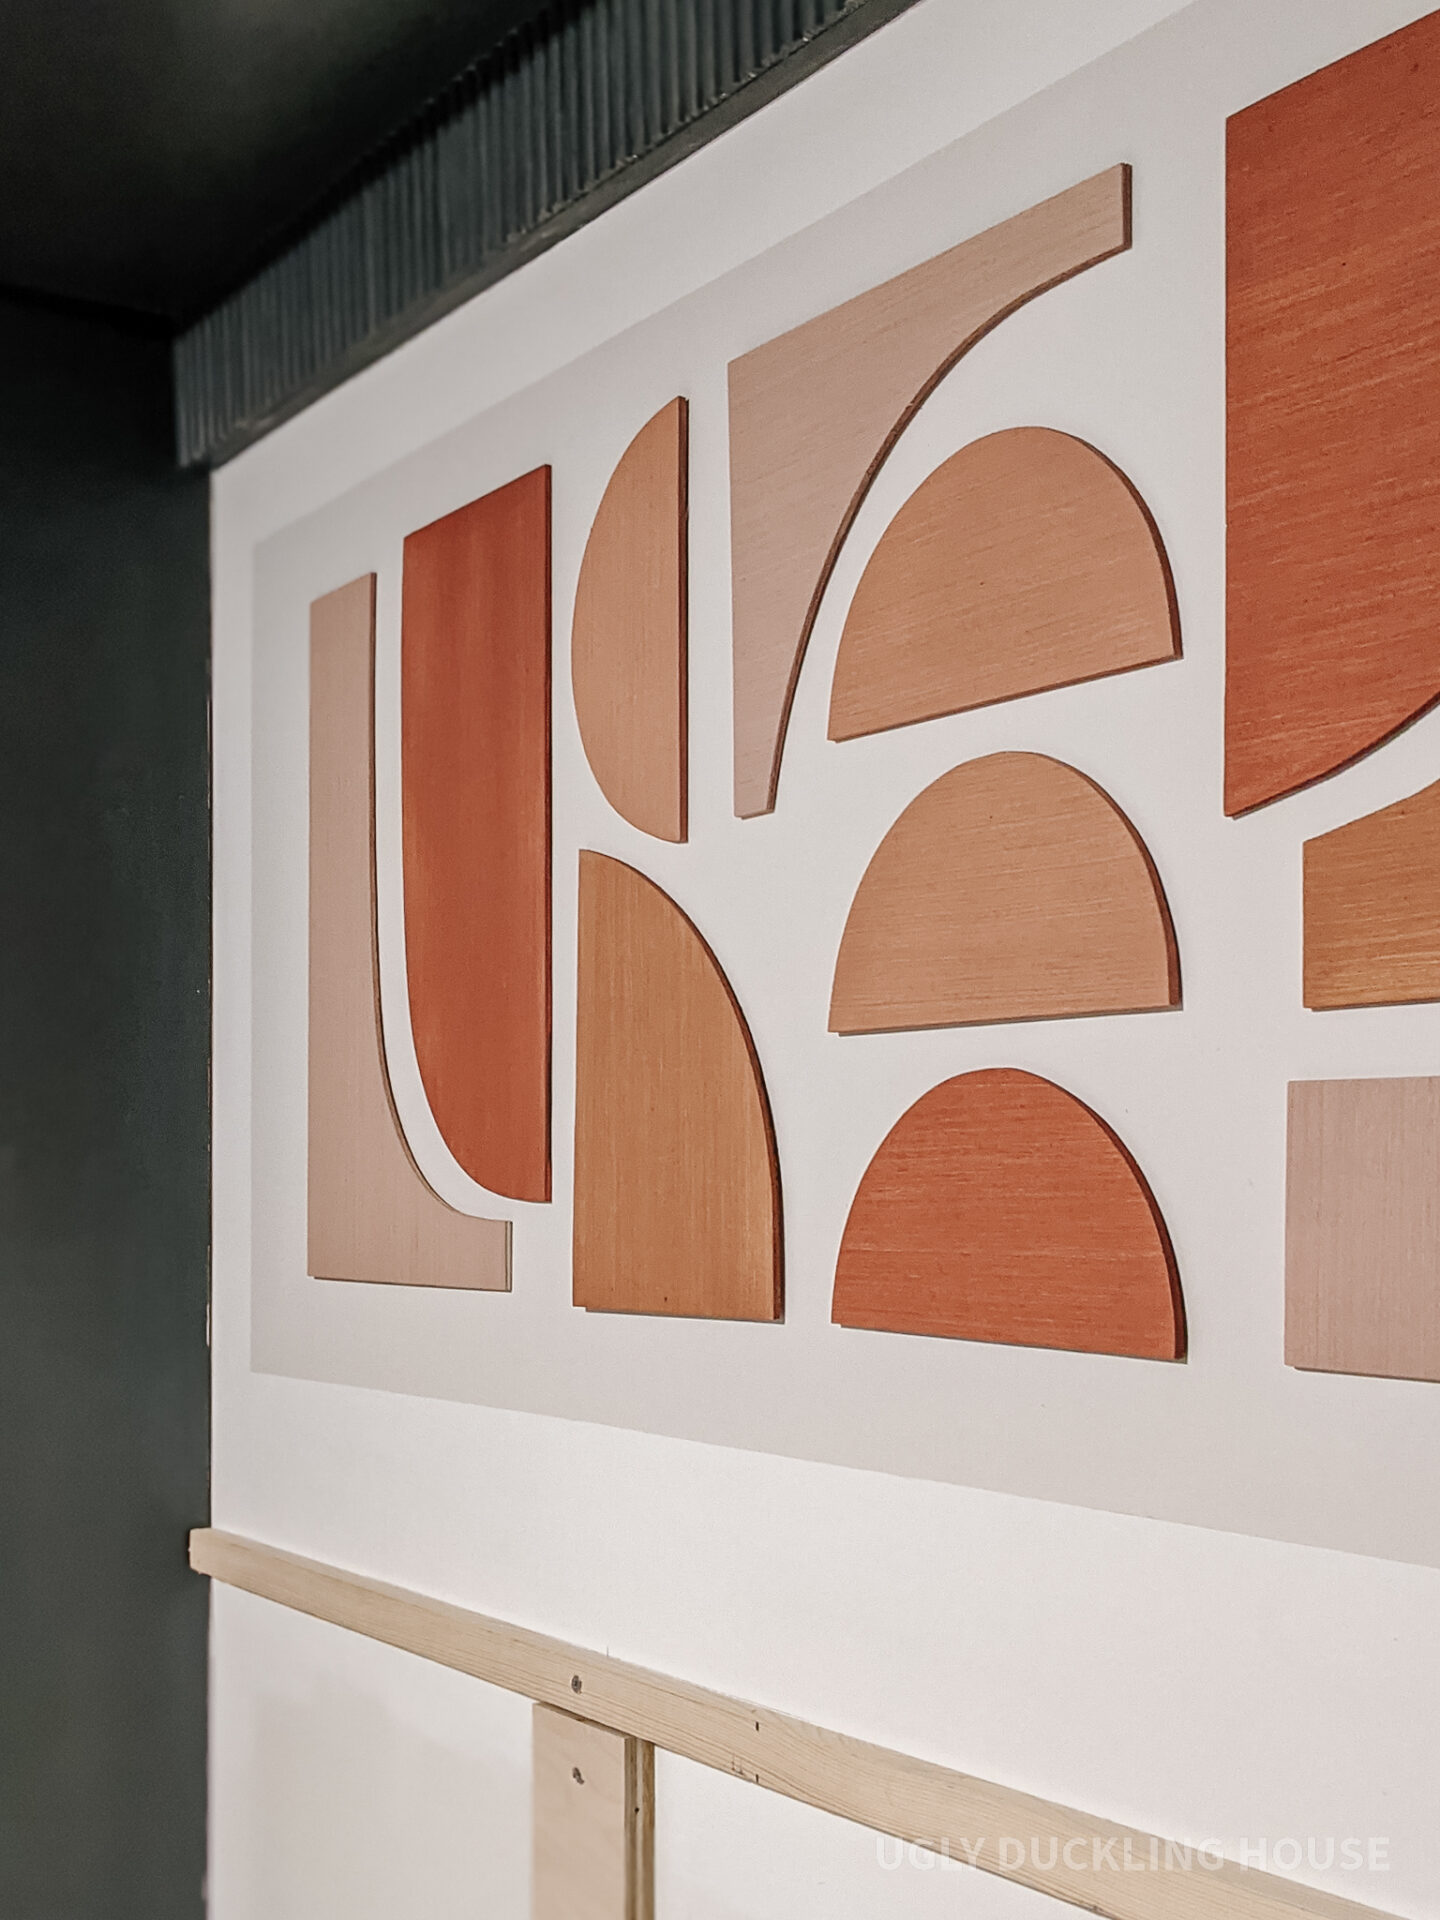
I had a few pieces of scrap underlayment that led to the art you see. In fact, I created TWO different art ideas for the wall; I wasn’t sure which I’d like better and had free scrap wood to spare, so I wanted to try both.
Option 1:
Minwax Colors used:
- Deep Terra
- Sandstone
- Light Ginger
- mixes of these 3 colors
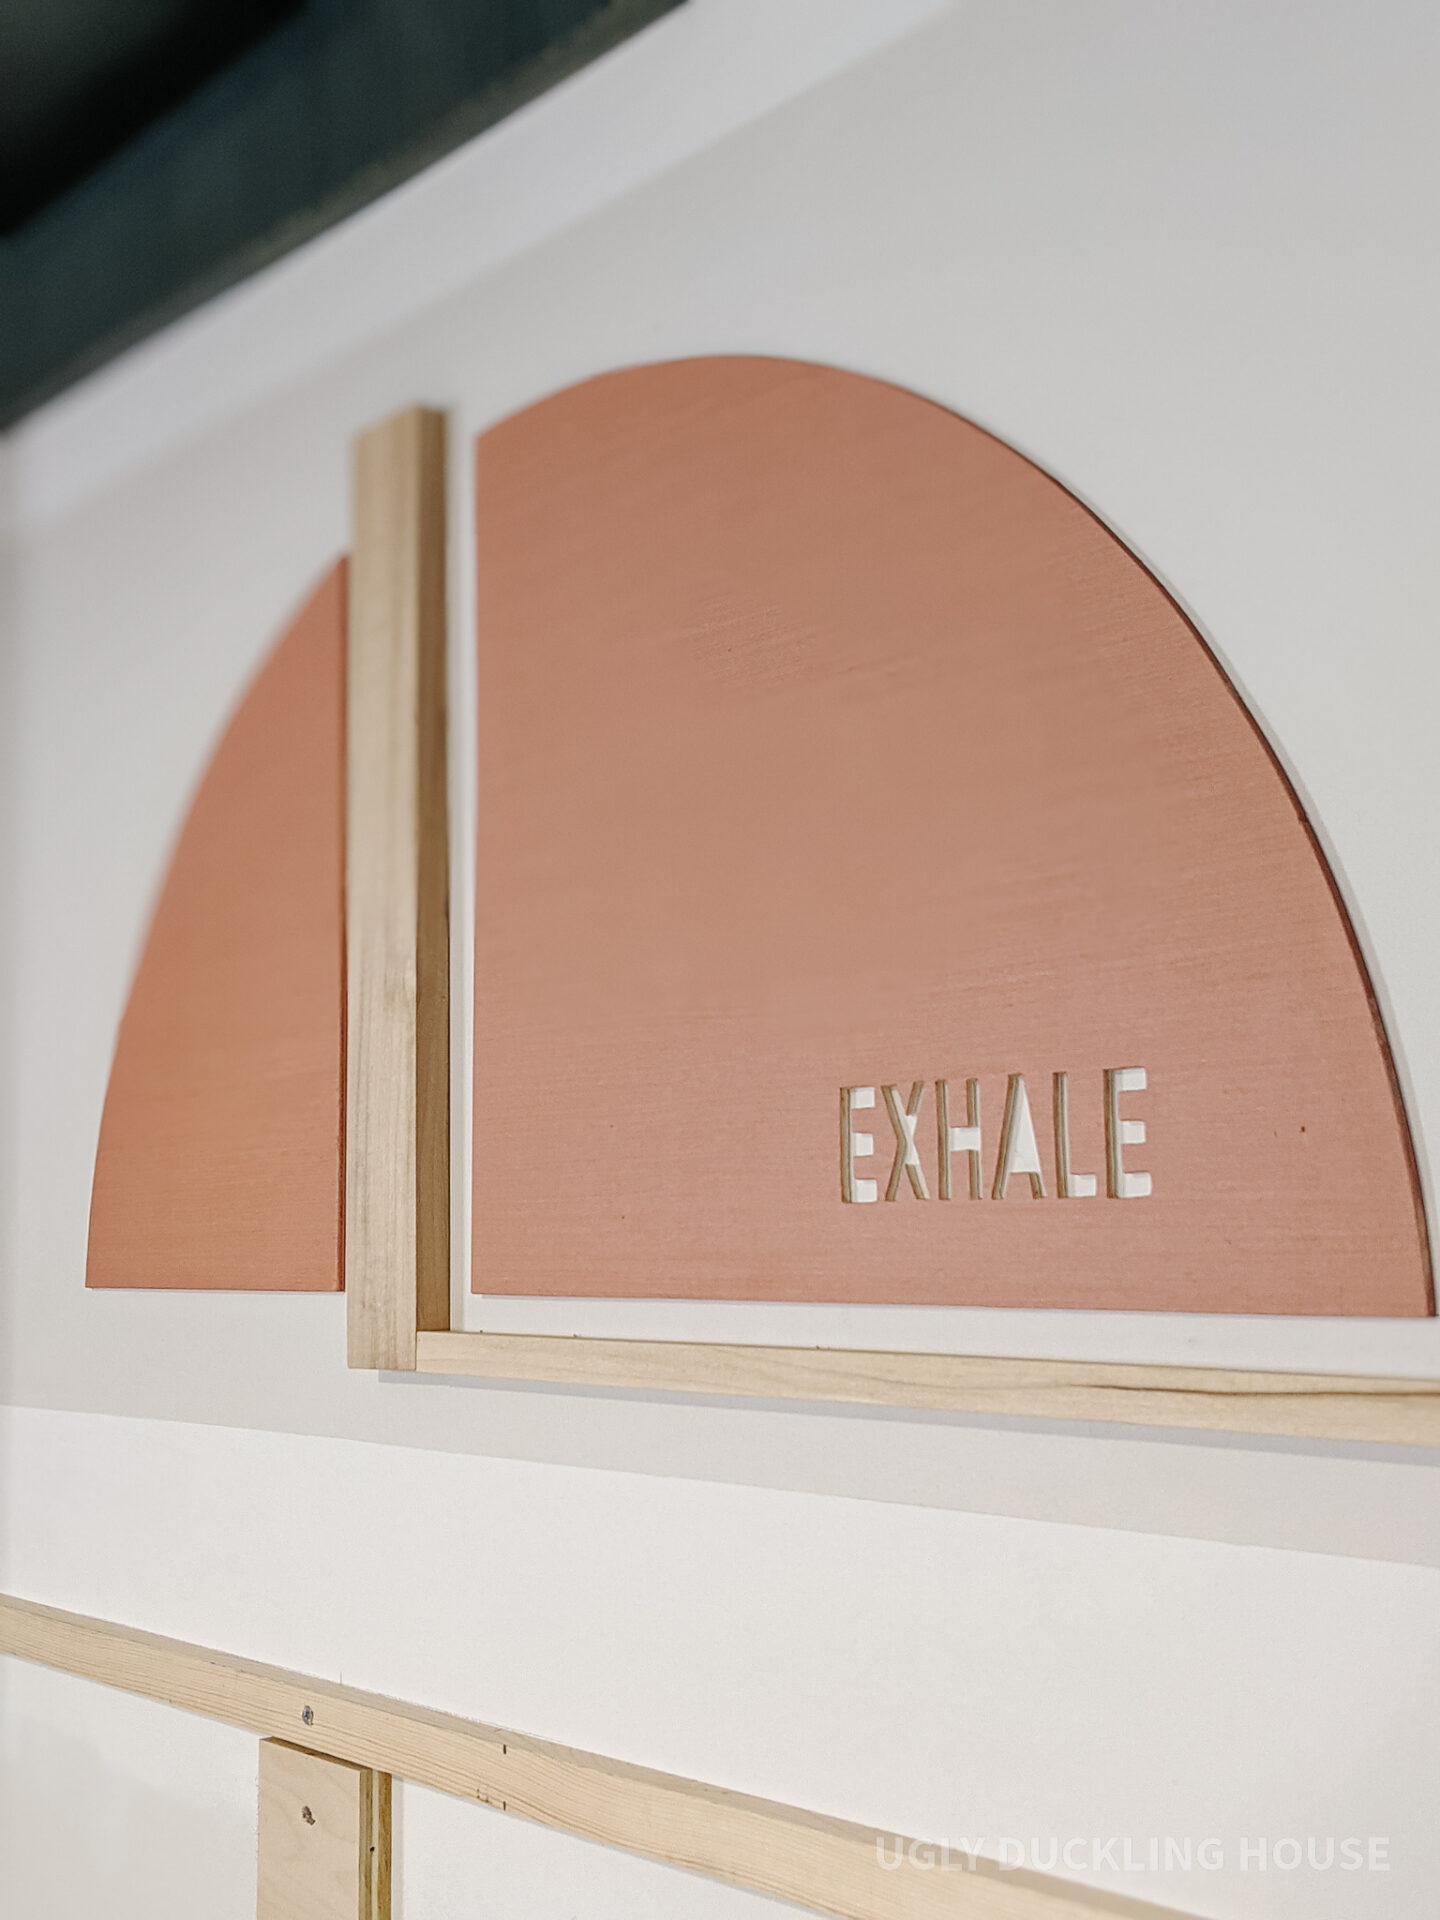
Option 2 (winner):
For both options, I used Minwax’s water-based solid color stain. It comes in a palette of 200+ different color options, which you can get mixed at the Lowe’s paint desk. You can also get colors custom-matched to paint swatches (I may one of my favorites, Tricorn Black, mixed for a future project just so I have it on hand).
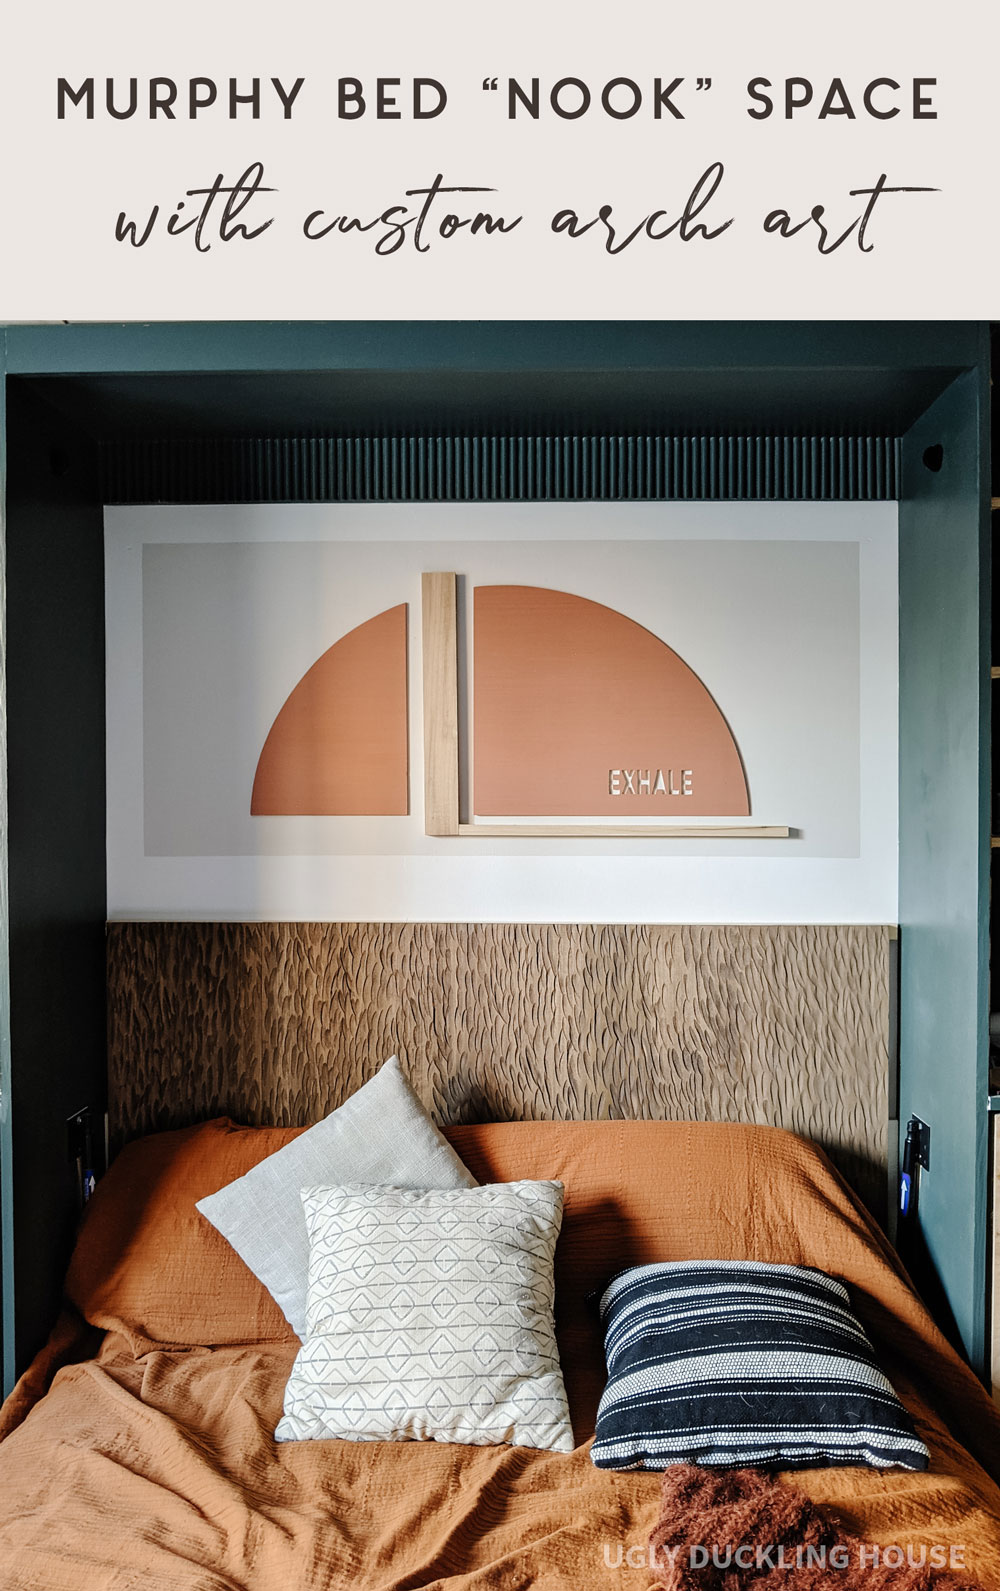
Ultimately, I went with option #2 because I liked the pairing of the minimalist art with the textured headboard. I think I would still really like the busier pattern elsewhere, so I may re-stain it and place it in a new spot somewhere else in the house (how great would a tone-on-tone canvas look with those shapes to add texture??).
Both were created using pretty similar steps and products, so I’ll focus on just the “EXHALE” art in the DIY tutorial below (you can pretty much connect the dots on your own of how to do the other and I’ll add a few notes where I think it’s worth mentioning). I’ll have a separate tutorial for ya on the DIY carved headboard in the next post!
DIY “Exhale” Stained Wood Wall Art
Materials & Tools
- Minwax solid color stain
- Minwax pre-stain wood conditioner
- Minwax ultra flat polycrilic
- 1/4″ underlayment (or similar) plywood
- 1×3″ poplar (for vertical wood block)
- 1″ square dowel (for horizontal wood stripe)
- pencil
- miter saw
- orbital sander
- sandpaper
- measuring tape
- safety gear (glasses, hearing protection, breathing mask)
- paint
- painter’s tape
- paint roller
- paint tray
- scroll saw
- pin nailer
- 3/4″ pin nails
- rotary tool
Create a fun and relaxing art installation anywhere in your home!
- Tape off & paint the color block background
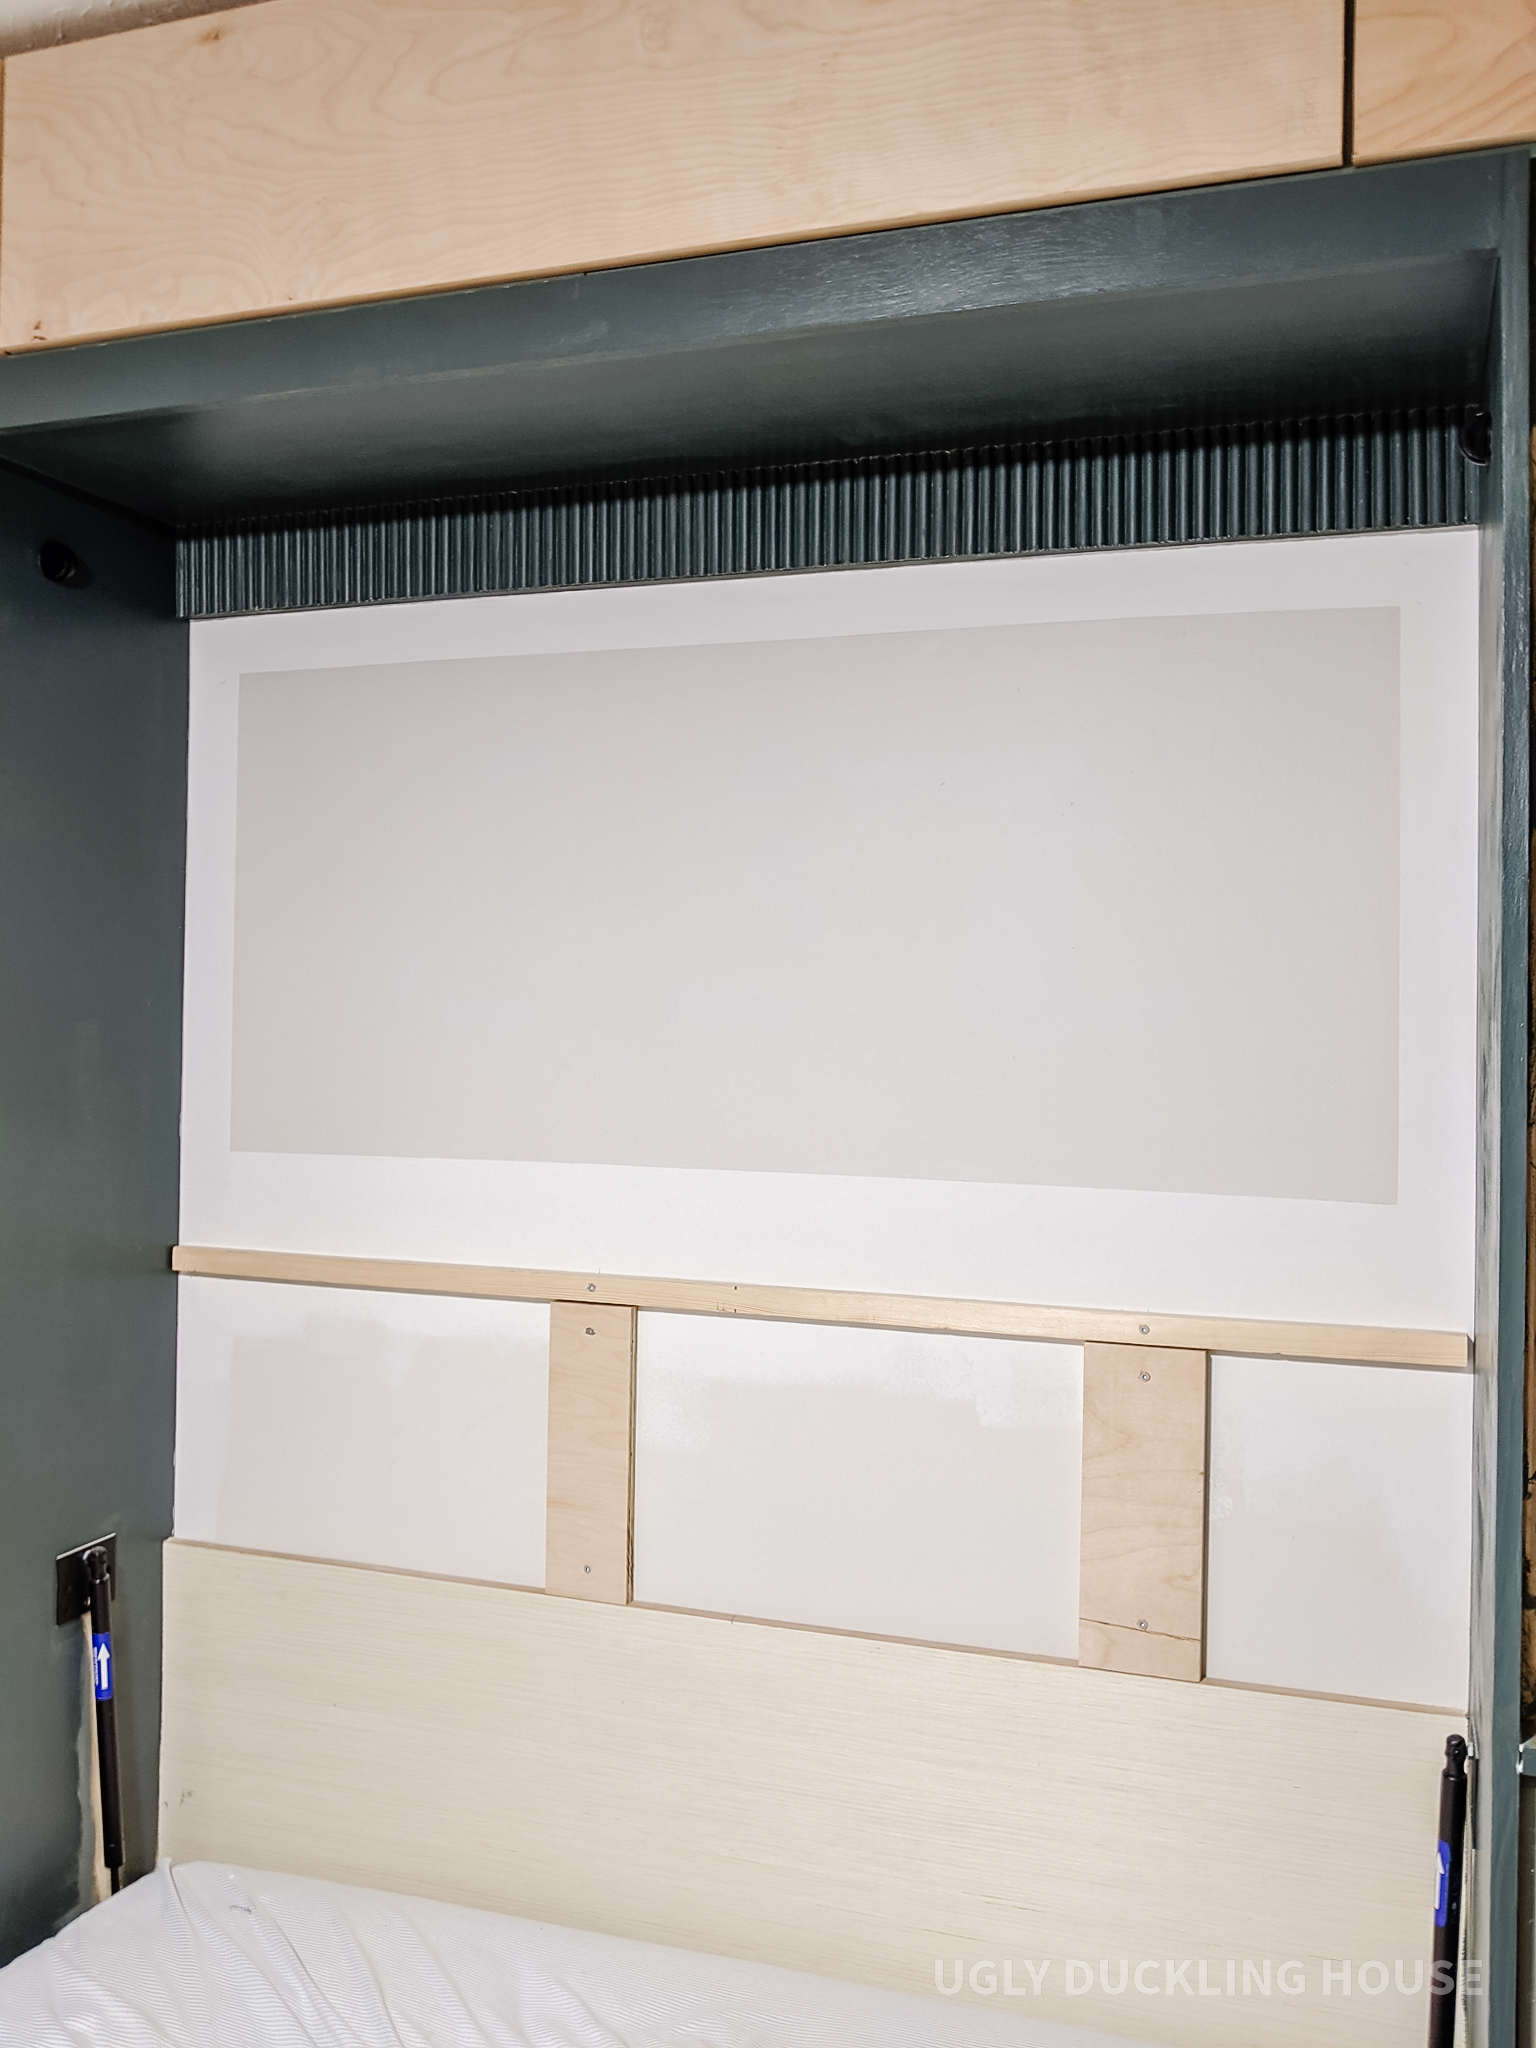
I wanted this art project to have its own space inside the nook, so rather than paint the entire wall the same color, I taped off a section and painted it a neutral greige (would you even call this a color block?). The white border is sort of like the mat inside a frame. I think it elevates the project just enough, but of course it’s entirely optional! Tip: if you’ve recently painted the wall where the color blocking will go, use painter’s tape that is meant for delicate surfaces.

- Draw out an arch shape and cut.
I had two smaller scraps of wood instead of one large piece, so the idea for creating a negative space in the middle of the arch came mostly out of necessity! To get the drawing just right, I used a string on the end of a pencil and held the other end in the “middle” of where the arch would be. Then, I pulled the string taut and dragged the pencil over both pieces of wood like an invisible circle. This plywood was thin enough to cut through quickly on my scroll saw, but you can use a jigsaw or band saw as well. My cut was somewhat uneven, so I used a benchtop sander to smooth the roundness of the arch shape (you could use a different sander, but I found this easiest to control the parts to be sanded down).

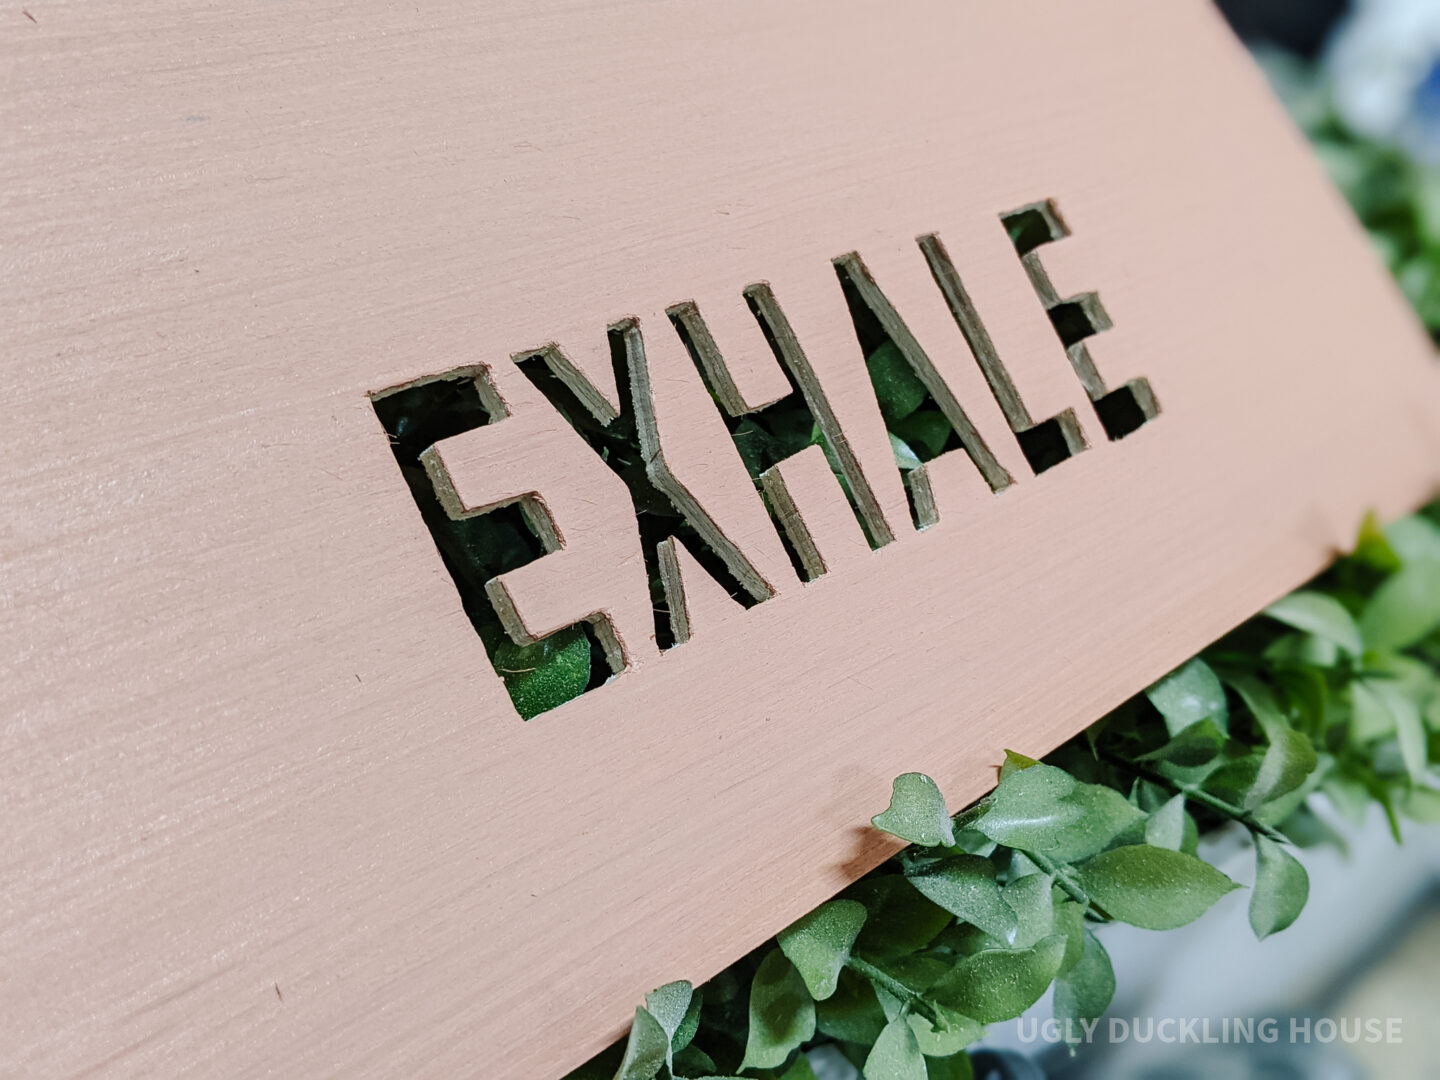
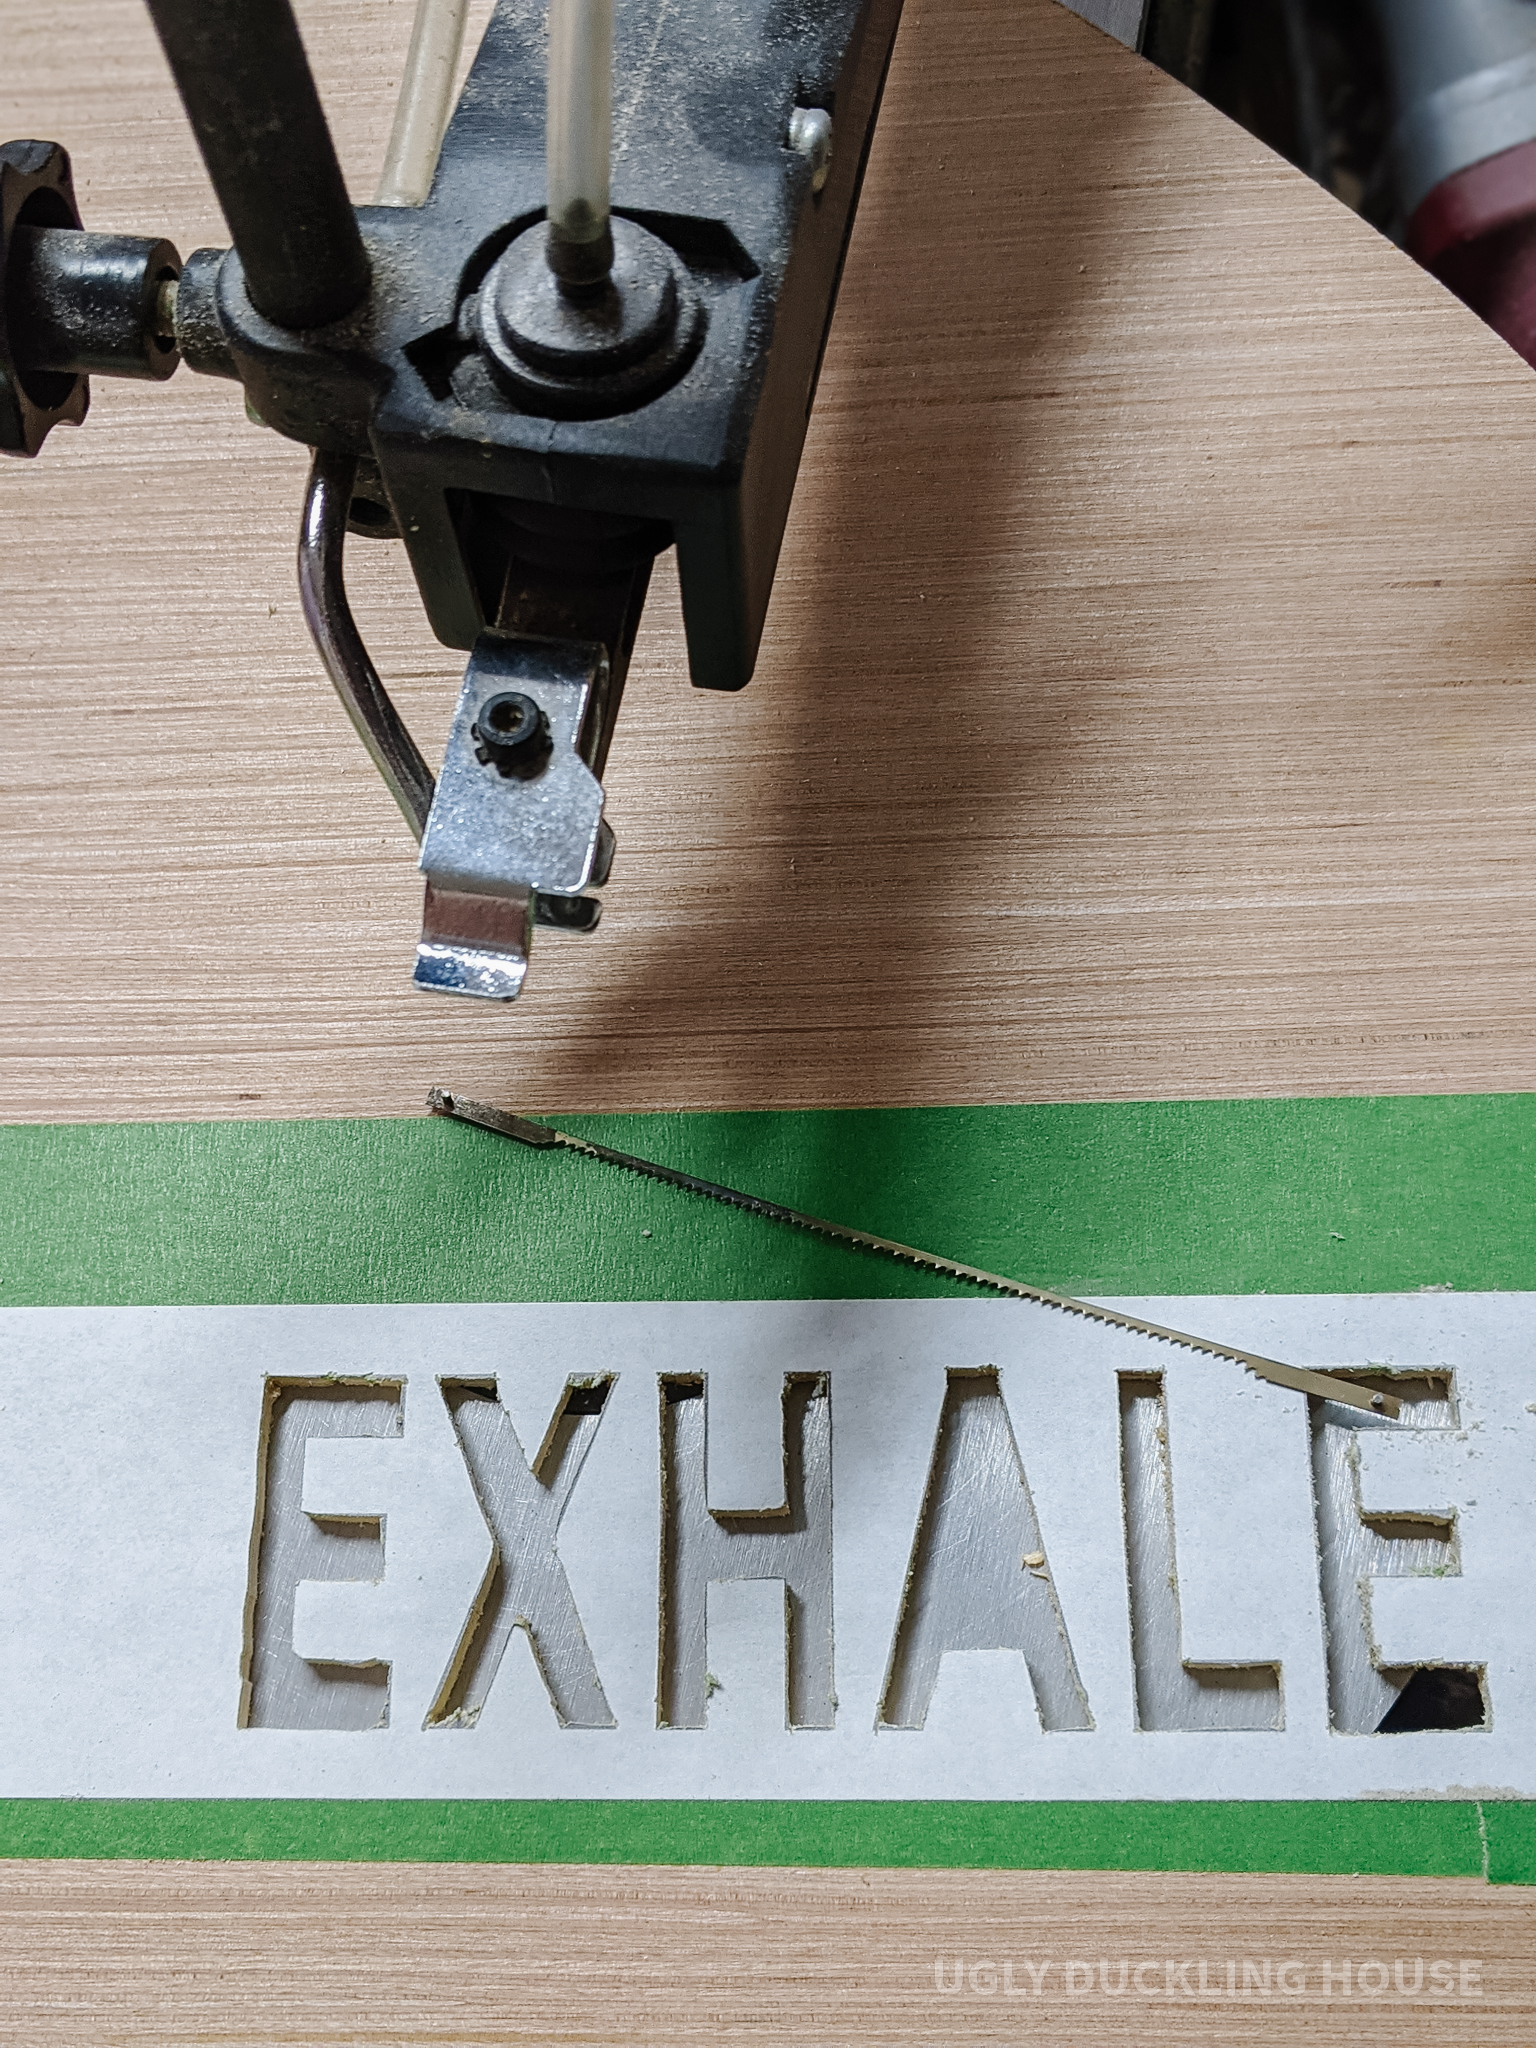
- Cut out a word on the larger arch side
I really wanted to add a word to the right side of the arch, so I ran with the whole “negative space” idea and cut the letters out of the plywood instead of layering them on top. My cuts were again a little rough (I seem to be rusty lately!), so I used a rotary tool to clean up the jagged corners.
- Prep surfaces for staining
I sanded my pieces to #220 grit and then applied a pre-stain wood conditioner. In most cases, the conditioner serves to make the stain application less blotchy. It also raises the grain a bit, so I again sanded the surface after about 30 minutes.
- Apply stain
I know from experience with Ellis’s nursery art project that this solid color stain goes on SUPER fast (it’s 5x thicker than normal stain… almost like paint, but lets just enough grain to peek through). To me, this means the wood conditioner is crucial for the look to be as even as possible. Using a synthetic pad, I swiped the stain on and then back off again. It takes only minutes to get the full application… which is perfect since I’m doing finishing work between baby naps. I liked the “Deep Terra” color from option #1, but decided to mix all three colors for a slightly lighter color on the arch. It’s actually one of my favorite things about using this stain; the colors mix so well together!

- Cut wood blocks
After mounting the arch pieces to the wall, it needed a little something else… it just didn’t look complete to me! So, I cut a 1×3 to 19″ and a square dowel to 24″ (both poplar wood). These are the vertical and horizontal pieces used on the wall to add additional dimension. I wanted to keep these really pale, so I used Pickled Oak as my stain color.

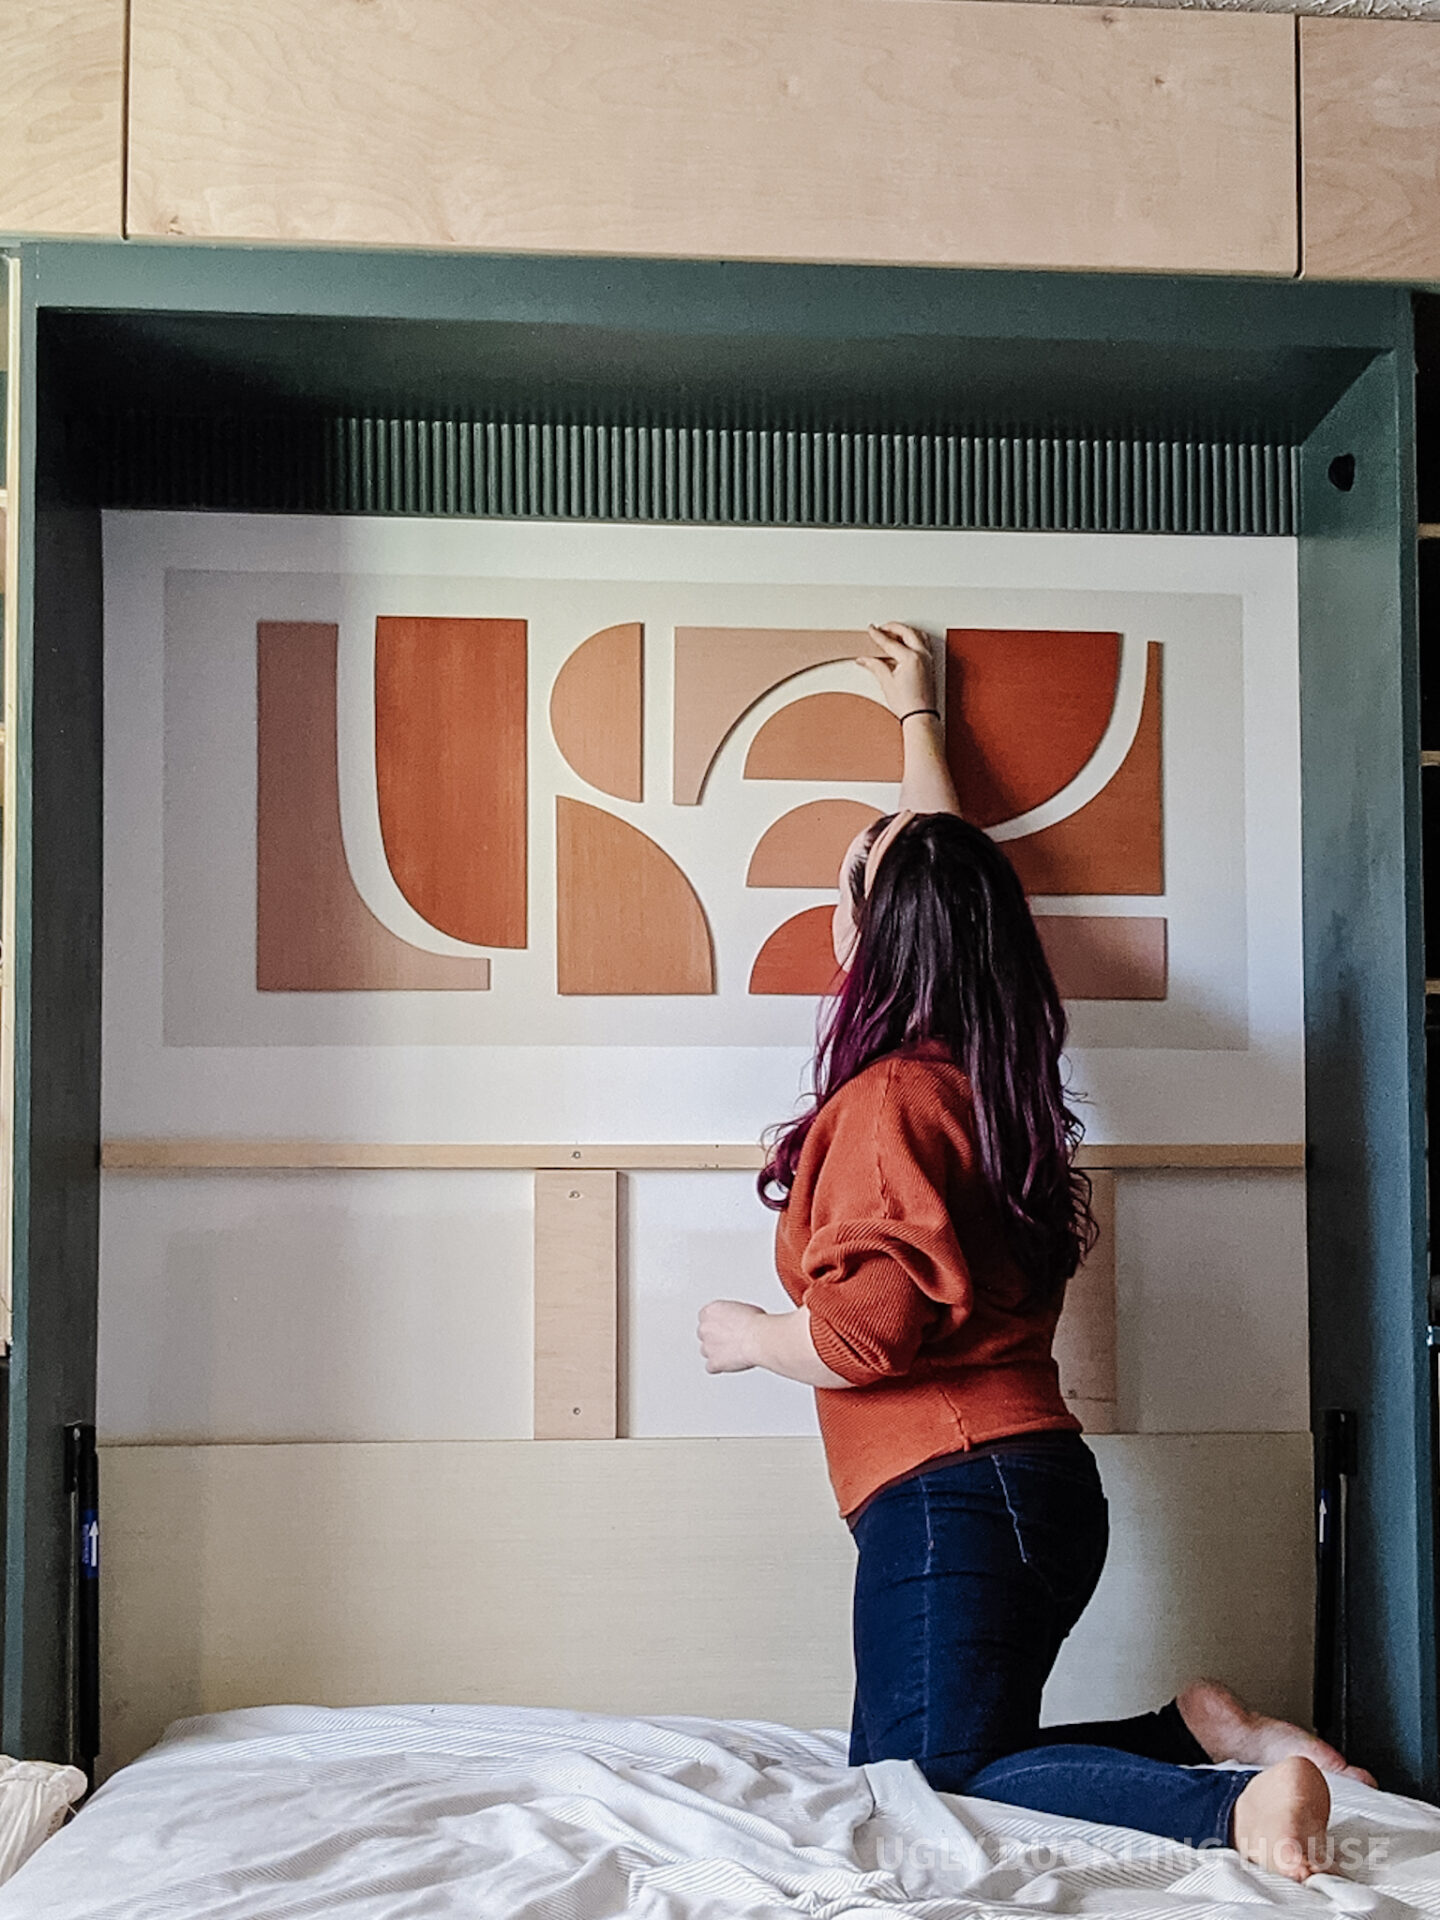
- Protect and hang.
Over both stains, I used a flat polycrilic and then mounted the rest of the pieces to the wall. Since these are all hung using a pin nailer, patching holes will be a breeze when I decide I’m ready to change things up!


And, done! To make option #1 instead, I pretty much followed the same steps as above, except I’d add a tip that when trying to get all the smaller arch pieces to form the same shape, I held them together as one thick piece while sanding them on the benchtop sander. That way, I could control exactly which areas to sand and knock down any high areas that didn’t match the rest. Easy!
Special thanks to Minwax for sponsoring this project; check back for the next post to see the headboard DIY!
Don’t forget to pin!


Love the whole thing! The colors ate beautiful.
The colour combos are just stunning
Thanks, Rach!
Thank you! I definitely don’t normally gravitate to these colors but I love that they worked!
Great job! I love it!
I think there might me something wrong with your site. The display ads are covering up all of your wonderful work. they pop up right over your pictures and words and I cannot fully see what you post. I love your ideas and your creativity and it is a bummer that is covered by display ads most of the time. It seems like the ads should be above, below or at the side of your posts. I hope you are able to get this fixed for the sake of your blog and site.
You’re absolutely right, that shouldn’t be the case at all! I’m sorry that you’re having that experience. Can you tell me: what browser you’re using (Chrome, Safari, Firefox?) and whether you’re visiting on a mobile phone or desktop? Is it the video ad that’s covering over things or a different ad? I would LOVE a screenshot (because I tried to see the same thing on my end but it looks normal to me). I know that’s a lot to ask, but it helps if you can let me know. I can email the ad people who serve the ads on my site and give them specifics and have them make changes. Thank you for the info!