
Disclosure: this post may contain affiliate links, which means I may make a commission if you decide to make a purchase through one of my links, at no cost to you.

This night sky painting was so easy and fun to make! Catch the full step-by-step tutorial or take a look at the speed video to see it come to life.

Hey, friends! Hope your weekend went well. Mine was SO ridiculously busy: K and I built a new bed for the primary bedroom (plans coming soon). Then, we made significant progress on the Murphy bed in the guest room (Charlotte, I’m comin’ for ya). Finally, Stella got into the garden bed so bad she needed an immediate bath (painted. the tub. with mud.). Oh, and I finished another DIY video, which means I can finally publish this night sky mountain painting today!
Before and After

As you can probably tell, this painting wasn’t originally any of those words. My original was a terribly painted flower vase at one of those “paint and sip”-style events. It was actually a promotional thing a brand put on with a bunch of Atlanta bloggers. It was honestly no different than what you would expect in one of those classes: show up, drink, paint (other than they put it all on their Facebook page; this isn’t a plug and they’re not my sponsor or anything; I just went because free drinks and free canvas to take home and I got to see some of my blog friends like Erin Spain).
I know why I paint so poorly in those someone-teaches-you-how-to-paint-a-specific-thing classes. Since this is now the second time I’ve decided to paint my own thing instead, I think I’m just not into it. (It could be the wine. It’s a mystery.) If you’ve ever been fiercely put off by your horrible technique in one of those things, it’s because you’re being forced to paint something you don’t love. So, go rogue! It’s your canvas and to you-know-where with the ugly flowers.

Finding Inspiration
I was inspired — random-est of things — by one of the screensavers displayed by the Amazon Fire TV device connected to the TV. If you aren’t familiar, it’s series of 182 different photos that would give just about anyone some serious wanderlust. And with my vacation to St. Lucia in my rear view and K and I talking about this whole vintage camper renovation project, this photo of The Milky Way over Mt. Hood (Oregon) just struck me. The other screen savers would come and go, and every time this one appeared, I would pause and stare.
So, I typed up a quick tutorial about an organic process that would be unique to every painting (I couldn’t replicate this to the same result every time either). Nothing about a bunch of swirling colors would really be repeatable, but if you want to give it a try, I highly encourage it and would love to see the variations you get! I stopped to take a few of these photos and grabbed a few stills from the video I took overhead.
How to Paint a Starry Sky and Mountains
The trick to a painting like this is pretty straightforward, believe it or not: it just takes continuous layering of colors. I used acrylic paints in the following colors (note: affiliate links to products may be used here):
Supplies
- 10×10 wood panel
- Anita’s Craft Paint (picked up at Hobby Lobby ages ago): Twilight Blue, Medium Blue, Christmas Red (all matte)
- Apple Barrel: White, Black, Wild Iris, Purple Iris (all matte)
- Small and medium all-purpose paint brushes
- Gesso (surface prep medium)
- Frogtape Delicate Surface painter’s tape (I know they do a lot of sponsoring on blogs, but this isn’t sponsored)
- paper towels
- container for clean water
- paper plate for mixing
Prep
Start by painting over the entire surface of the existing 10×10 panel with gesso, which is a “medium”. In this context, there are several mediums designed to do cool things with acrylic paint. Some add a crackling effect, some help paint adhere to fabric… this one is basically a thin version of white acrylic paint and simply helps prep the surface for adding more paint on top, like a primer.

I then did a quick pencil sketch to mark the sky, mountain, trees, and water on the bottom. A few general shapes are all that’s needed to get started.
Color Blocking
As you’ll see in the speed video, I started with the sky first — blocking off color areas such as black in the top corners and white in certain areas on either side of the mountain. This was somewhat monochromatic at first, but I also kept adding in blue and red. To layer in the paint, I also used a damp paper towel to help “sponge” in some of the texture and help layer in paint colors.


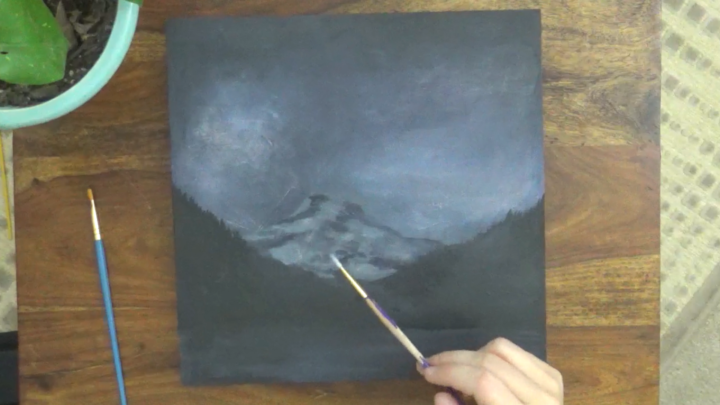
With most of the general color blocking done, I moved on to the tree line in black, and then the single mountain in the center — which pretty much exclusively has layers of black, white, and a small hint of blue. Since the sky would be the focus of my painting, I wanted to make the mountain highlighted but muted (so as not to compete).

The whole non-compete idea carried through in the rest of the painting. I marked off the mountains and created quick swipes with a small paint brush to give the trees texture (black only). For the water below, I painted large swipes of blue with white and black. Watering down the paint makes it look really streaky.

As the mountain dried, I added in more black and white areas for highlight and shadow.
After the first night (I did all of this while sitting in front of the TV), it looked like this:

This is a great stopping point, since acrylic sometimes needs some dry time when you begin to add water. Wiping off paint after it starts to dry might remove large blobs of paint (it happened to me a couple of times). General rule of thumb: do not mix more than 30% of water or use an acrylic medium to thin the paint instead; I’ll admit to using just water on this one, but you now know better!
More Color Layering
The next night after some sufficient drying, I added in more color to the sky area with the same swiping, sponging pattern: more blue, more purple, more white.

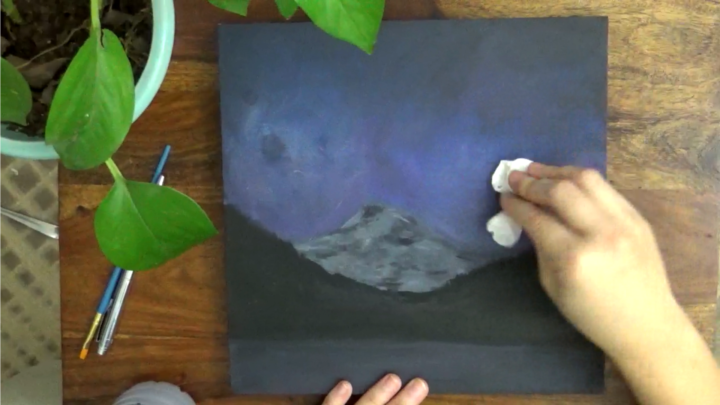
The photo below is after it had more time to dry and I added a second black layer of the trees.

Tape and Stars!
Once you’re done with this part and are happy with the sky’s color variation, let it dry COMPLETELY.
The canvas is now freshly painted, so protect the bottom area with painter’s tape meant for delicate surfaces. Tape anything that isn’t the sky.

Then, I used a VERY dry brush to dab just a little pure white paint onto the tip. With each flick little tiny spots flung all over the sky surface. I varied both with the quantity of paint on my brush and with how close to the canvas I got, so there were little clusters of white paint flecks and bigger flecks all randomly dispersed. This is the magic that makes it look like a starry sky, and my favorite part! If you make a mistake, use a tiny dab from a wet paper towel to take the paint back up. Do it quickly and don’t rub… it could still disturb the newly dried paint below.

In areas I wanted to emphasize a little more, I went in by hand and added a couple more stars.

With that done, I pulled all the painter’s tape off and my painting was complete. I plan to seal it with some art resin and frame (new posts!), but I’m really pleased with how it turned out. It will probably eventually hang in the vintage camper.
K immediately loved this painting. He’s offered to scan it at work for me, so I will have that available as a print soon as well!
Catch the full video:

Want another example of going rogue at a paint n’ sip class? Here’s my laundry room art inspired by talented artist Emily Jeffords.


So pretty! I always come away from those Paint & Sip events with something “meh” (I guess I let all the wine distract me lol), it’s nice to see your canvas had a chance at a second life!
Same. They just don’t ever look like something I WANT to have in my home. Then they go into the closet and eventually get thrown or given away. Better to just do your own thing and be happier with what you create!
wow. It came out pretty. I suck at painting, I can’t paint to my self, hahahaha. But you made it look so easy. Might try to replicate this night sky this weekend and see how it comes off. I ran so far away from painting, it comes out looking not so beautiful as I had thought.
The flower vase painting isn’t that bad too.
Loved your painting Sarah. A step-by-step guide this is and I particularly like the night sky mountain. I am absolutely sure that it is not as easy as it looks. That painting will look apt against a wall color painted lavender or chrome yellow. Thanks for sharing.
Would love to buy a print of your night sky if decide to put them for sale. Love how it came out. Please email me if you decide to sell prints.
You got it, Kim! I’m actually working on part 2 of the update now, and I’ll be sure to take some time tomorrow to do an overhead shot so I can get the print ready. I’ll email you. Thanks so much for the compliment, too!
This is late, but a very easy way to make tiny star-like dots is using an almost dry toothbrush, dipped sparingly into watered down white paint. Just lightly “flick” your thunb along the bristles above the intended surface. Instant starry sky. Love your blog!
That’s basically what I did with the brush in the tutorial and video… dry brush and flicked! Thanks so much for the tip Sherrie!