
Disclosure: this post may contain affiliate links, which means I may make a commission if you decide to make a purchase through one of my links, at no cost to you.
This post may contain affiliate links. This won’t change your price, but may share some commission. Read my full disclosure here.

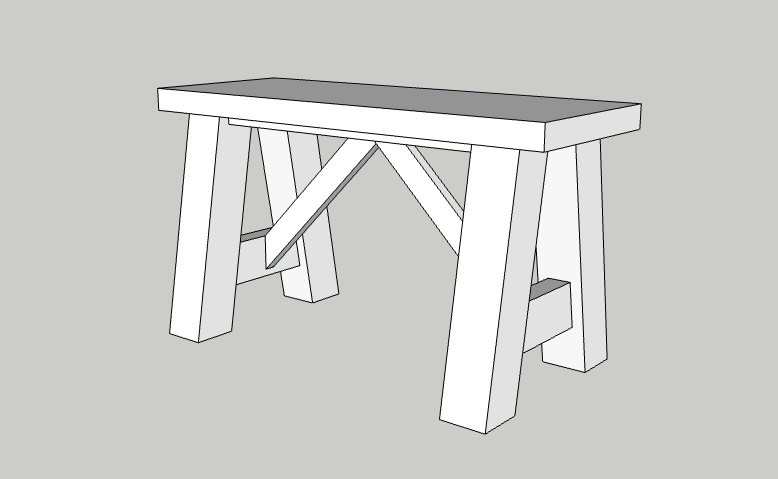
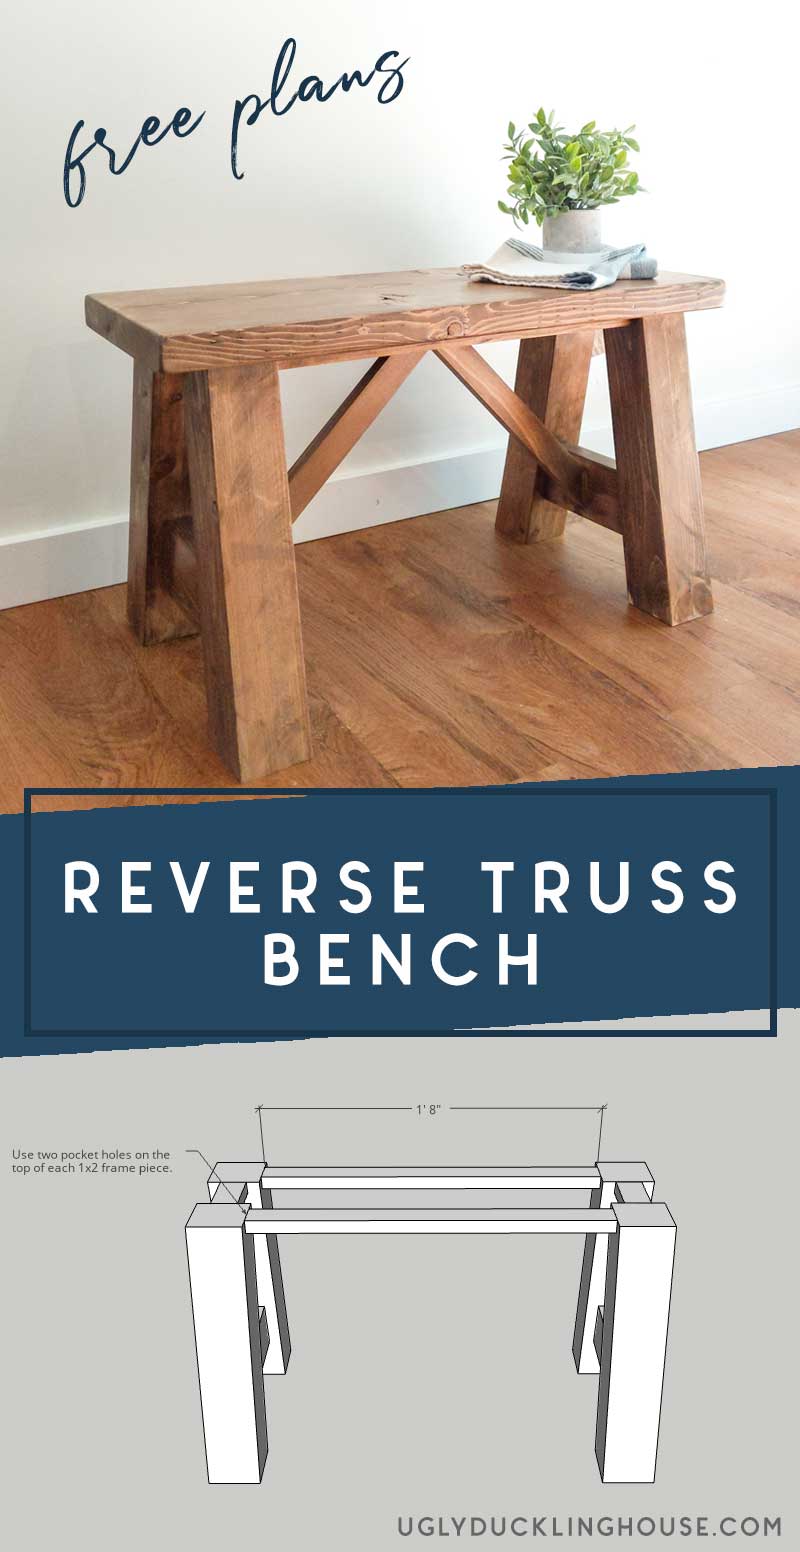
Hey guys, it’s Tylynn stopping in from Bitterroot DIY! This week I’ve got some new plans to share for this small reverse truss bench. It can go almost anywhere in your home but looks great in an entryway!

Tools & Supplies
- Miter Saw
- Drill
- Kreg Pocket Hole Jig
- Orbital Sander
- Tape Measure
- Clamps
- Wood Glue
- 2 1/2” Screws
- 1 1/4″ Screws
- Wood filler
- Brad nailer
- 1 1/4″ finish nails
- Speed Square
- Pencil
- Safety Glasses
- Ear Protection
- Wood conditioner (if staining)
- Stain or paint
- Polyurethane

Lumber:
- 2 | 2 x 4 @ 8′ OR 1 | 4×4 @ 8′
- 1 | 1 x 2 @ 8′
- 1 | 2 x 12 @ 3′ (you need 30″ but sometimes they sell 36″ sections)
You can either buy 4x4s or make your own 4x4s out of 2x4s for the legs. I chose to make my own 4x4s on this project.
How to make your own 4x4s
- Cut eight 2x4s just slightly over the final length (so about 16″ with parallel 10 degree miters)
- Glue two 2x4s together and clamp. Repeat for all four legs.
- Once the glue is dry, cut the rounded edges off with a tablesaw (1/4″) on each side.
- Trim the legs to their final length (15 1/2″). Trimming after gluing ensures the ends are perfectly flat.
- Sand until they’re smooth and the joints appear seamless.
Cut List:
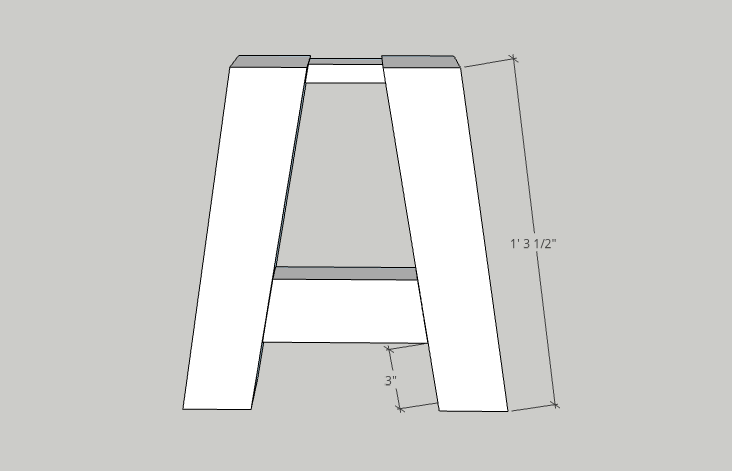
- 4 | 4 x 4 @ 15 1/2″ with parallel 10 degree miter (legs)
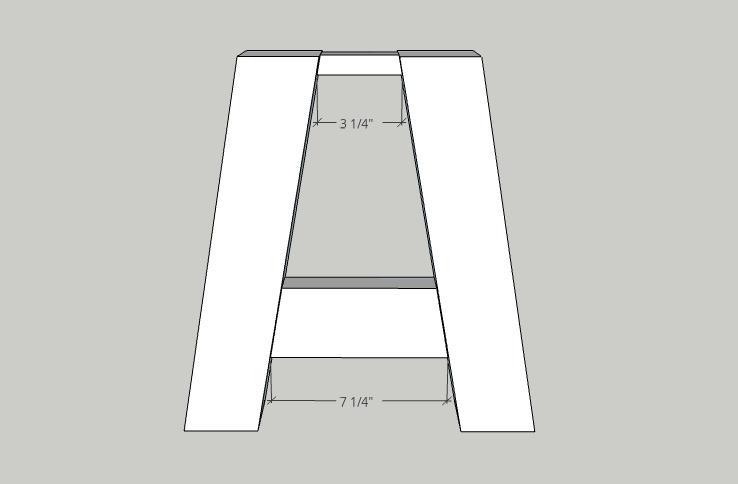
- 2 | 2 x 4 @ 7 1/4″ with perpendicular 10 degree miter (long side) (bottom leg support)
- 2 | 1 x 2 @ 3 1/4″ with perpendicular 10 degree bevel (long side) (top leg frame)
- 2 | 1 x 2 @ 20″ (top frame)
- 2 | 1 x 2 @ 16 3/4″ with perpendicular 45 degree miter (reverse truss)
** If your miter saw doesn’t bevel, simply turn the 1x2s on their narrow side and cut them at
How to make a reverse truss bench
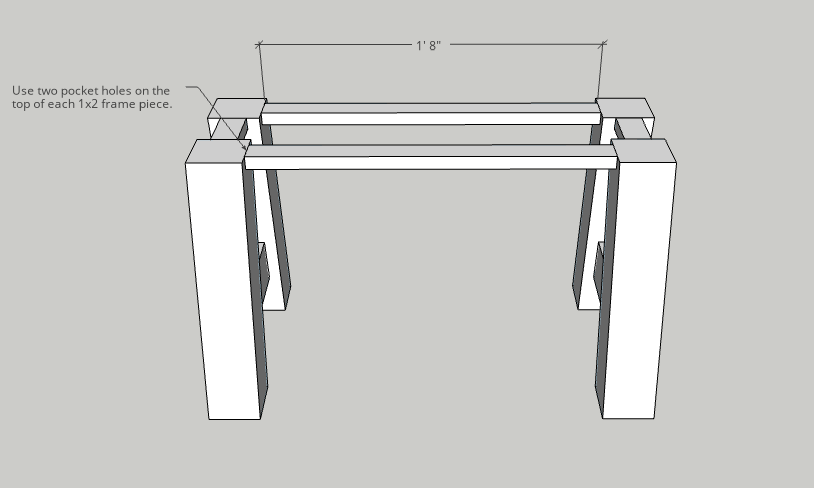
Step 1. Create the legs
Build the legs as shown in the diagrams below.
Drill two pocket holes on the top of the 1x2s and two pocket holes on the inside of the 2x4s to best hide them. Use wood glue and 1 1/4″ pocket hole screws to attach the top 1×2 to the legs. Use wood glue and 2 1/2″ pocket hole screws to attach the bottom 2×4 to the legs.
Use wood filler or plugs to fill the pocket holes on the 2x4s. The bench seat will hide the pocket holes on the tops of the 1x2s.

Step 2. Connect the legs
Attach both legs to each other. Use wood glue and 1 1/4″ pocket hole screws to attach the 1x2s to the legs.
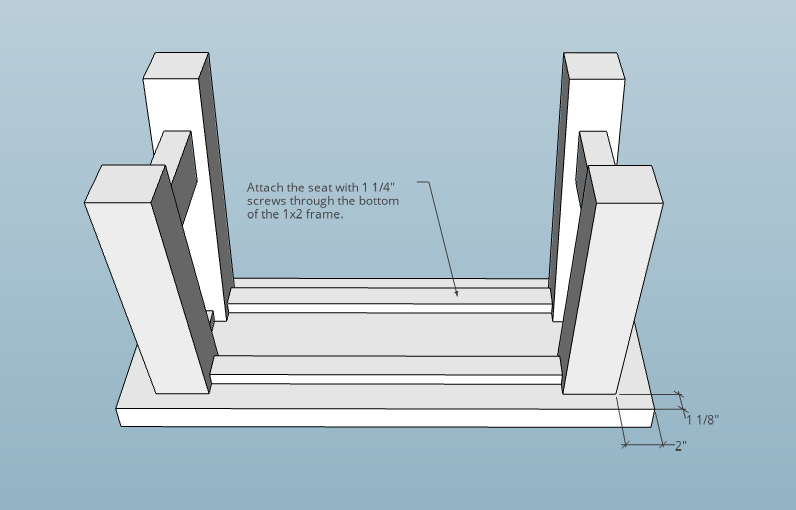
Step 3. Attach the seat
Flip the bench over and attach the seat to the frame with 1 1/4″ screws.
Step 4. Add the reverse truss pieces
Center the 1×2 reverse truss pieces on the bottom of the bench seat and inside the 2×4 leg frames. Attach with wood glue and 1 1/4″ finish nails.
Since the 1x2s overlap in the center of the bottom of the bench seat, they will each be 3/4″ off center on the 2×4 leg frame (one 1×2 width).

If you plan to stain the bench, make sure to wipe off any excess wood glue with a damp rag since wood glue will not accept stain.
Let the wood glue dry, then sand and finish as desired. I stained the bench with a mix of Minwax “Provincial” & Varathane “Sunbleached” and sealed it with glossy polyurethane.

Please let me know if you have any questions and I’ll get back to you as soon as possible!
I’d love to see it if you build from these plans! Tag me on Instagram @bitterrootdiy.
For more project ideas like this, I’d love it if you stopped by my blog. You can also find me on Pinterest. And to stay up to date with the latest shenanigans, follow me on Instagram!
Don’t forget to pin it!


It’s a beautiful bench, in my favourite Scandinavian style. Looks very strong! I looked at your “House Tour”. You have a very cozy and beautiful house!