Disclosure: this post may contain affiliate links, which means I may make a commission if you decide to make a purchase through one of my links, at no cost to you.
This post may contain affiliate links. This won’t change your price, but may share some commission. Read my full disclosure here.
My friend Charlotte and I are in a DIY battle to renovate our guest bedrooms. Catch the entire series here.
Hey folks! I’m sure you guys expected me to post this last Wednesday (sorry about that), but these last two weeks have been nuts!

My birthday was on the 1st… and like clockwork, I was hit with epic hayfever that left my face swollen, sneezing, and itchy. Not a pretty picture. It makes me feel miserable, and feel so lame, all at the same time. I think it’s the mundaneness of being taken down by tree dust. Or that I somehow manage to forget not to leave the house until June when I’m excited that spring has finally returned.
Still, I at least got to go out to dinner and put on a nice dress and flowers and all the mushy stuff with K, and I also got a new power tool (because he knows my love language, ha). I’ll get to why I was outside to make matters worse at the end of this post, but I need to give you a Dueling DIY update first!
As we touched on with the last update, Charlotte (of At Charlotte’s House) was thinking she was probably going to be done with her guest room makeover by our next scheduled post. And since her room was a little smaller than mine, it’s not exactly a surprise that the challenge is ending sooner than I’ll actually finish all the big builds in the room (I still have the built-ins to finish, plus two custom-made pieces of furniture to create for the double-duty use of this room… a lot going on!).
But, that isn’t really ever the point of Dueling DIY. I still plan to fully finish this room, but the goal is always to light a fire under my ass and actually make some progress after years of stalling. I think my room has done just that! So, it’s time to toot my own horn a little, fully furnished or not. Let’s go wall to wall and cover the biggest leaps forward that we’ve seen thus far, and what’s yet to come!
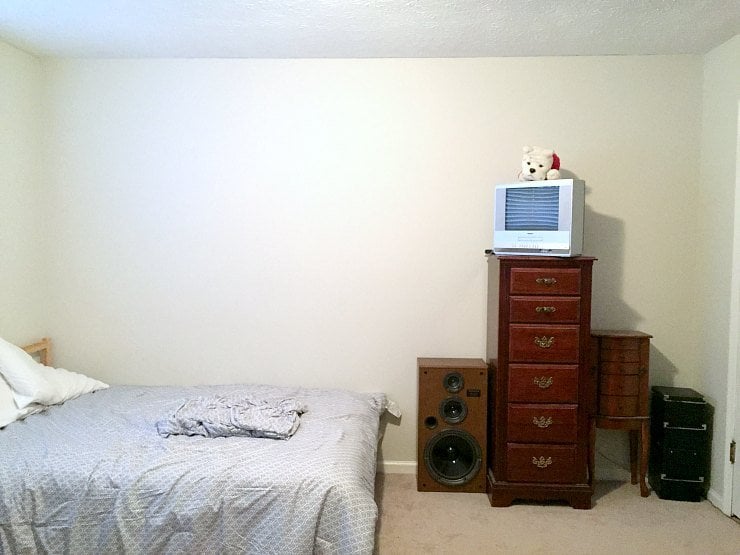
Before: boring and cluttered

During the “before” tour, I showed you a freshly cleaned-out room. Lots had been donated to Goodwill, which was a start, but the room had ZERO personality.
Progress: a cozy corner

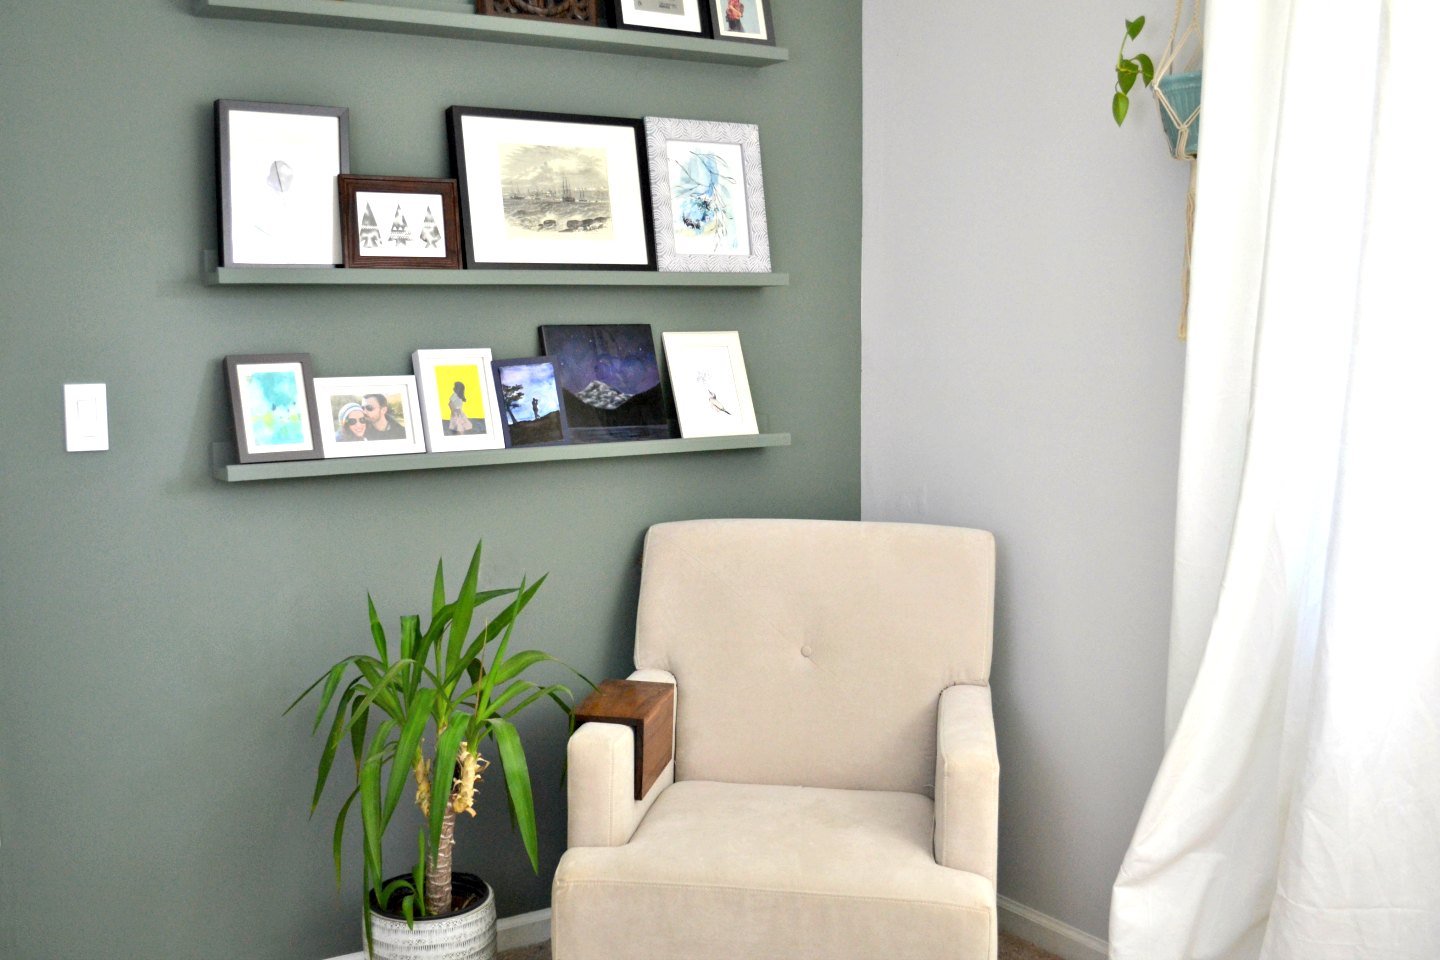
I added a beautiful sage green to two of the walls, and a super pale gray to a third. A final wall will be painted after the built-ins are complete (and will match the wall on the right). But how awesome does this same corner look now compared to before? The picture ledges turned out exactly as I imagined, and got a ton of my artwork out of boxes. Win!

I also added DIY curtain rods to the window that have a nifty hanging rod built in, which allowed me to create some hanging planters. I still like them, but as you can see, I already switched them out. K made that call, actually… he didn’t like that they were deliberately hanging at different heights. Since this room will serve as his office space when he needs it (and I’m trying to make him feel welcome in what was my house exclusively for years), I made a switch to pre-made ones from Amazon, and will pick my battle another day. ?
Before: cluttered TV wall, too-hot room


Clutter and a boob light… snore.
Progress: a place for remotes, a comfortable breeze
I know I’m not breaking the mold with these two upgrades, but adding another picture ledge beneath the TV and a bright, breezy ceiling fan (with remote) has made this room so much more comfortable to even be in! We removed the old visible storage as well, and there will soon be a custom-built piece to fit right under the TV and house a set of K’s vintage speakers. He is really excited to develop a piece for the blog, so I may give him the reigns with that one for his first project to share his design from his POV.


As for the little nook o’ nothin’ right next to the door, that space will get a few easy shelves for K’s vintage records and video games. When the built-ins are finished, we may switch what’s displayed where; but with all his stuff moved into the house in odd places, getting things out of the living room will be a step in the right direction!
Before: the bed wall
Progress: still “the bed wall”, but way cooler!

The Murphy bed has been talked about repeatedly already, but in the last two weeks, there have been two significant changes:
- It’s painted the final color of the future built-ins; and
- I’m working on the art on the front!
The green tape in the photo was a way to visually see what size art I want on the wall. The two smaller vertical pieces are where the handles need to be for optimal leverage. My goal with the art piece is to make it so that the handles are somehow incorporated into the art, so when closed, it looks like a really cool wall and not the exposed bottom of the bed. So far, here’s what it looks like!
Murphy bed wall art

Ignore the plywood scraps behind the art… that’s just a flat surface to work on. This is a happy stopping point until I get some input from K on what we should do next (I’m thinking of adding some scroll saw pieces so it’s got some geometric and swooping shapes to it). And as for where the handles fit…

I’ve cut out a place on each side that should fit right over the handles once installed! I cut these using a scroll saw and then glued them to another piece to keep them stable (that front part of the wood that hides the handle is super thin, so it would never hold on its own). It probably still looks a little confusing with the plywood in the background, but I’ll have a post dedicate to the entire DIY process once I figure out how the rest is going to look, stain it, etc.
Dueling DIY Vlog #4
Since this is the official end of Dueling DIY: Guest Room Gauntlet, I made one last vlog update as well! You will now find four episodes over on my YouTube channel, and I’ll be adding each of these to a playlist on the Dueling DIY: Guest Room Gauntlet tag in case you ever want to see them in sequence. If you want to see more about how I plan to make the art on the Murphy bed work too, I have a short clip of the handle placement, and wait for Charlie’s input around the 2:20 mark.
And as for that reason I was outside, getting attacked by hay fever demons? Here’s a sneak peek:

Things are finally happening with the new shed and platform deck! I’ve been planning things since last fall, and things are now majorly underway. These are the big reasons I was trying to make headway with the guest room before spring, since I knew that it would be way too hard to try to do the bulk of the Murphy bed and all this at the same time. I’ve decided that I’ll batch out the posts as two separate series (series-es? hehe) so I can give more details on things like pre-treated lumber (such as when to use ground contact, etc.), framing the walls, and all that. It’s all a huge learning process for me, so I’ll pass on as much info as I can (we’re still talking about structural details that will likely vary a good bit depending on location and what codes to follow, so it might be hard to answer specific questions if they haven’t applied to me/my yard).
That’s all for now, but check in again this week. My goal is to post every other day (including weekends) until all of the goings-on have been posted about, but I have several complex tutorials in my pipeline that I’ve been wanting to share, so it’s mostly a matter of how much sleep I get until the hay fever goes away (which unfortunately after a winter of not enjoying warm weather, makes it hard to stay inside!).
So, tell me: what have you been working on or planning that you’re really excited about?
P.S. One more thing: Charlotte and my friend Erin Spain have a podcast called North South Makers, and they asked me on as their first guest interview! You can check me out on Episode 34 right here. They’re also going to be my roomies at Haven in Charleston this July. I’ll be sure to include any road trip shenanigans when we do a recap. ?
P.P.S. One MORE thing: I have added the guest bedroom to the house tour, complete with some highlights! I’ll also be adding a resources list to the bottom of that page in case you want to create a similar look.


What color is the sage paint? The room is looking great.
Thank you! It’s Sherwin-Williams Retreat.
Amazing how much more room it perceivable creates. And looks really classy