
Disclosure: this post may contain affiliate links, which means I may make a commission if you decide to make a purchase through one of my links, at no cost to you.
As a DIYer who does a large number of projects solo, I’d like to think that I’ve improved in a number of ways. Sure, the typical DIY stuff can be a challenge (knowing what materials to use, how long things might take, the constant measuring & re-measuring, etc.), but for me, there is an entirely different obstacle: figuring out how to do something without extra hands involved.
It’s not that I don’t have friends and family who will gladly help if asked. But, as often happens in this house, my energy level ebbs and flows. And if I’ve learned anything at all in these last four years of DIY, I know that my enthusiasm will fade long before I get someone else’s butt over here to help. So, it’s best to simply push through and get ‘er done. Embrace the challenges that come with only one set of hands. Think creatively. And that’s exactly what happened with hanging the stair handrail.

If memory serves, I removed the handrail within just a month or two after moving in. My intention was to paint it, paint the walls, and put it back up again (and back then, the plan was to paint it white like the stairs). Just about the only picture I have with the handrail intact is this old one from the first few months:

But when I tried to remove it, I got stuck from the very start. The first bracket removed cleanly; the second had stripped screws (and since both brackets were screwed into studs for obvious reasons, getting out a stripped screw wasn’t going to be easy). I ignored the problem for a few months while working on other things, always intending to come back to it and get the second bracket out.

But one afternoon while I was out of the house, I came home to find the bracket removed… along with a chunk of the wall that it was screwed into. Clearly, either my Dad or my ex just thought this would be easier (and it always is, when you don’t have to be the one who fixes it!). I remember being really annoyed, but after all this time, I can’t remember who actually did it. We stuck the handrail in the garage, and there it sat.
I basically just ignored it again, waiting for the inspiration/enthusiasm to strike to finally address it. Which pretty much never came. It’s easy to ignore things like this until you have to prepare a house for sale (once again, #slackerprojects)! But after realizing I needed to paint the railing black (to match the existing color scheme of the rest of the stairs), I guess the desire to finish this project off finally came back around.
Painting the rail took quite a few coats, which I managed to do in a makeshift setup in the kitchen (using the top of the trash can and a short stepladder as sawhorses). In the meantime, I also patched up the spot in the wall where the old bracket had been ripped out. Once the rail was dry and ready to re-install, I ran to the hardware store to pick up new support brackets (the old ones were shiny brass that had all sorts of old paint splotches from the previous owner’s wall paint, and I wanted satin nickel to match the new hardware placed in other spots in the house). The holes on the new hardware matched almost identically to the old, which would prove to be extremely helpful when getting the angle of the railing correct. In theory, all I would need to do is screw the railing back into the same spot. Which in theory, also seemed easy. But since I would be doing this alone, I had to break the project down a bit more.

I knew that the biggest problem would be holding the rail at the correct angle to mount onto the wall. So, screwing the brackets into the rail and then hanging both on the wall together was not the proper way to execute (there would be no other person to hold the other end, and the whole length of the rail was a bit cumbersome to hold in the air). Mounting the brackets onto the wall first, then placing the rail on top and screwing that in, seemed like the only option. For a while, I considered trying to find a way to support the other end while I worked at the top, but stairs make it difficult to create a temporary support system (like my nifty paper towel trick in the kitchen). There wasn’t a flat surface I could depend on.
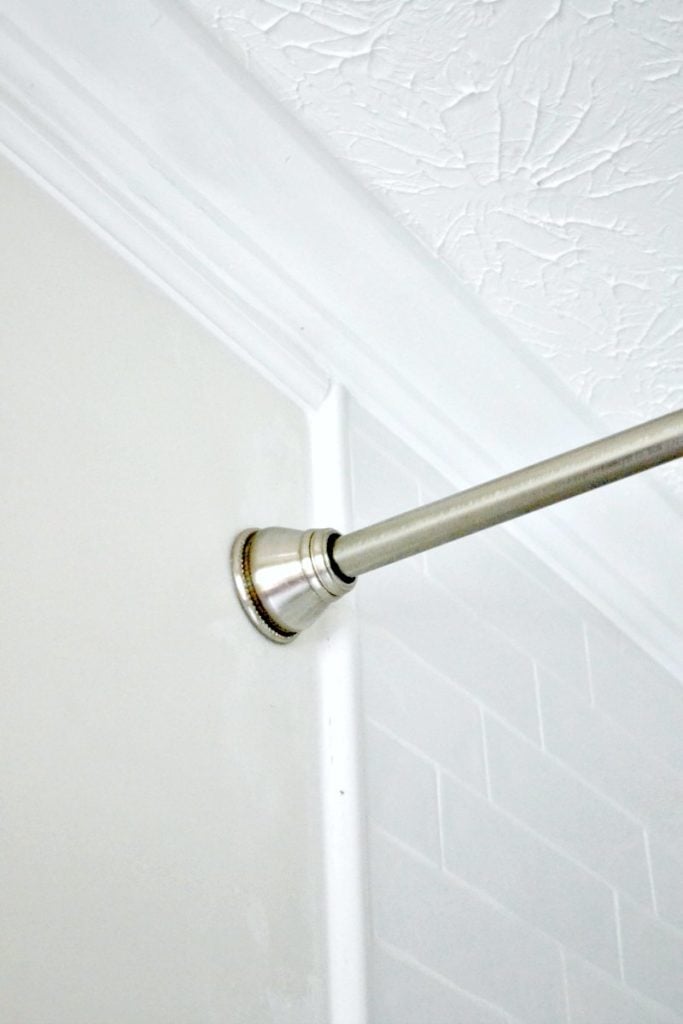
The brackets came in two parts: the support piece that screwed into the wall, and another sort of crescent-shaped piece that screwed into the handrail. When tightening both pieces, the crescent shape would wrap around the end of the support, thus creating a secured rail. By loosely securing the piece that attached to the rail, I could temporarily create a sort of loop that would allow me to slip the rail over the bracket, which would loosely let it sit on the base.

By doing so on either end, I could relatively hold the rail at the correct angle while I tightened each screw.

It doesn’t make much sense until you actually begin mounting the rail to the wall (sorry!). And as difficult as doing this alone might be, stopping at any point to take mid-installation photographs was impossible (for dramatic reenactment effect, I took that last one above after unscrewing things a little bit so you could see what I mean). But in the end:


Bam. It was a frustrating thirty minutes of running up and down the stairs (tightening one screw a bit at the top, adjusting, going to the bottom bracket and tightening one screw, adjusting, repeat). But it ultimately worked out. Thanks to the black paint, there were a few scratch marks left on the wall (I’d already painted up to that point on the wall in anticipation of having the rail in place – will need to grab the scaffolding from Dad’s house again to finish the top parts of each wall). I buffed off the scuff marks with a sanding sponge.

There’s still more to do before the stairs are finally complete, like paint the rest of the walls and cap the top of the stairs (where the laminate floor ends). But I was pretty damn pleased with myself on this one. I told myself I wouldn’t need a second set of hands, and I actually did it. Booyah :)


I totally respect ya for going solo! I cant count how many times my hubby has bailed me out and that’s just talking strength. Glad your creativity persevered ;)
Well Done!! After reading you describe your ordeal, I had sympathy frustration pains, ha. I would have said “screw it” I’ll do it when I have help but again that’s the reason I’m not an avid DIY person. You SHOULD feel proud of yourself!
My partner and I have been rehanging his mom’s cabinets and it’s been a wreck with two of us. I’d say you’re crazy for going solo, but we know you got this! You inspired us to redo her cabinets for Mother’s Day and they look incredible, so big thanks for getting us off our butts :)