Disclosure: this post may contain affiliate links, which means I may make a commission if you decide to make a purchase through one of my links, at no cost to you.
How to start seeds indoors — growing tips on when to plant seeds, which kinds of vegetables can be started indoors, and what materials to use. If I can grow them, anyone can!
So, it finally happened: my time as a notorious plant killer might finally be at an end — because I finally started my first vegetable garden! I planted seeds, grew them in a little greenhouse, and am ready to transplant them outside.

Buying these seeds was as though I’m re-learning things I thought I knew about myself. I mean, me?? The person who once killed every plant she even glanced at, is now putting real dollars into the ground — and expecting to eat from that investment??
My former self is laughing in disbelief, I can promise you that.
Interrupting Disclosure Duck ? says: this post may contain affiliate links, where I might make a commission if you purchase products based on my recommendations (it does not change the purchase price). For more on how that works, check out my page here.
Why start an indoor greenhouse?
In all honesty, this project doesn’t really belong to me — the ownership kinda belongs to K. He has been asking me for more than a year to find a space in the backyard for a small vegetable garden, and I agreed to put one next to the soon-to-be-built shed (more updates on that coming soon, but there are a lot of photos to comb through!). As we planned, he ordered the seeds and we chose to start more than half of them indoors using a pre-made greenhouse kit.
The benefit of using one of these greenhouses is that it comes ready-built for proper seed germination. There is very little guesswork (scroll down for steps). And, for my first garden, it helped that we could get the seeds started earlier than waiting for the outdoor weather to cooperate. It was easier to monitor growth and really got me excited during the last few weeks of cold weather for spring!
When to start seeds indoors
Even though indoor seeds could be started well before it warmed up outside, I still had to time things just right. K has plenty of experience with home gardens, but if you don’t have an expert at your side like I did, the Farmer’s Almanac has a handy chart page based on your area that helps clear things up a lot!
Seeds to avoid starting indoors
If you clicked on that link above, you might have seen a few blank spots in the Indoor Seeds column. While the majority of the seeds I ordered can be started indoors (a variety of tomatoes, peppers, and herbs), there were a few left out of the greenhouse on purpose. We set aside the cucumbers*, onions, and carrots to be planted outdoors instead. As it turns out, there are a number of seeds you should look to plant directly outside and skip the indoor step:
beans, beets, carrots, corn, okra, onions, parsnips, peas, potatoes, radishes, spinach, turnips
(I put an asterisk * on the cucumbers since even though it’s okay to start as a seedling indoors, we chose to plant outdoors only.)
The whole thing is actually pretty cool
We bought one large greenhouse kit for all the veggies and a smaller one for herbs (thinking I would plant just a few at my kitchen window). Each contained a plastic tray, lid, and peat pellets that expand to hold seeds.
This next part is really fun: it comes to life simply by adding warm water (we used a measuring cup to add the amount specified on the packaging). You can see below how it looks before vs. after adding water.

Excuse the crappy nighttime carpet photos. I genuinely did not think this would be an interesting part to capture and realized that mistake a little too late!

The water is soaked up in mere seconds by the peat pellets. I did the dirty work of breaking open the top of each pod to expose more dirt, while K did the majority of the planting (mainly because he was a perfectionist who did not at all appreciate my artistic interpretation of making sure seeds were planted at the correct depth). Pssh, experts. Amirite?

Since I’ve had furniture kind of scattered all over the place thanks to the guest bedroom remodel, the old bench I had in the entryway was upstairs. It just so happened to be the perfect height to sit in the primary bedroom hallway; right under the windowsill, where it could get lots of sun.

Seedling Growth!
It took such little time to see the first few sprouts — just a few days, I think. I practically blinked, and they began peeking through the soil.

Before long, they were everywhere!

I tried to take a few more shots each day as I found mew seedlings pop up. The peppers were the first to peek through, but the tomatoes quickly caught up. The dill and basil snuck in there when I wasn’t looking.

My plan was to wait until I started seeing more seedlings come in, then build new garden beds. (Finally, a task I know more about!) I procrastinated as long as I could so I could concentrate on other indoor projects.

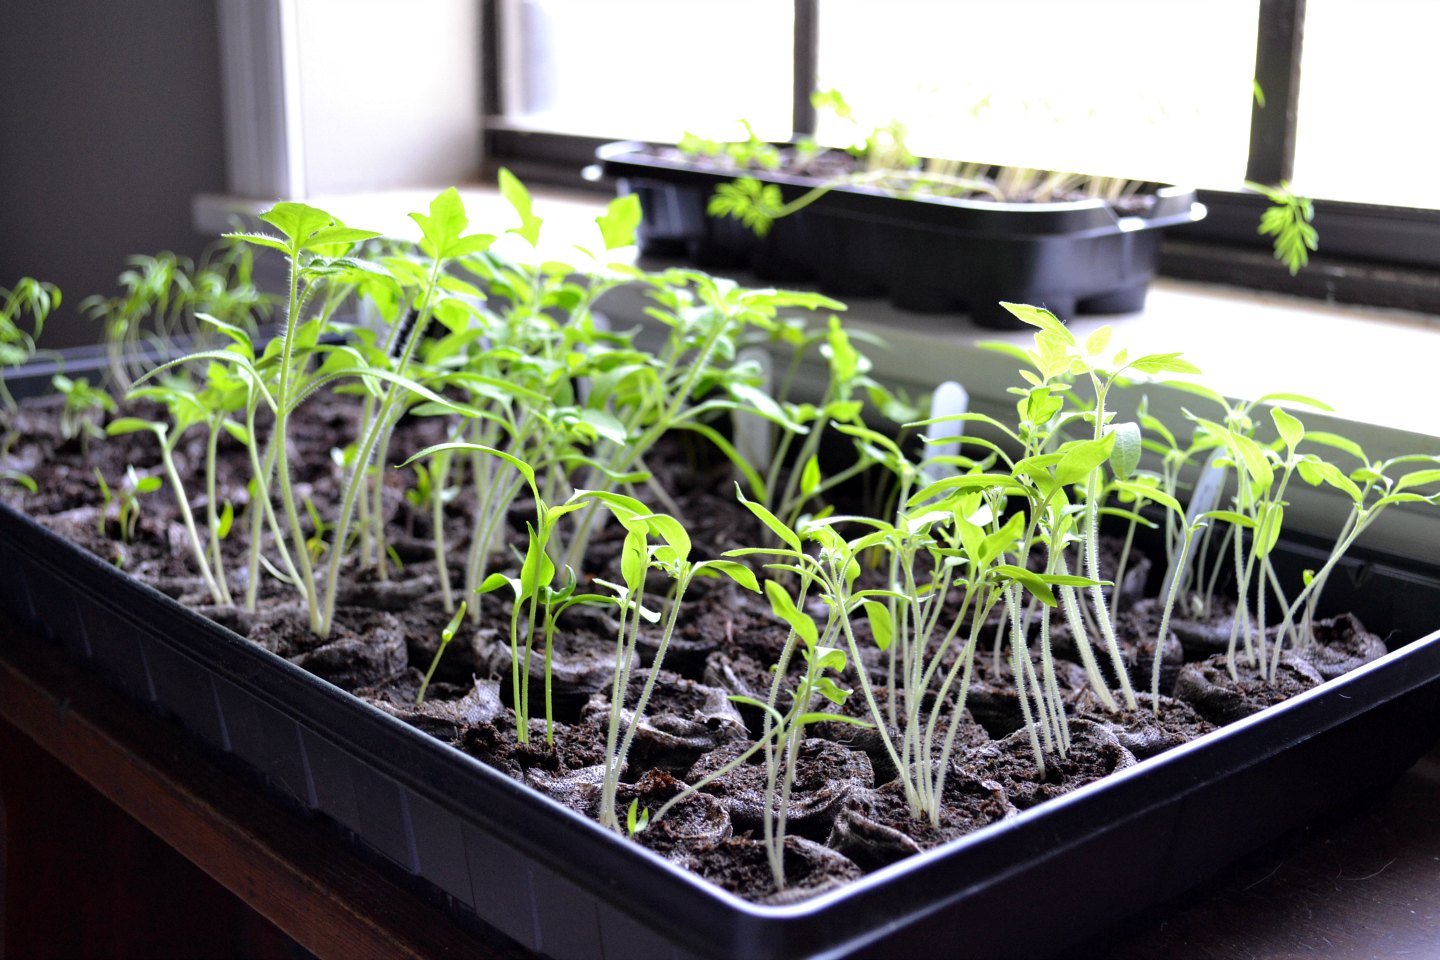
Tomatoes, peppers, and dill — oh my!

When to transplant the seedlings
As you can see from the pictures, lots of the seedlings were growing like crazy. It was enough so that the roots were starting to peek out from the pellets on the sides and bottom.

So, if the rapid growth of their stems wasn’t enough of an indicator that I needed to hurry and build the new vegetable garden beds… those roots certainly were! I rushed through this build, but I will have details for you in a separate tutorial.

Want a video sneak peek? Here you go!
I still have to plant the outdoor seeds yet and build a separate trellis bed so the cucumbers don’t choke out the other plants, but I’ll be sharing that soon! I’ve got an idea for how I want that to look right next to this L-shaped bed. Hopefully constructing and finishing planting by this weekend.
Are any of you growing your own garden this year? Any other first-timers like me? What are you planting?


I started seeds this year after a 9 year break. Back then I took a class and we planted a ‘flat’ of tomatoes and peppers. I even bought a mat that you place under the flat to warm the soil. The seedlings were placed under a fluorescent light and moved to individual pots. By the time they could be planted outside, there were tomatoes on the tomato plants! This year I started tomatoes and peppers to share with a friend. The tomato plants are already 7″ tall and the pepper plants are 5″ tall. It won’t be warm enough to put them out until later this month. I’m enjoying doing it this year because last year I didn’t plant due to recovering from surgery and the year before I was out of town for 2 weeks spending time with a new grandbaby and crazy busy getting things made before I left.
Darlene, it sounds like I could learn a lot from your gardening experience! Have you ever packaged up a plant to give to a neighbor? We’re thinking of doing that this year because we’re so close with one of the guys next door and he’s an excellent landscaper.
Sarah, back in 2009 when I took the class I wound up with almost 100 plants! I kept about 30 plants and the rest were given to coworkers. I just gave them away in the pot they were growing in. I suppose you could wrap the pot like they do with poinsettias at Christmas. Most of the folks wound up giving the empty pots back because they knew that I had to buy so many. Hubby thought that it would be a great idea if we grew plants the next year and sold them since most of the plants would have sold for 10.00 based on their size. I told him that since ‘we’ didn’t do all the work ‘we’ wouldn’t be doing that! He didn’t disagree!
Warning: if you thought squirrels were assholes before, wait until they start stealing your tomatoes. You might want to build yourself a wire enclosure of somesort to keep themaway from your veggies— they are a huge problem in my Atlanta yard….
THANK YOU for this tip! I wouldn’t have even thought of that. If I find a solution I’ll be sure to share it! We’re already thinking about doing a trellis for the cucumbers so perhaps we’ll have to do an enclosure as well.
I just stopped in to let you know I really like your pictures. Its nice to see such vivid photography showing those seedlings popping out from the soil :)
Thanks Rich!
I love having an indoor greenhouse! This is beautiful! Having plants inside the house is wonderful and it just makes the whole house feel so much cleaner? Haha but I love it!
Hi there! I have been reading for a while (I guess somewhat creepily because I never comment), but I thought I’d let you know on the off chance you are in DeKalb County, they offer free compost to country residents! I noticed the bags o’ dirt you dumped (I did that last year and it rapidly got $$$), and figured it was worth sharing if you (or anyone else in the Atlanta area) could get any use out of it.
I also second the Atlanta squirrels complaint. I opened a kale buffet to the squirrels in my yard already this year and am now trying to stave them off with this little guy: https://www.homedepot.com/p/Easy-Gardener-Garden-Defense-Action-Owl-8011/203112120
Happy growing! It’s seriously the best to eat out of your own garden.
Thanks for the tip! I’m in Gwinnett County, but we were actually able to add some of our own compost underneath those top “nicer” soils, we just didn’t have enough produced yet! My hope is to build a solid composting spot near the shed when all is said and done.
I’m trying a veggie garden for the second time this year. I was moderatly successful last year. I loved having fresh lettuce whenever I wanted last year. Fresh from the garden is so much better than store bought!
I can’t WAIT to try my fresh veggies and compare!
A good vegetable growing method and very convenient. I like so much
The images bring back so many memories of when I was starting out. You’re definitely more organized than I was. I remember being a mess and being uncertain of everything I was doing.
I do a lot of projects and my googles always seem to lead back to your site. Thanks for posting with such great process photos. May your pandemic be fruitful and productive and not crazy making. Cheers.
What a wonderful comment to read. Thank you for making my day, friend! And same to you regarding the pandemic: stay safe and healthy!