
Disclosure: this post may contain affiliate links, which means I may make a commission if you decide to make a purchase through one of my links, at no cost to you.
My friend Charlotte and I are in a DIY battle to renovate our guest bedrooms. Catch the entire series here.
Hey hey, friends! Sorry about the delay — I know you expected this post yesterday. It’s been one of those “technology sometimes sucks” sorts of weeks, so I’m just going to jump right in and not dwell any further on crappy internet-related problems. It’s time for a Dueling DIY: Guest Room Gauntlet update, and vlog #3!
 If you need a recap, start here and check out the updates here and here. I created the Dueling DIY series because it gives me the motivation I need to stay focused on a house project that I might otherwise shove further down the to-do list (send to project limbo, basically). By challenging another blogger and committing to these bi-weekly updates (along with a vlog recap each month), I get a lot more done. The smack talk is also a lot of fun — especially when I get to make my challenger cry. This time around, I’m challenging Charlotte from At Charlotte’s House, who is also redoing a
 closet she’s saying is a guest room and pretending her projects are as badass as mine.

Dueling DIY: Guest Room Gauntlet
The biggest news first, shall we?
The Murphy bed
THE MURPHY BED IS INSTALLED!

Over the last few weeks, I’ve been working almost nightly to get the bed completely built and install all the hardware.


I had to iron on the edge banding and trim it all down so that the unit is ready for paint (delaying all of that painting until more of the built-ins are completed; it’s a lot of painting).


Sidenote: I had to convince myself to buy this little edge trimmer tool. It was over $10, which just seemed like a needless splurge. But it saved me so much time! I went from “this is a huge waste of money” to “this thing is so handy” in one use. I’ve used edge banding on a few projects before, so I’m certain I’ll use it enough again to make it a worthwhile investment.
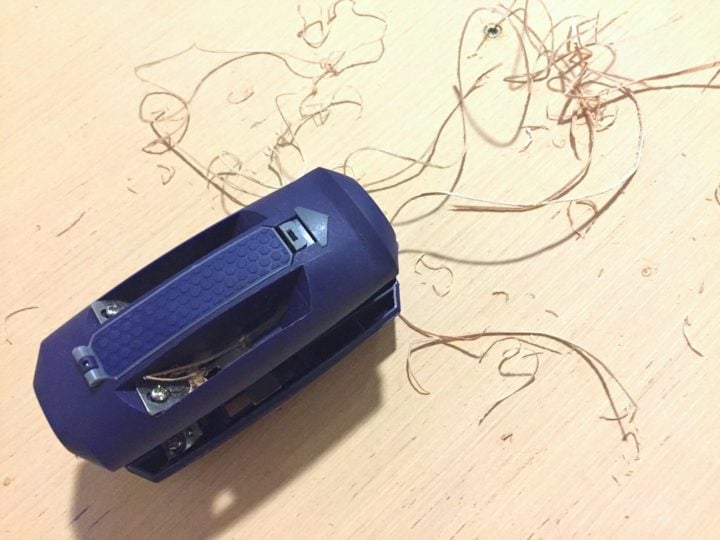
Sidenote to the sidenote: I totally loved the sound. Some people hate it like nails on a chalkboard, though. Just a fair warning!
Installation
When I say “installed,” I mean that the mattress is in place and the whole unit is bolted into the wall. The good news: all of the hard parts are DONE! The bad news: the springs are so tight that the whole thing almost squashed me!
The unit is made with a hardware kit, which includes installing a piston lift system to help keep the bed closed and allow the unit to spring back into place when not in use. But that same hardware is meant to be counter-balanced by a heavy mattress on the inside (skip the box spring, FYI). So when you’re installing, trying to keep the thing open is tough, since the unit is designed to be front- and top-heavy and wants to fall over (aka, prime squashing territory). It’s definitely a situation where I needed a helper, so I’m glad I wasn’t cocky enough to install it until K was home from work.

Together, we got the top header bolted to the studs (VERY important to secure this part, so we went with bolts instead of screws to make it more secure) and there it was: my new Murphy bed, installed!

Of course, there’s still more left to do: install some handles (notice how there isn’t a way to open the darn thing?? yeah… gotta fix that) and start building the cabinetry and shelving that will flank the sides of the bed and give the entire wall a clever, built-in look.

Since we went with the biggest news first, all the other little updates seem a little less impressive to me. So I’ll recap them all really quickly:

In case you missed it, there are new hanging planters along the window. Click here for that tutorial.

I sealed one of the paintings along the new picture ledges with art resin — such a cool project! You can find that recap and tutorial here.
Speaking of the picture ledges, I built a total of 4 but only wound up using 3. I took the 4th and placed it under the TV for a convenient way to store remotes. Now guests won’t have to wonder where they are.

And speaking of the window, I noticed that the conduit I’m using for the curtain rod is just shy of fitting properly into the DIY brackets I made. I want to add some decorative knobs (finials?) to each end, so that means extending the pole just a few inches. I’ll have a tutorial on this soon, but here’s a hint if you’ve ever wondered about gluing metal and wood:

Next plans
Having the Murphy bed mounted to the wall makes it very obvious that there is so much floor space in the room. That means a new focus on trying to optimize this space for all of the other possible uses: a secondary office for K (which means we’re on the hunt for a good dresser to turn into a desk), entertaining space (the speakers have to go somewhere, maybe add seating, etc.). It should make for an exciting next month for this series! I see the finish line in sight.
Vlog #3!
Don’t forget to head over to Charlotte’s blog to check out her progress as well. She says she’s almost finished with her room, but then again, she already said she was going to be finished by this update. So if you leave her a comment, make sure she knows that you know she’s a liar. And again, don’t let her fool you with those pillows and tchotchkes: she’s not done with her bed yet either, and that’s an attempt to hide her secret shame.
P.S. I can’t WAIT to make more progress on this built-in install!


It has been fun watching the progress of the Murphy bed, I used the same hardware and instructions a year and a half ago. Feeling a great sense of pride as I folded the bed up for the first time, then realizing that I as well forgot to add handles to open it again….Damn….
Haha, I didn’t install the handles on purpose (it was too much hassle to install them with the weight of the unit). BUT I do have plans for opening them, just gotta figure out how to work that into some artwork…
is looking great! I like to call mine a guest room in 9 sq ft. My husband wanted a sofa bed but I vetoed that for our only other bedroom that also has to function as an office/craft room. I can’t wait to see the rest of it.
Me either! I’m getting started on the built-ins this week and anxious to make my first cuts.
I am so impressed and looking forward to seeing the built- ins.
I hear wine corks can work beautifully if you are modifying Gruntal rods (IKEA), I bet this trick works for the right size rods as well.
I was daydreaming about a single long picture ledge in my Master, since you made yours, (I’ve been looking at boxes on the floor full of unhung pictures, from moving 2 yrs ago) I got MDF one night and measured/ cut them perfectly at home. Then decided to practice with the scraps and kreg jig last night since it was going nicely so far. It didn’t work out so well. Despite me using clamps to hold it all in place, my screws wouldn’t grab and pull in the second board squarely, instead push it all out of place and destroy the material. So I’m thinking of joining them in a less fancy way (no kreg) because I have the MDF, and counter sink the holes to fill. I think using regular wood even if it’s a rough board would’ve been better. It’s still a good week because I made progress on other projects, and learned MDF for surfaces not projects with boards…
MDF is not a great material to work with when it comes to pocket holes (and be sure you’re wearing a dust mask while cutting). I countersunk mine even though I was using pine because the glue will hold far stronger than a screw will. Glad you learned something along the way (it’s an experience for us all!).
I love how this is coming along! I can’t wait to finally see the finished product! (Also those pictures are pretty funny)!
Hello Sarah. I found your blog a week ago and I really love it. I’m interested in DIY and home decorating. Your blog is about those two and even more. I especially like this post because I never thought individual can make a murphy bed, but you did! I’m very impressed. Thanks for your great posts, I want to decorate my own room. What do you think is the most important thing in home decorating?
Just stay true to what you like, and don’t follow trends. Good luck on your decorating journey!