
Disclosure: this post may contain affiliate links, which means I may make a commission if you decide to make a purchase through one of my links, at no cost to you.


Thanks to frosted window film, my primary bed and bath share a bright, sunny space but with the added comfort of privacy. Bonus: it got Charlie to stop barking at the neighbors walking past the house! In this post, I’ll share the easy install and frustration-free tips.
Why Not Curtains or Blinds?
When I mentioned I was doing this on social media, the first question I got was about the more obvious alternatives — why not blinds or curtains? (Or in some cases, more mockingly, “hAve YoU nOt HearD oF bliNds oR CUrTains??”). It’s a natural first question, so I’ll address that first. It’s not that the first two options were unknown or not considered; it’s that despite wanting those options, both failed.
The Charlie of it All
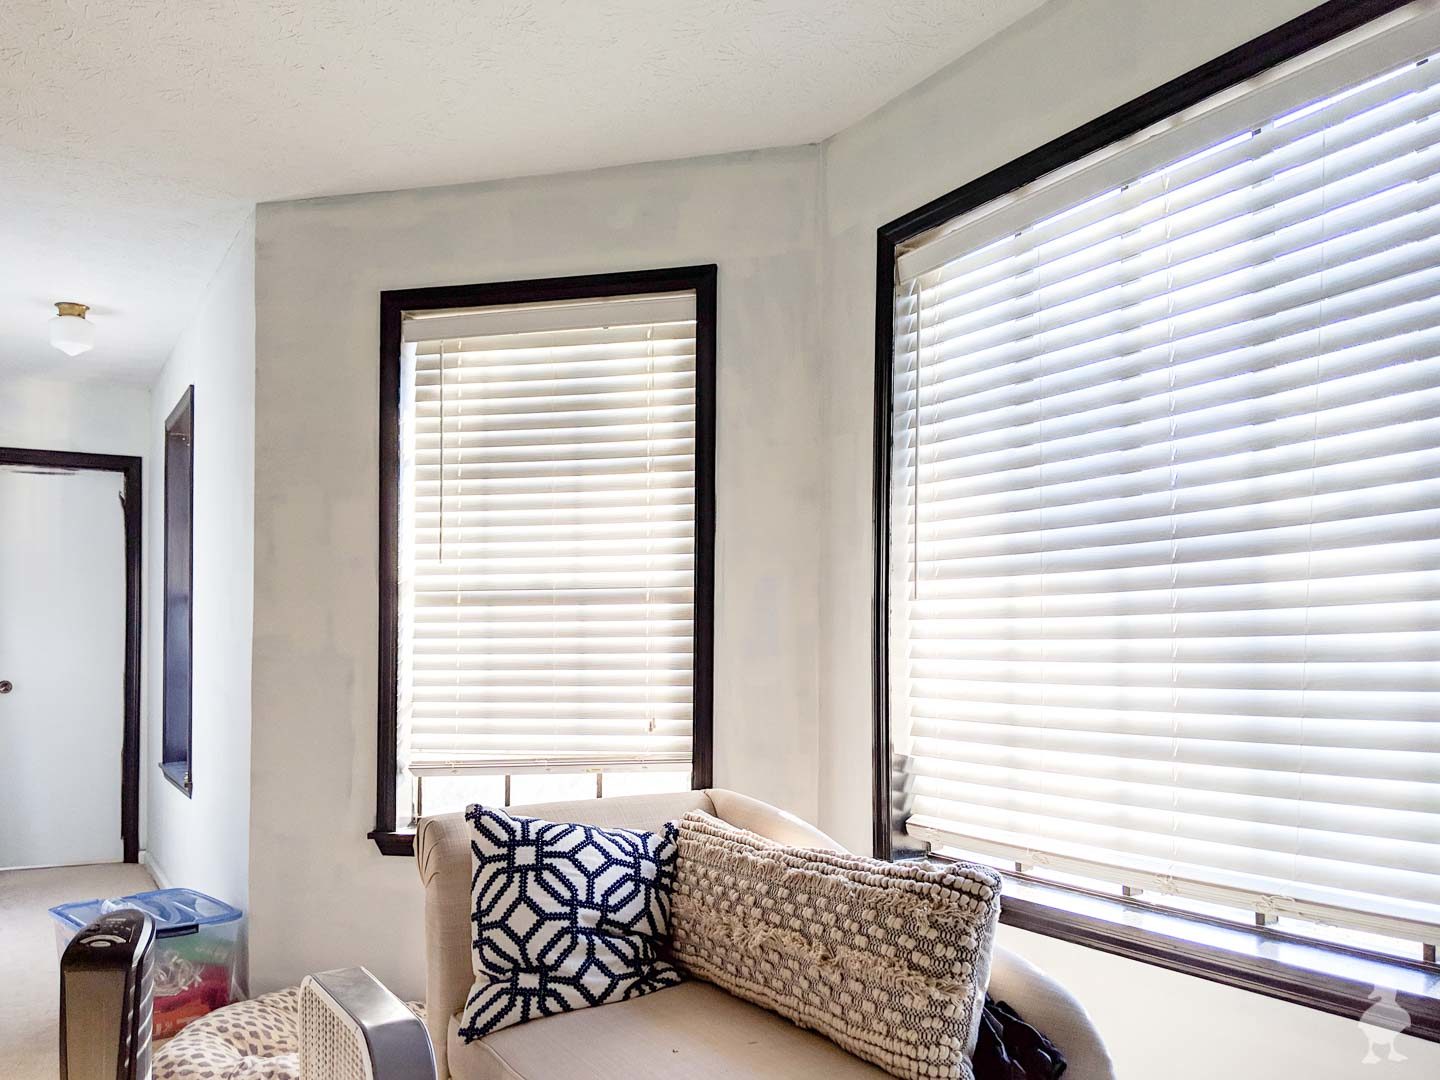
Let’s start with the problem: my primary bedroom faces the street. It’s also one of the biggest rooms in the house, and therefore a room we spend a lot of time relaxing in. These two things combined means we have to deal with a lot of issues related to privacy. When I first moved in, I installed 2-inch faux wood blinds that I like a lot and have subsequently installed in the rest of the house. After Charlie joined the family, however, I faced another issue of her wanting to peer — ahem, BARK — out of the window. If I did that without pulling up the blinds a little bit, she would stick her nose right through the blinds, eventually breaking them from the constant stress testing. So, we had to keep them open a little… at about bum/crotch height. Which isn’t great when you want to change clothes, get dressed after the shower, or just let it all hang out.
Additionally, in the bathroom, I wanted to keep the light, but sheer curtains simply weren’t doing enough to hide the view from the street when the light hit midday (or when the indoor lights were on at night). And really, should neighbors be able to see you on a toilet? I think not.
Curtains would do just fine in the bay window area, and I do plan on adding some eventually, but curtains seemed like more of a trip hazard if I were to have them on the hallway window. So, it seemed best to try for a solution that could be applied in multiple places for privacy, but not have a bunch of different window treatments.
Why Not One-Way, Mirror, or Tinted Film?
This is usually the next most-often-asked question. The simple answer is, most only work well in the daylight, and I wanted nighttime privacy, too. When you have the light source coming from the inside of the house (such as from indoor lamps), the effectiveness of the one-way film kind of disappears. My parents installed the mirror type on their French doors in their home, and you can still see everything at night.
Want to know something funny? Manufacturers even use this failure as a feature in their marketing by labeling these products “for daytime privacy” or “with nighttime vision.” Smart, right? Ha. But, now you know!
Tinted window film was nixed as an option because I still wanted lots of light whenever possible plus the nighttime thing. Frosted film diffuses, but does not darken the light; a tint would.
How to Install Frosted Window Film
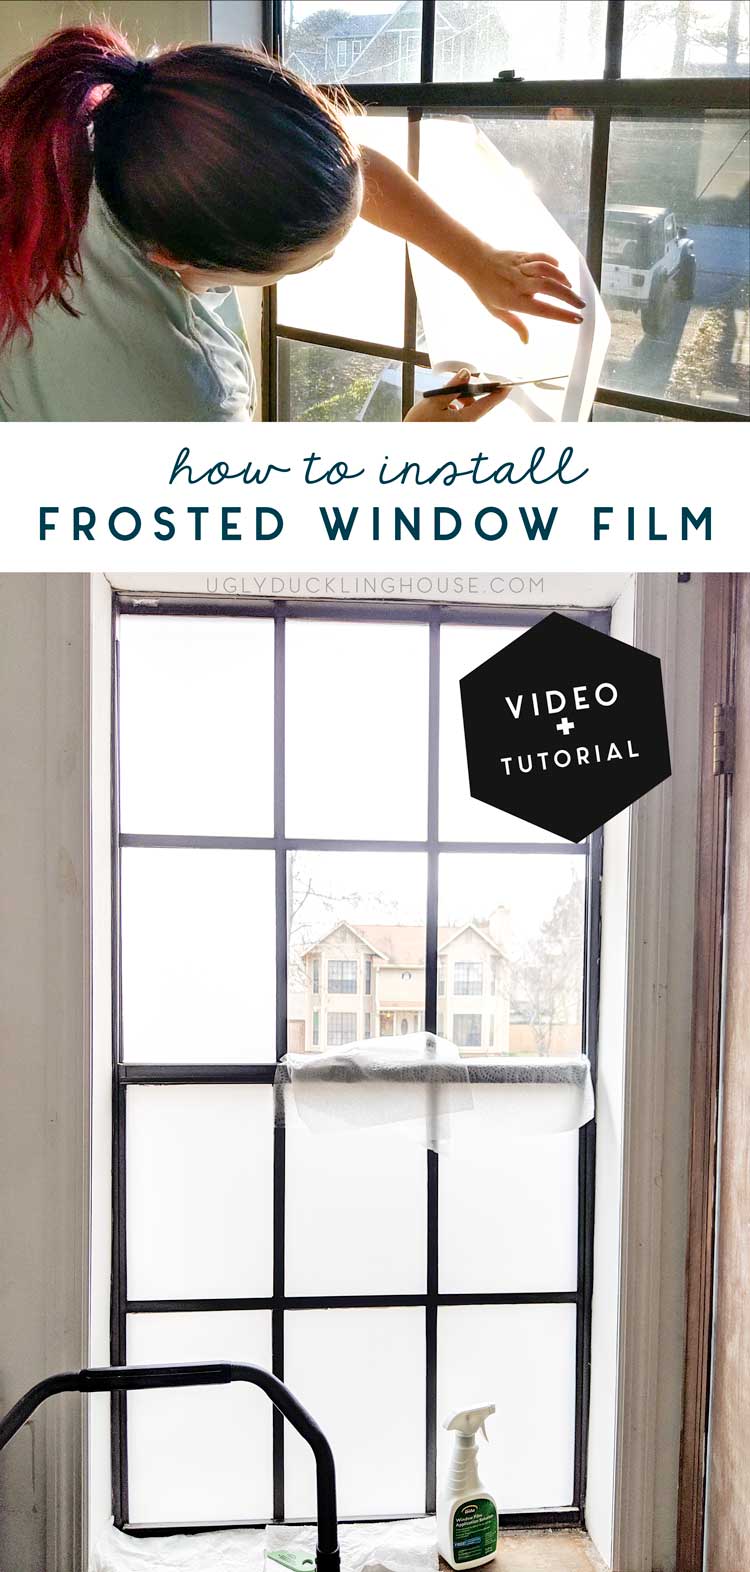
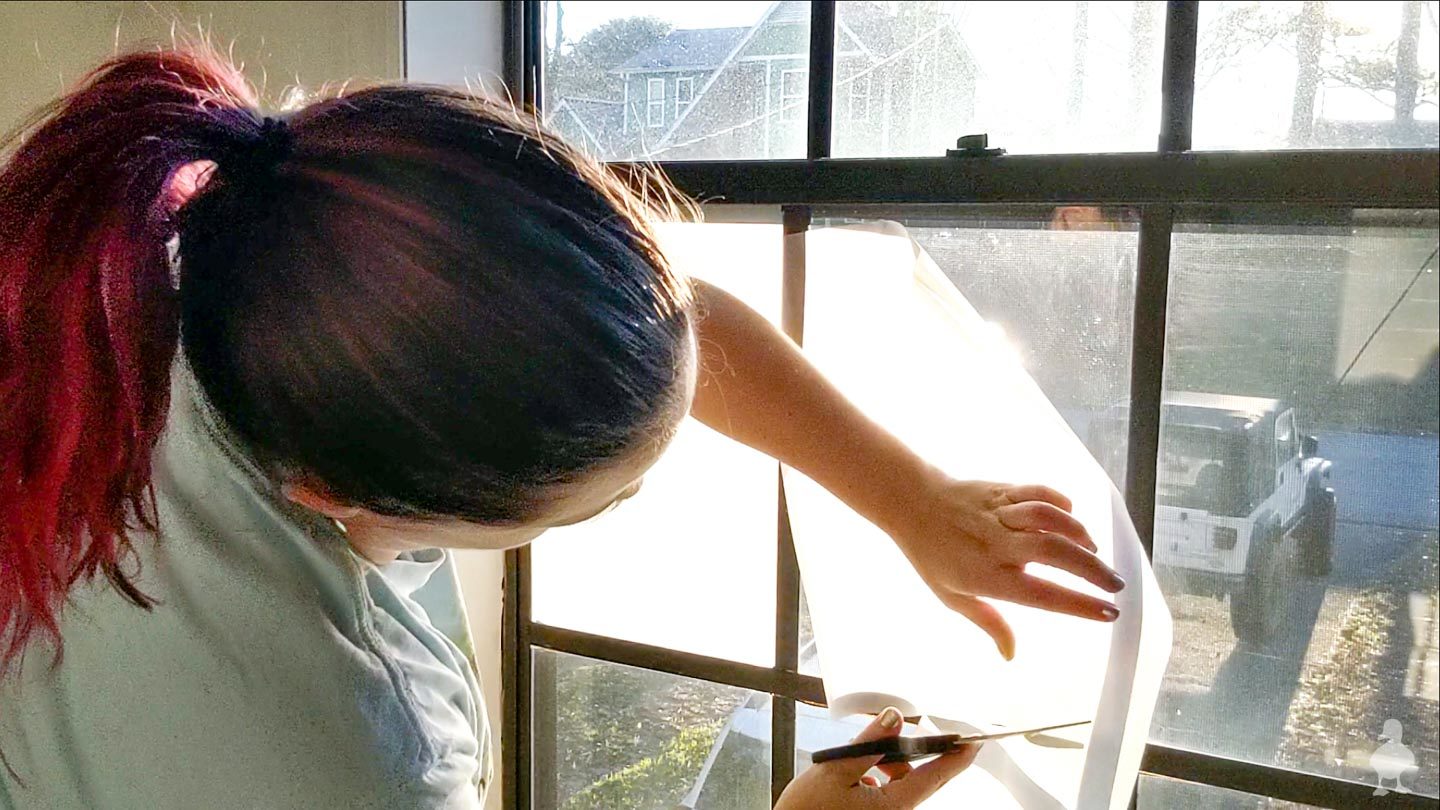
This install is super simple. If you’re covering as many windows as I did, though, it will probably take a couple of nights just because it can get really repetitive. Take your time and have patience until you get into a comfortable rhythm; since my windows had lots of individual divided panes, I had to basically repeat this task 40 times! And because of that, I was able to create both a detailed video tutorial and a written version for you below.
If you don’t catch the steps in full the first time you see them in the video, just keep watching. I got multiple applications for you to be able to see each part over and over.
Materials you’ll need:
- Window cleaner
- Frosted window film (large or small roll)
- Window film kit (contains lint cloth, solution, squeegee, cutting tool)
- Paper towels
- Utility knife

1. Roll out the window film and cut to approximate size
I cut each piece slightly larger than each window pane — a manageable size to account for adjustments, such as if it slid or went on crooked. I preferred to have the top as a straight edge and use that for establishing placement. I usually cut a bunch of pieces at once so I could apply entire sections in a row.
2. Thoroughly clean the window
It’s super important for the window to have zero
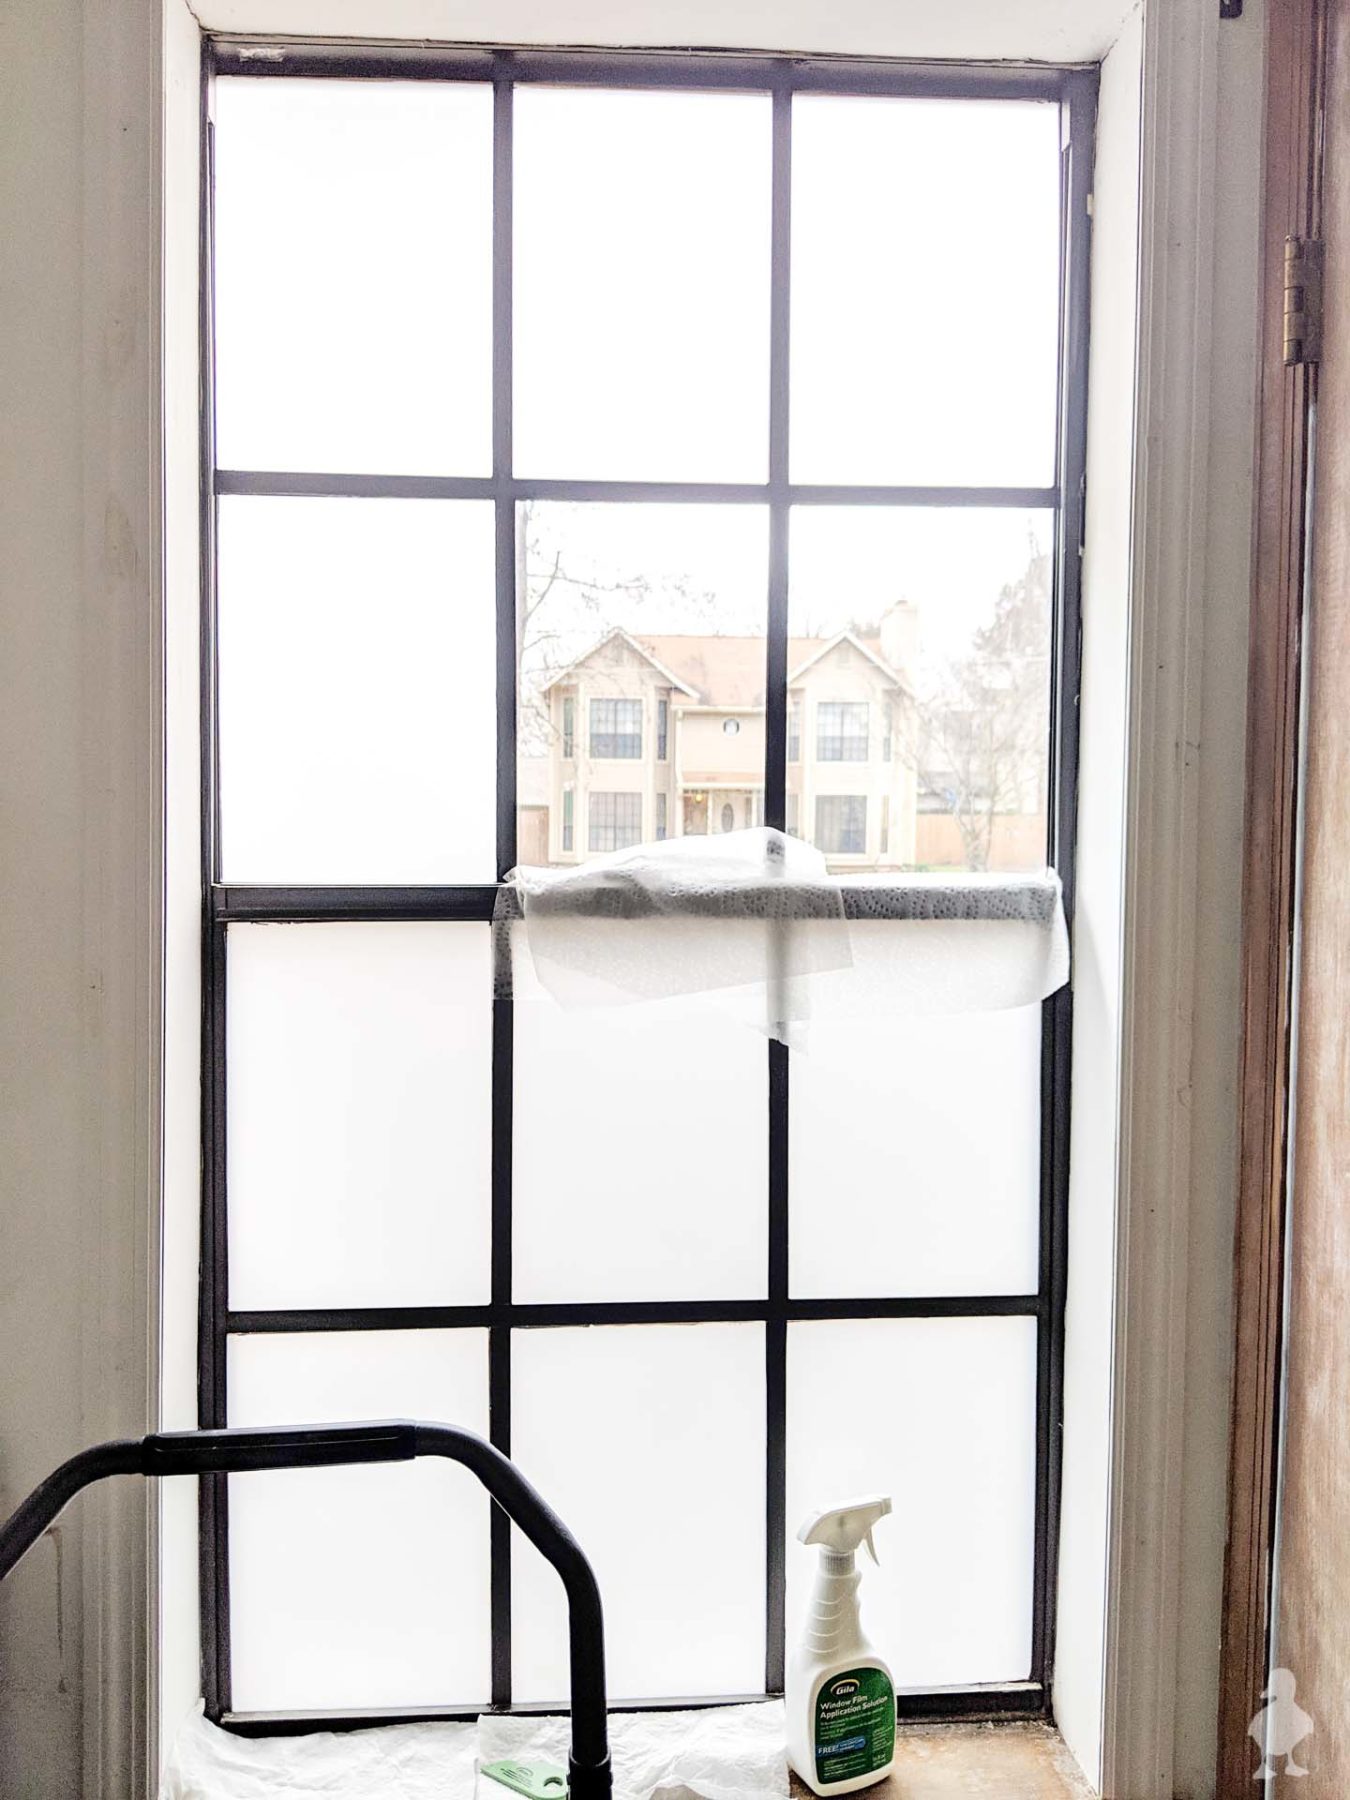
I also added paper towels to the window sill around this time to catch any of the excess solution in the next step (prepare for things to get soaked).
3. Spray window solution
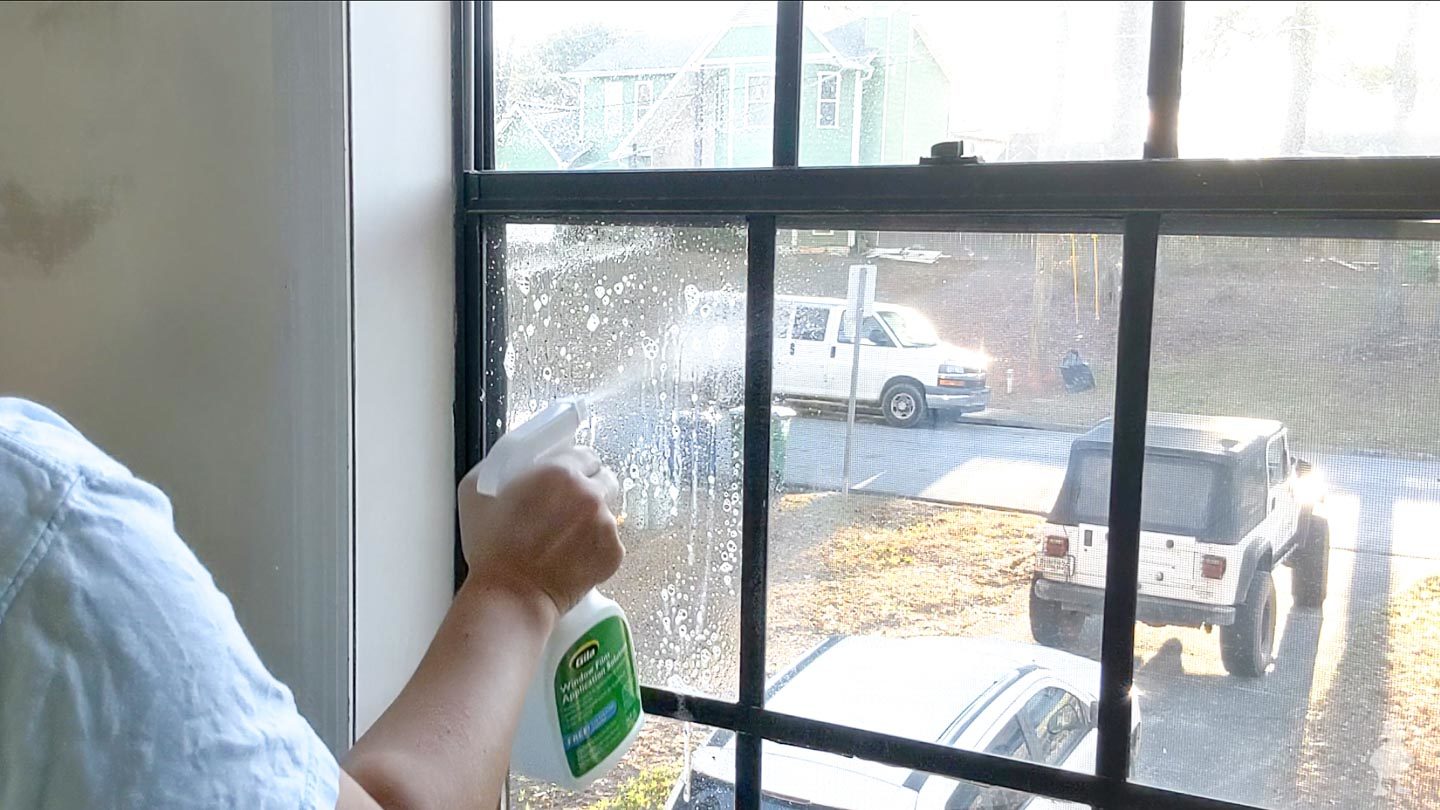
Spray a generous amount of solution onto the window. The solution will try to run off pretty quickly, but it’s good to keep the window nice and saturated.
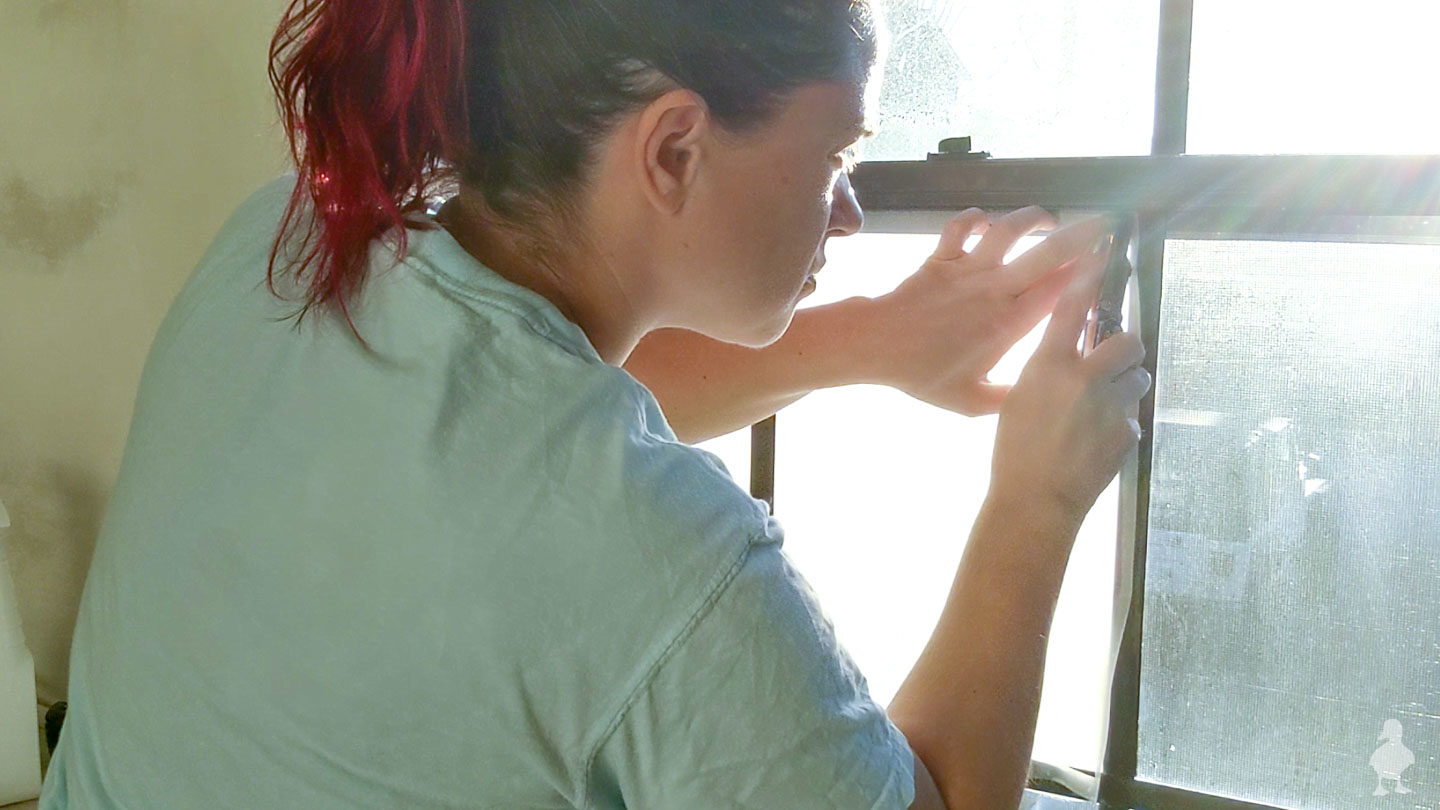
4. Separate the film from the backing & apply to the window
I found separating the backing from the film to be one of the more frustrating steps at first, but I eventually learned to rely on my utility knife. The blade slipped easily between the layers to get things started. After peeling away enough of a chunk to attach to the window, I applied the separated corner and pressed down on it and then used my other hand to rip the rest of the backing away and immediately apply to the window (leaving no time for any lint to get on the sticky film).
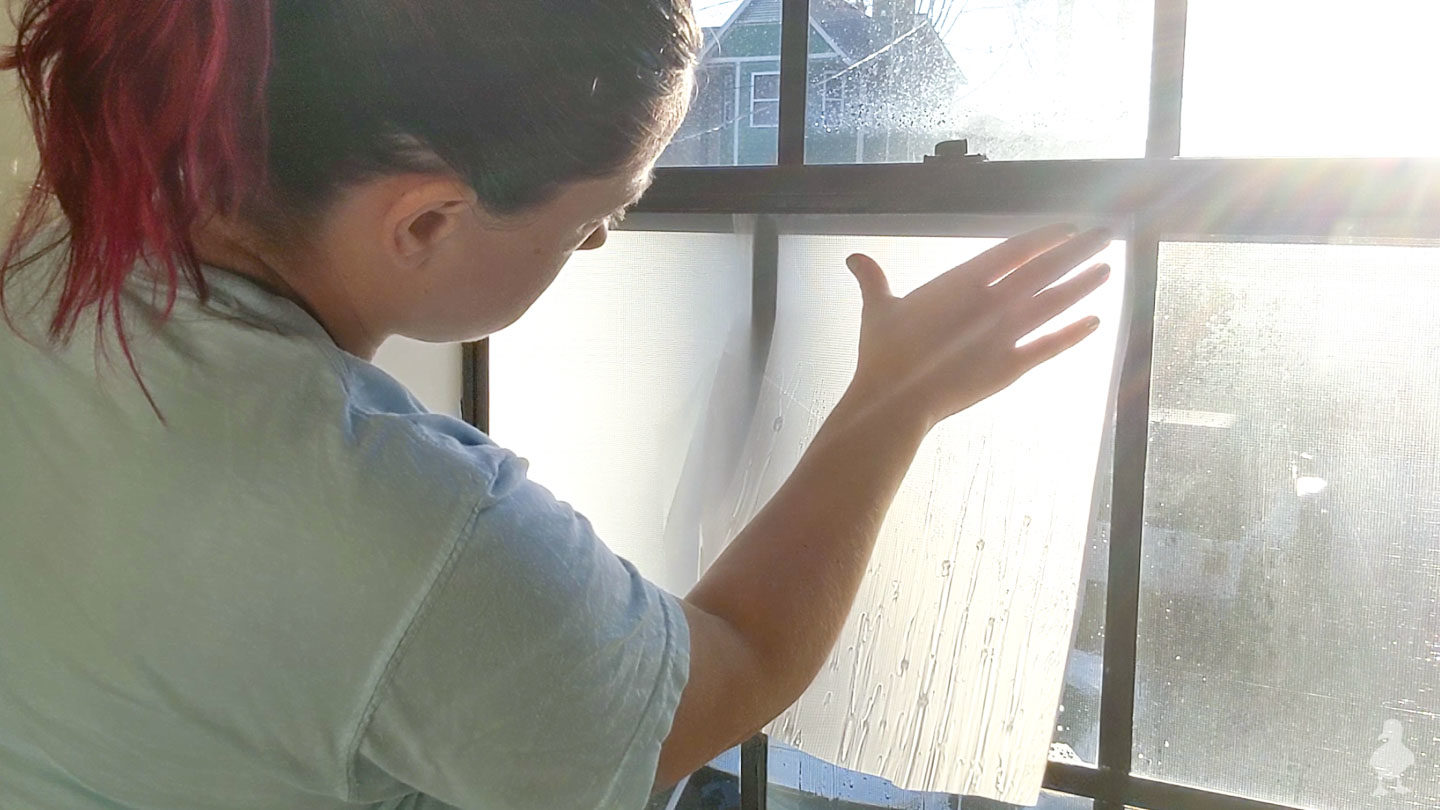
Sometimes, separating the backing was still tough enough that the solution on the window began to dry out a little. When this happened, I was ready with another re-spray.

Here’s why keeping the window wet is a good thing: I found that if I could get a nice, straight edge at the top, I could concentrate on getting the sides and bottom applied. Having the window nice and saturated with
5. Spray more solution & smooth
You’re definitely going to have bubbles, but spray a little more solution on top of the film and then use the smoothing tool (the yellow squeegee thing) to push all of the air bubbles out.
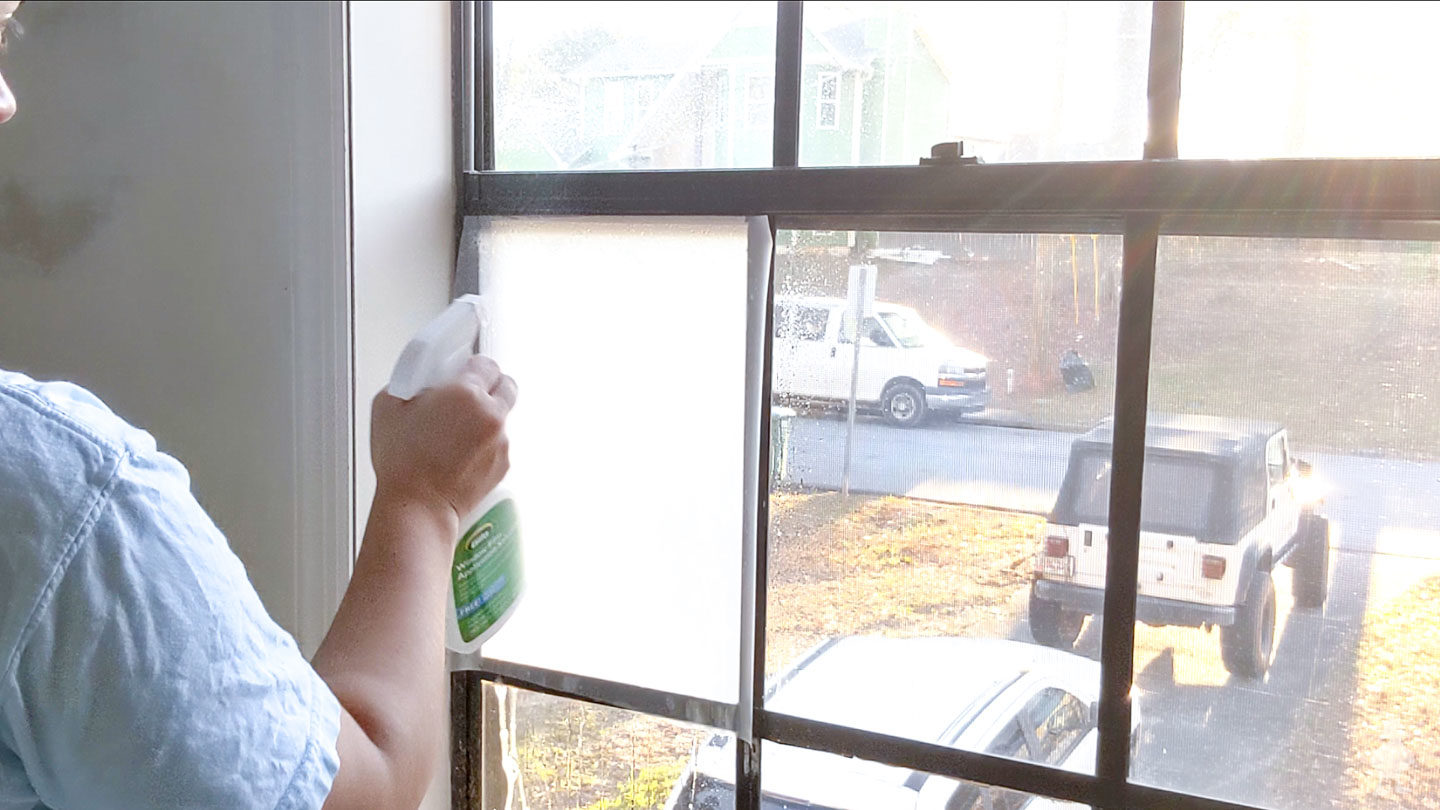
It’s going to seem like a lot of solution wasted, but the small bottle has excellent coverage. You can also buy just solution instead of replacing the entire kit if needed (it comes with a new lint cloth, too). I managed to use one bottle for almost all of the windows but ran out close to the end (I wound up needing 3 boxes of film but only 2 bottles of solution).
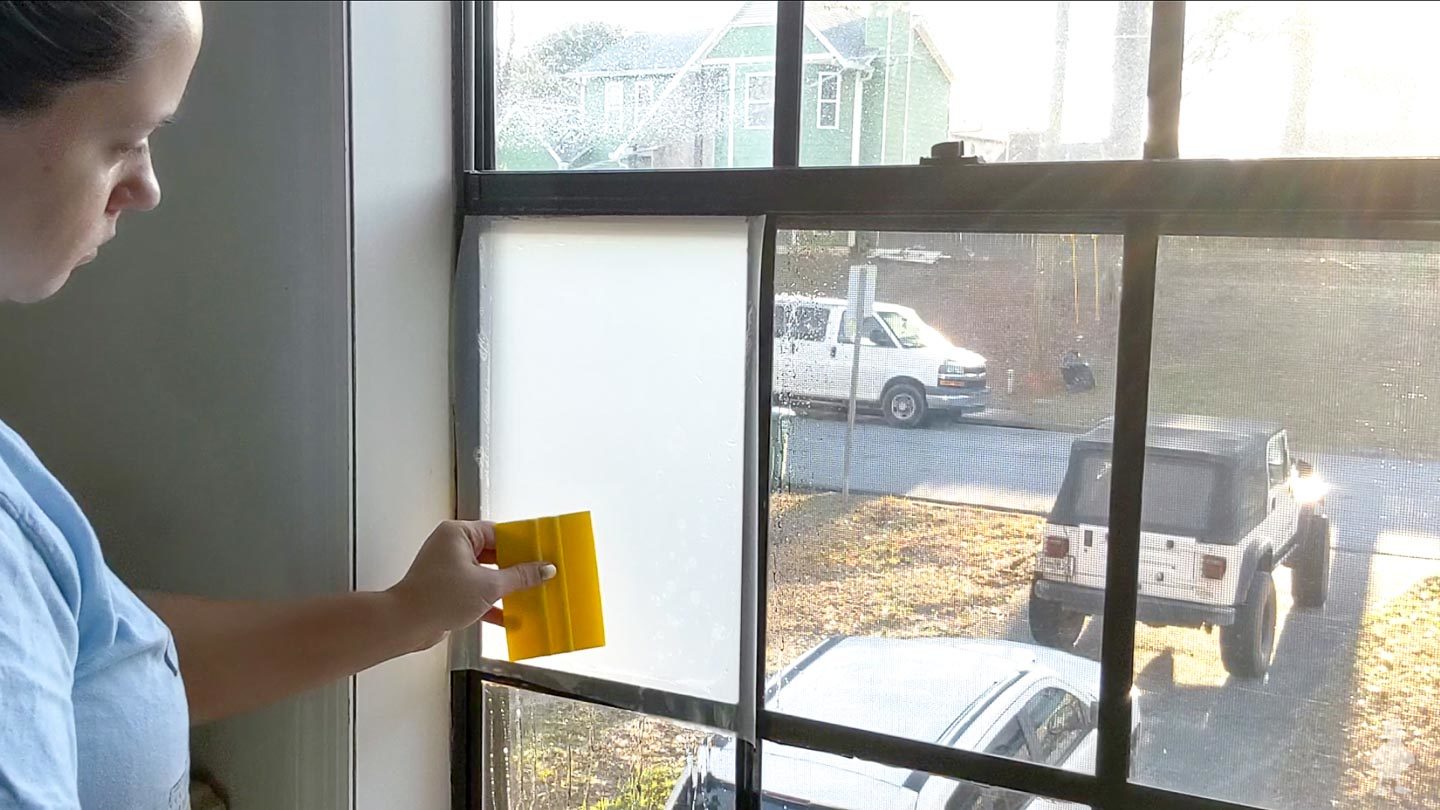
6. Cut away the excess
Using the cutting tool included in the kit and the smoothing tool as a straight edge, I cut away strips on all of the necessary sides. I found that using my own utility knife was better for the corners, though (and eventually, the blade in the kit got too gummed up so I defaulted to my utility knife only).
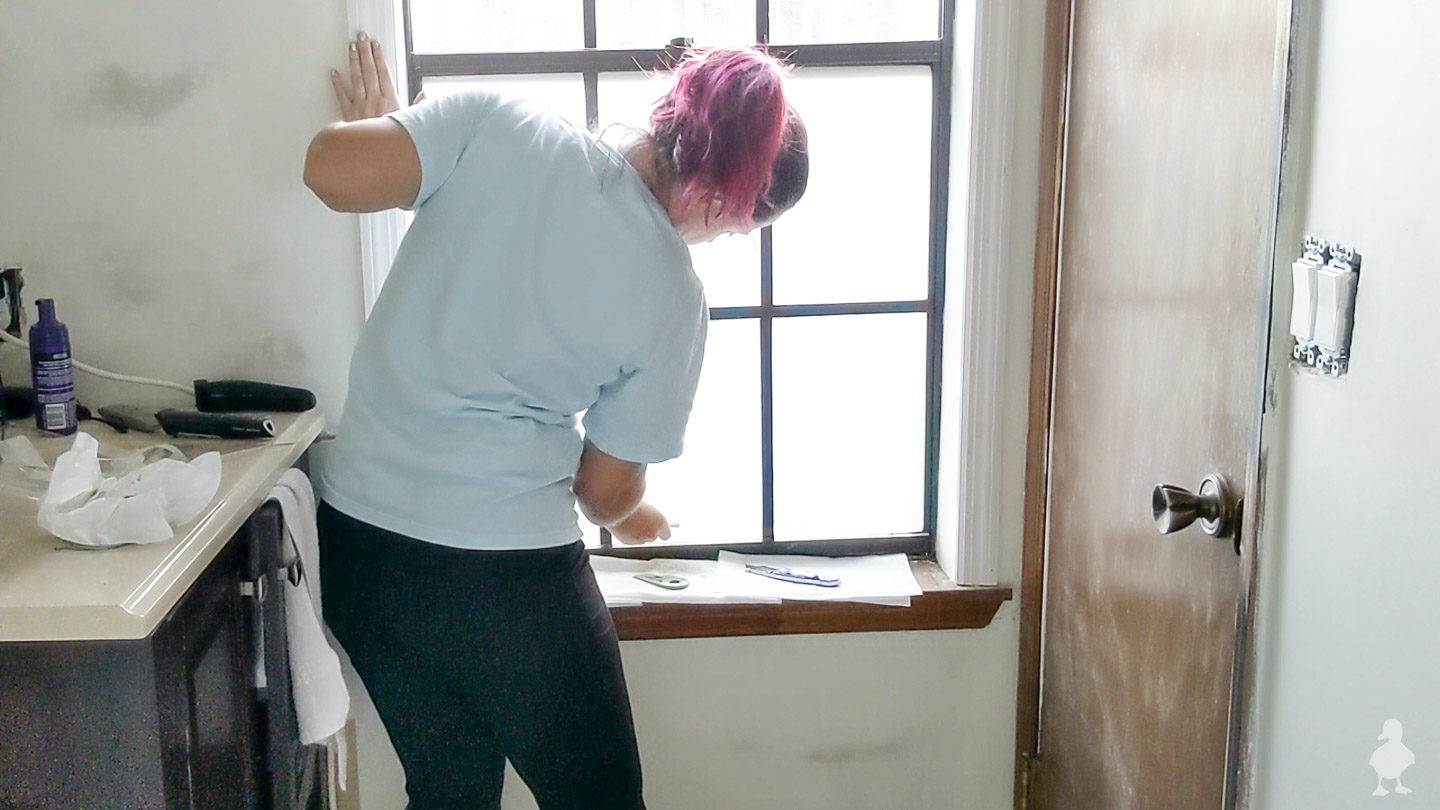
For the bathroom window, I applied everything on the bottom first and then tackled the top. The bottom half of the window sticks out from the top, so I was able to put more paper towels in that spot to catch the excess dripping off.
As you can see, it’s still nice and bright. In the video, I also share the light in the rest of the bathroom (it’s easiest to install on an overcast day or even at night so you’re not looking directly into sunlight).
Let’s talk about that other problem, too: how this install solved the “barking ridiculously loud in the morning” problem.
How Privacy Film Stopped Charlie from Barking Out of the Window
I get that this is a super obvious no-brainer after the fact. But prior to installing frosted film, especially in the hallway, Charlie would spend the whole day doing this:
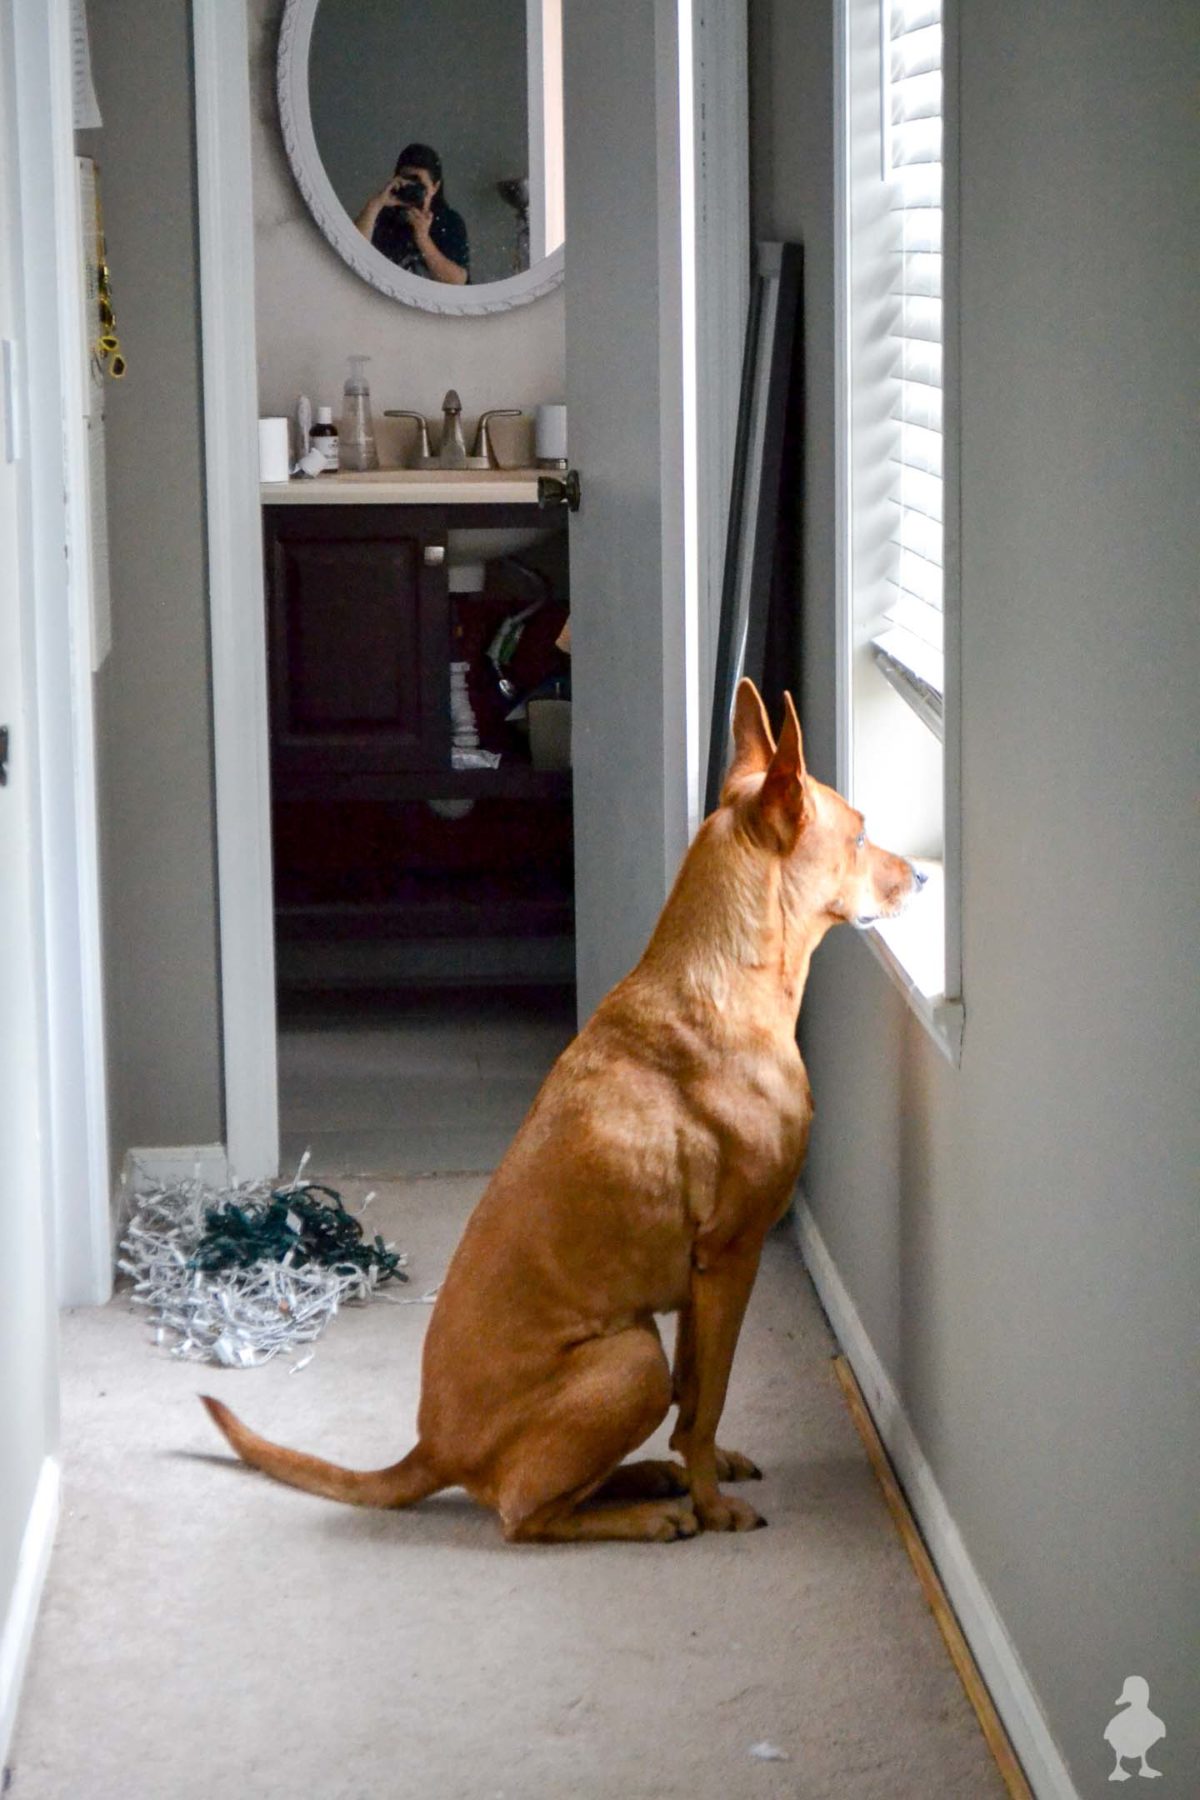
Of course, there’s absolutely nothing wrong with letting her do that, aside from having to wipe her nose prints off the glass. But sometimes, she also barks at neighbors if they are outside on their front lawns or walking past the house (especially if a neighbor is walking their dog). And now that Stella lives in the house, she has a tendency to instigate Stella’s barking… which then sometimes sets off Charlie again… and on and on it goes until I get them to quiet down.
Given that I work from home, this scenario is not exactly ideal as a work environment. And unfortunately, my dog is just as stubborn as I am. It’s not as bad when she’s downstairs and doing it, but she prefers to look out one of the bedroom windows if I’m upstairs. So, after years of trying and failing to curtail the behavior, I did what any reasonable adult would do: I gave up.
When I installed the privacy film, I was 99% sure I’d go from wiping nose prints off the glass to wiping nose prints off the film (at least until she was sure she couldn’t look out the window as easily). Or worse, not being able to wipe the window as clean with the film on it. It’s one of the reasons why the box of film was sitting in the corner of my bedroom collecting dust for MONTHS after I’d bought it!
(That turned out to be more of a mistake because somehow the box and the film inside was damaged during that time, or so I think… I had to cut around creases and stuff. I double checked the other boxes I bought after that to finish the rest of the windows and didn’t run into the same problem, so I still recommend opening the box and checking the roll before using.)
As it turns out, I won’t have to worry about nose prints like I thought! Charlie immediately adapted and began ignoring the windows altogether. She still goes downstairs, but that’s far easier to deal with. WIN.
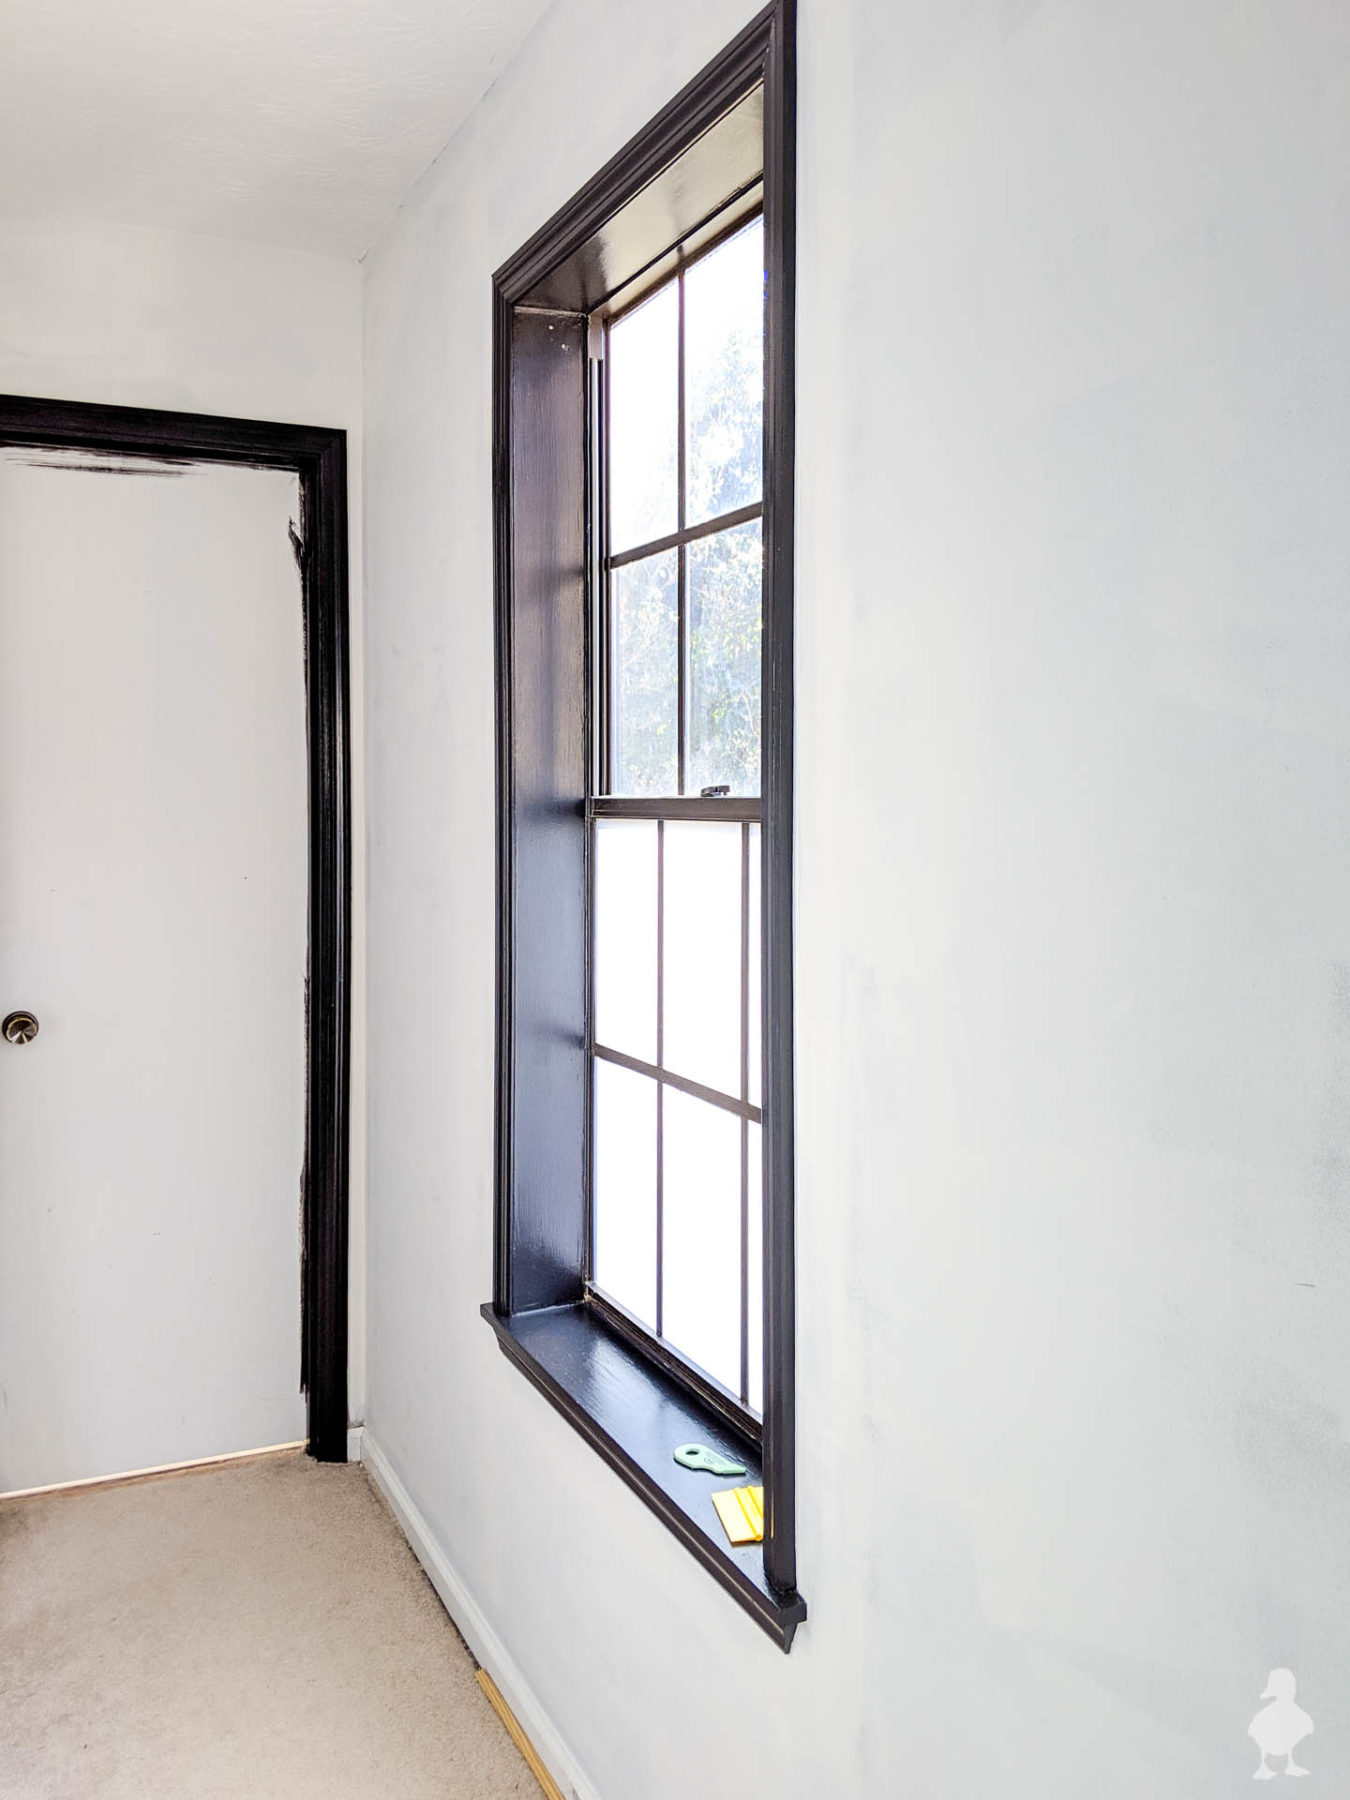
There is still more window treatment to be done in the bedroom, such as adding new shades to the top half of the windows and some dark curtains in the bay window. As for the bathroom, I’m planning on a different shade install too, but still not sure what that will be yet. The film has been installed for a few weeks now, and it has already totally changed my comfort level when walking in front of the windows (K even went outside and confirmed for me that everything is comfortably obscured). I’ll keep ya posted on the other updates, and more primary bedroom makeover coming up next!


Window film was a great solution for our laundry room. Easy to keep clean. Our dog also destroyed blinds in our living room trying to bark at people. We had to just keep them raised!
I had to laugh because I got the same remarks when I started using window film and not traditional curtains. But I love it! I have two dogs and a kitten- as an added bonus, I never have to de-fur fussy fabric curtains or blind panels and the house has more of a modern, open look. Great post ☺️
Great post! After living in a city house (grabbing sunlight wherever possible), I’ve been ‘frosting’ the bottom half of windows for a while now. For temporary fixes, I’d use those light filtering paper shades, but the frosted film just looks so great. Actually adds value to a home.
Never occurred to me that this’d have an effect on curious dogs — genius!!! I’ll try to share your post as much as possible. Hoping this can spread to 1000s of dog owners, trainers, walkers, etc. Life changing (for the neighbors, too)!
It looks great. Thanks for sharing. The film and window cleaner link didn’t work for me?
I’ll have to update those then! Sometimes links go dead after posting if the product gets sold out. I’ll try again and thanks for letting me know!
Does the view from outside looking in the windows look the same as these interior photos you have posted?
Pretty much, the view from the outside doesn’t look conspicuous at all, just like the back of a set of curtains, pretty much. I will try to update the exterior view this summer when we’ve had a chance to clean up the yard. ;)
I love the look! When you first mentioned doing this and why, it made perfect sense to me. I’ve considered using it on the back door, but then I wouldn’t know who was knocking ?!
As a side note, a friend’s parents did the mirror on their ceiling to floor bank of windows facing west to the water. You couldn’t see through at night with inside lights on. This was decades ago. Wonder if they still make it like that? Would solve the back door problem!
So far I haven’t found a fool-proof option available. But if I find it I’ll probably try it out (since it should be pretty easy to un-install the frosted kind).
I did this to my bath room window years agoe because the window faces the deck. It has been a durable long term solution.
That’s great to hear! Thank you!
We did the same thing! Our 3 dogs ripped the window treatment on the door to our patio. We put up a patterned window film that lets light in but still provides privacy. It’s beautiful and the dogs leave it alone.
Hooray for inexpensive fixes!
Even though I like the idea. As I live in a house that has a lot of southern exposure. After needing to replace those windows do to the fact a previous owner used some. Type of film. The film eventually gluded it’s self to the window that it was impossible to remove the film and it produced a Haze on the glass that I could never get removed or clean to the point the window had to be replaced. So even though I like the idea of window film after seeing what happened in the long run I will never add it to any of mine. I just recommend if you do this to ever so often either remove and clean the windows or replace the film so it doesn’t get permently glue to the window. Only my experience.
Was it definitely glass? I’ve heard of haze happening to glass replacement materials like acrylic (it’s actually what happened to our camper, but there are special cleaners that can work if it’s still surface haze such as if it happens to car headlights). Haze also happens with sun exposure in general depending on the material. I’ve never heard of window film impacting glass like this, but thanks for letting me know!