
Disclosure: this post may contain affiliate links, which means I may make a commission if you decide to make a purchase through one of my links, at no cost to you.
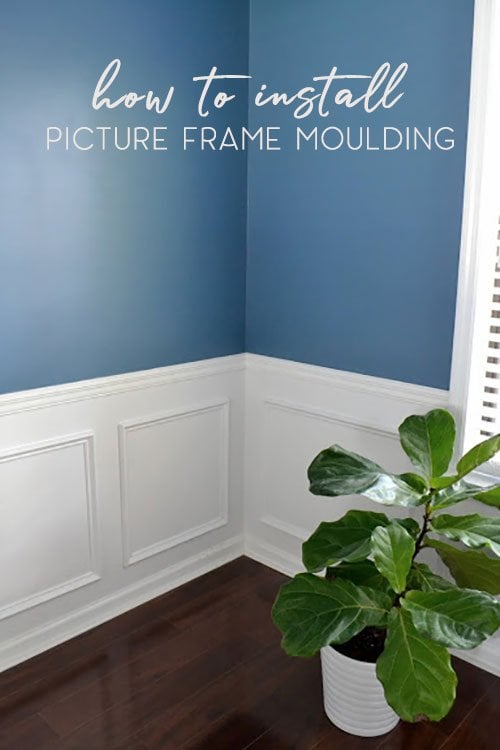
How to easily install custom picture frame moulding (or “molding” as we sometimes spell it in the US): with a chair rail separation, getting the spacing right, and how to deal with older walls that aren’t perfectly straight.
I was very, very tempted to call this post Even More Caulk Jokes. Especially since as I type this, my fingers are sticky and it’s driving me crazy. But I’m simply way too excited to show you this first:

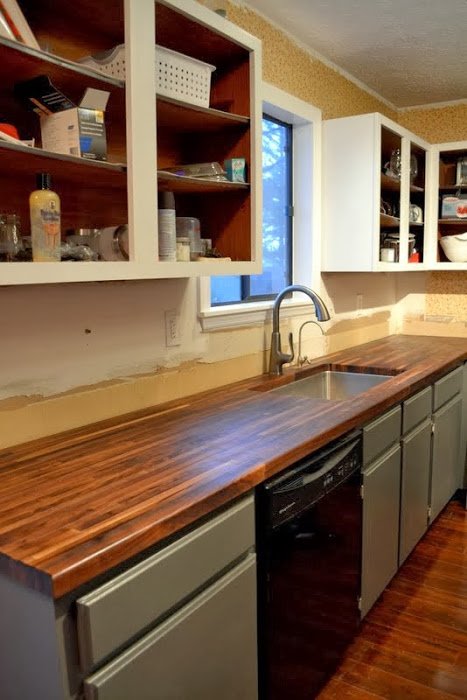
Helloooo there. Thanks to my uncle (and his brother Timmy), we got a lot done in the last 24 hours. Not only did they organize my garage (more on that later), finish off my workbench for me (more on that later), and trick out my kitchen window with new molding (you guessed it… later!), but we spent the majority of the day in the dining room realizing my picture frame molding plans. It’s like my dining room finally had it’s cliche 90s teen movie moment where it ripped off its glasses, pulled out the ponytail, and put on a slinky dress. It’s all grown up.
Materials & Tools
- pencil
- miter saw
- measuring tape
- safety gear (glasses, hearing protection)
- caulk
- caulk gun
- primer
- trim paint
- air compressor + nail gun or a nail gun like this
- 18 gauge nails
- level
- laser level (optional but very helpful)

How to install picture frame moulding on the wall:
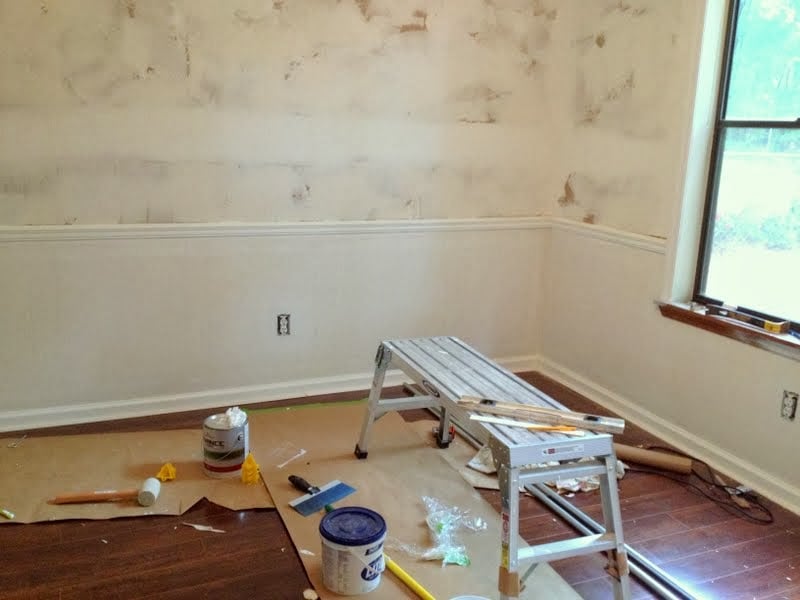
The night before, the room looked like this:

Hack #1: prime before installation
First task: I used the same primer that I’d been using on the kitchen cabinets (and brush and roller, since they were still wet & wrapped) to cover the lower half of the dining room walls. The chair rail was original to the house, but I knew it could look a little better with the moulding I’d picked up during last night’s late trip to Home Depot (if you recall yesterday’s foreshadowing photo, you may have seen some of that already). Even the primer alone brightened up the room, but we had much more to go.

Hack #2: Measure and mark to visualize (before cutting anything!)
Next, while the guys were outside prepping for a long day of saw-whirring, I was in the dining room marking & measuring boxes to determine where everything would go along the bottom of the wall. Truth be told, I wanted to get this done last night instead of this morning, but after class and two trips to the stores to shop & pre-purchase the molding (it was too big to fit in my car in full 16′ lengths, so I arranged to have them picked up by Dad this morning), I was simply too tired.
However, by taking the time to mark the entire length of the wall where each box would go, I could better visualize how it would all look together and make adjustments. Making it look “right” isn’t always easy, since boxes being all the same size may look good on paper but may not on a wall that doesn’t allow for even spacing (for example, the wall with the window needed a larger box on each end and short ones under the low sill and trim). This is also helpful so you don’t buy too much or too little of your supplies (odd-shaped cuts may require more material than you planned for).

It may have been for the best — the walls (of course) weren’t plumb and the chair rail wasn’t level, so measuring by distance from the chair rail or top of the baseboard to get the dimensions of the box didn’t work out quite as easily as anticipated. Eventually, I got the hang of it and marked off where I wanted the boxes to all go (each line marked the outside of the box so I could visualize spacing).

Hack #3: Use a spacer for uneven/unlevel areas
Part of the measuring required making sure that everything was as close to the same width as possible from the chair rail so that visually, things would look even. I marked a 4″ mark on a paint stick to make things a little easier as I moved along (I didn’t have a straight ruler, so a tape measure would be a little more clumsy to use each time). A scrap piece of wood cut to the exact width also works well! Then, I re-aligned the marks with a straight line along a metal level. For distances on both of the longer walls, I also used a laser level to check my accuracy (the painter’s tape along the back was just because the battery door wouldn’t close, ha!).

Once all of the fun math was done, it was time to start re-measuring each piece for cutting. Then, my uncle and his brother went out to my finished work bench (!!) to do some cutting.

Hack #4: create boxes before they go on the wall
Instead of tacking each piece in place one by one, they decided to go the box route of pre-building each box to be nice and flat, and then tacking it to the wall with brad nails. Genius!

We knew that on some of the uneven areas, there might be a gap between the wall and the tacked-on molding; any of these parts would eventually be caulked and cleaned up, so it seemed like a better idea to make sure that the corners matched up more flat and even instead of having to adjust them with shims when one piece refused to lay as flat as another. It doesn’t really make that much sense until you’re trying to lay (what seems like) two flat pieces of moulding to (what seems like) one flat wall, and then one piece has a lip — a lip that seems to protrude more each time you stare at it. I’d rather just have a flat box and then pull out my BFF (the caulk gun) and cover up any flaws.

Hack #5: Use caulk to help adhere the boxes to the wall
So, that’s where we wound up each time. To help hold the rectangles to the wall as we nailed, we added what I assumed would be Liquid Nails to the back — or so I thought! Instead, my uncle used caulk. At first, I thought this was odd, right up until I had to swipe away some of it that had squeezed out and could be seen on the wall. Caulk is what I was going to use on the seams anyway, and worked like a charm.

Then, we checked for level…

And then tacked them into place with a brad nailer (which conveniently needed a hose replacement right before the project began… isn’t that how it always goes?)…

And then I ran back over all of the seams with more caulk lines. I know, I know – caulk shrinks (I use the kind that say it doesn’t shrink, but I’ve heard it still does), and I should use putty for the nail holes… but when I have the choice between the two, I’m a caulk girl. Me likey the caulk, I guess is what I’m saying. (So. Many. Jokes.)

Before
So, that’s how we go from this:
After
To this:

In one day! But my superhero duo aren’t done yet. We’ve got more work yet to do & more pictures to share. I’m going to write up a separate post about the moulding near the dining room window (we ran into a couple of challenges with outlets and such, so I’ll tell you how we worked around them). And as I’ve just found out on Monday, more classes to attend (my mini-mester starts this week and not next week like the school schedule first posted – yikes!). Stay tuned!


Love it!!!. Can’t wait to see it with paint and furniture. It is going to be so beautiful. Good job and your superhero duo is amazing.
Beautiful! Do you have any texture on your walls? I’m debating this for my dining room but I’m worried that teeny tiny little bit of texture is going to make it look strange. I can’t wait to see your finished product. Keep up the great work!
I don’t know if you really wrote that post in a fast way, but I read it really fast and all hyper-y like I’m there working along side you, trying to pack in as many projects as possible! Can’t wait to see all the progress and good luck!
HAHA Kayla – I read it the exact same way, like I was hurrying along. It looks amazing though, and I love the idea of making the boxes and then installing. We’ve got a bunch of work ahead of us to make my built-in “library” shelving a reality, I think there will be cases of caulk in my future.
WOWZA! That looks amazing! Can’t wait to see the rest of the posts!
That looks awesome!
Oh, oh, oh…lovin’ your uncle and his brother. If I lived down the street I would be bringing them a big ol’ plate of my Gourmet Chocolate Chip Cookies! (I would have brought you a plate during your priming stints :) ) I am so excited for you! We did the same thing in our dining room. It is really such an easy DYI. (Interesting how they boxed it out first.) As long as you have smooth(ish) walls you just go right over it with moulding and paint. Done! And I am always the one that has to caulk. My husband tells me I’m better with the caulk–ugh! Did I not say a boy in the body of a man? Sorry to hear about the classes creeping up on you–not cool. You’ll be crazy superwoman and rock it–no worries :)
Amazing how a little bit of trim and caulk can change the entire feel of a room. Looks fantastic!
Wow! That looks great! I would have never guessed you did it yourself!! I’m new to your blog, and I’m absolutely loving it! :)
Glad to have ya around :)
Looks great! Well done!! You have been busy! xx
So you’re in my head with this as I’m literally planning to do the same thing in our dining room… hopefully 1/2 as well as this. Looks beautiful!! Question: did you construction elves just use little brad nails to make the initial squares of trim? I love the idea of making the squares first… good call!
xx
Charlotte
What a huge difference. I’m really amazed. Not to be insulting, but on its own, the chair rail looked a little wimpy and low. Now it looks intentional.
Sarah, this makes such a huge difference! And you can sure write a tutorial! Thanks for the great info!oxo
I really like the way it adds to the look of the room and that was a good idea to box first. I’m sure it made it a lot easier instead of trying to line up the joints. I may have to try that in our dining room.
Thank you for sharing.
The molding looks amazing! We were going to do something like this in our nursery, but decided against it for “lack of time” purposes. The look is soooooo elegant in a dining room though!
Caulk jokes are so hard to resist. I had a gay tenant who installed crown moulding (without asking) in an apartment I own. If he had done a good job (or asked first) it would have been great, but he didn’t know how to handle his caulk, well truth be told he just couldn’t stop using caulk, he used so much caulk that every crack was filled to overflowing with it … I was videotaping for a possible small claims lawsuit at the time (he did about $7500 of damage – the kitchen was a total loss) and we had to pause the video so we could get out all the terrible jokes and stop cracking up…
And if you have never seen it … this is one of my favorite home improvement sketches:
http://www.youtube.com/watch?v=tiPkYt09awo
love me some shadow boxes I have them in my DR too. really dresses up a formal(ish) space. well done. ~jb
Um… wouldn’t your Uncle’s brother ALSO be your Uncle?
He’s my uncle through marriage to a blood relative, which means members of his family aren’t related to me – just him.
My bad. I’m obviously dumb as shit and don’t think before I post stupid questions on the internet. =)
They’re both hunks, btw.
Ha, it’s ok! And I’ll let them know you think so. =)
Looks awesome!!! How much do you think this project cost you all together?
Dude, this is beautiful! And there should always be more caulk jokes. Well done, on all counts.
I was just thinking about doing this down in my basement with a chair rail. These pictures make it look so easy. Time to get my DIY on. Thanks!
Thinking of doing this soon! Love it! What is the height of the chair rail and distance between each picture molding “box”?
More details were included in this follow up post. Hope that helps!