Disclosure: this post may contain affiliate links, which means I may make a commission if you decide to make a purchase through one of my links, at no cost to you.
Hey all, it’s Tylynn dropping in from Terrace Place. It’s been a little while since I shared a new project here at Ugly Duckling House! I’ve been cranking out some major room makeovers at our house lately and got a little behind on blog posts … you know how it goes. But I’m happy to say that I finally have some new plans for you!
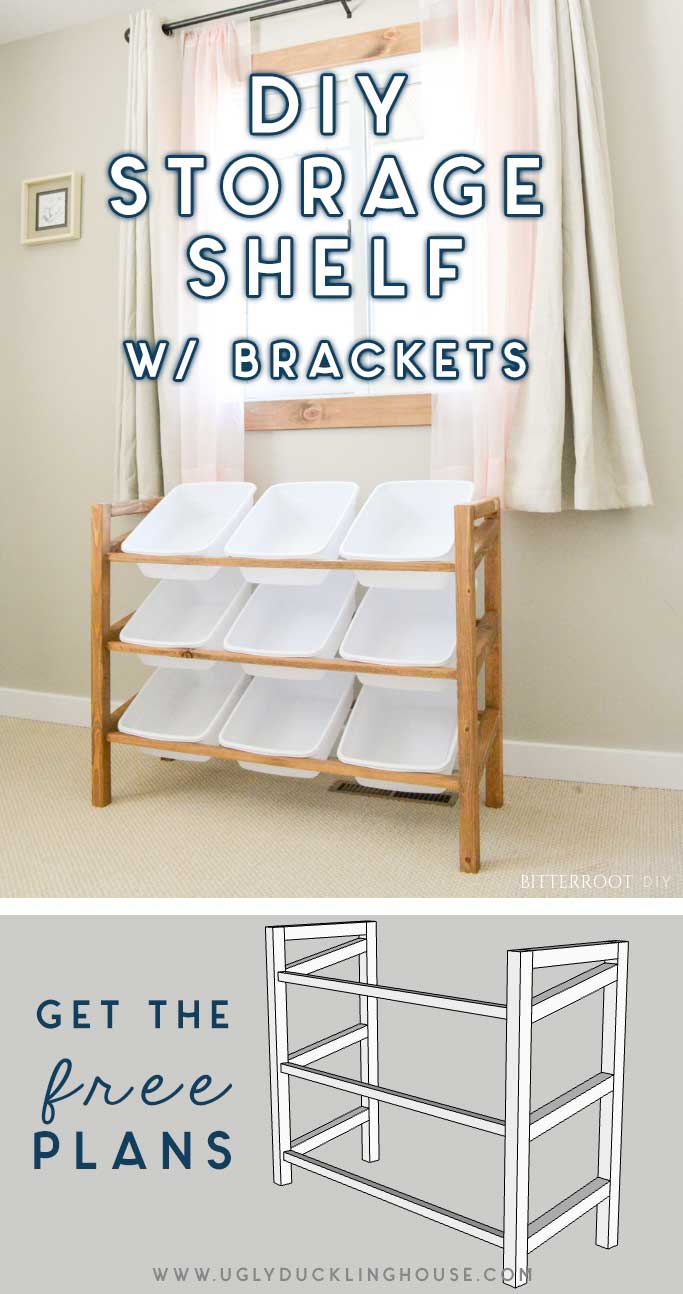
I recently finished renovating my son’s room and, as part of the renovation, built him a fresh new set of furniture.
Why am I telling you this?
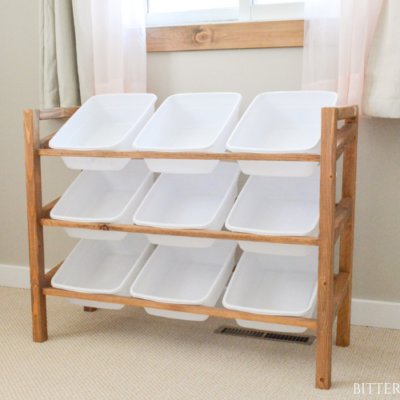
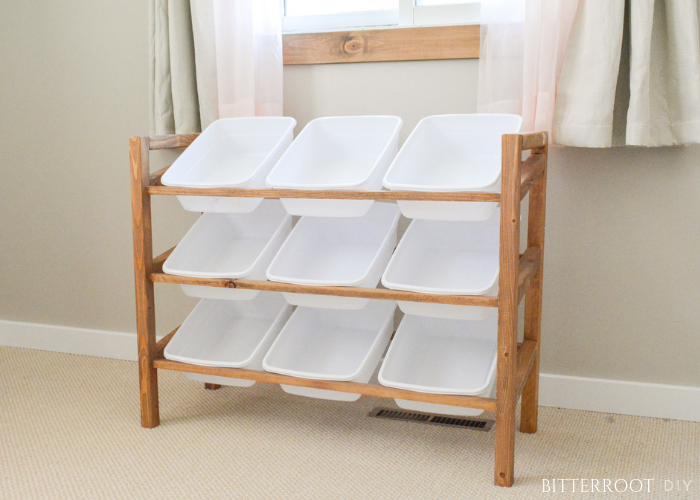
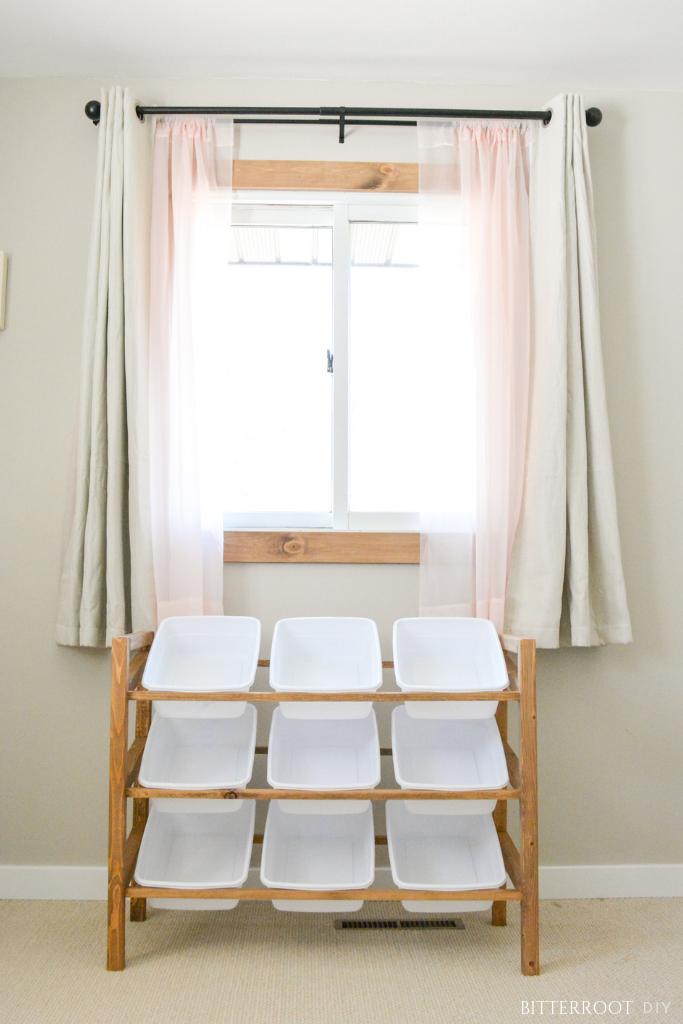
Well, this lovely DIY storage unit was originally supposed to be a toy organizer for him. However, it was wayyy too big for his room. Not that this shelf is that big, but the room is only 10′ x 12′. So a 3′ shelf took up some major real estate. I ended up building a smaller version for him, but this original shelf is a great storage solution if you have a little more space! We moved it to the basement to store all sorts of random goodness — you know, basement things — but it would be perfect for kids toys (as originally planned), baby blankets, books, colored pencils, etc. It can go just about anywhere that needs extra storage, such as a guest bathroom for towels and makeup brushes, in the craft room, and lots more possibilities!
Enjoy the free plans!
TOOLS & SUPPLIES:
- Miter Saw
- Orbital Sander
- Drill
- Kreg Pocket Hole Jig
- 1 1/4″ Pocket Hole Screws
- 2 1/2″ Pocket Hole Screws
- Wood Glue
- Tape Measure
- Pencil
- Safety Glasses
- Ear Protection

Lumber:
- 3 | 2 x 2 @ 8′
- 3 | 1 x 1 @ 8′ (I cut these out of 1 x 4 scrap)
Cuts:
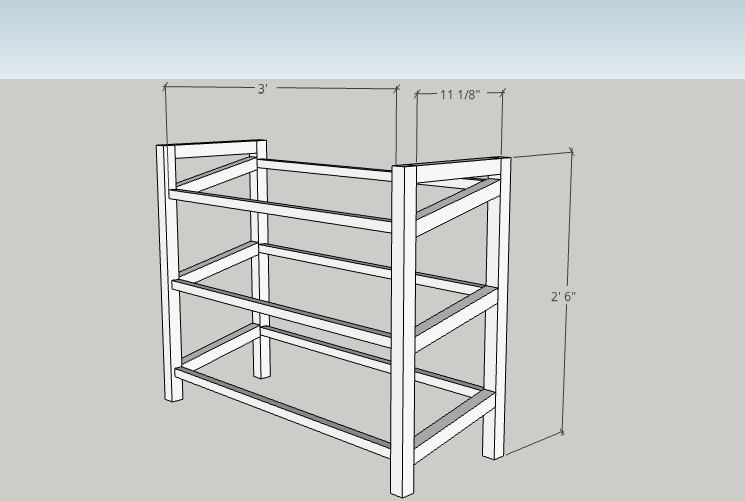
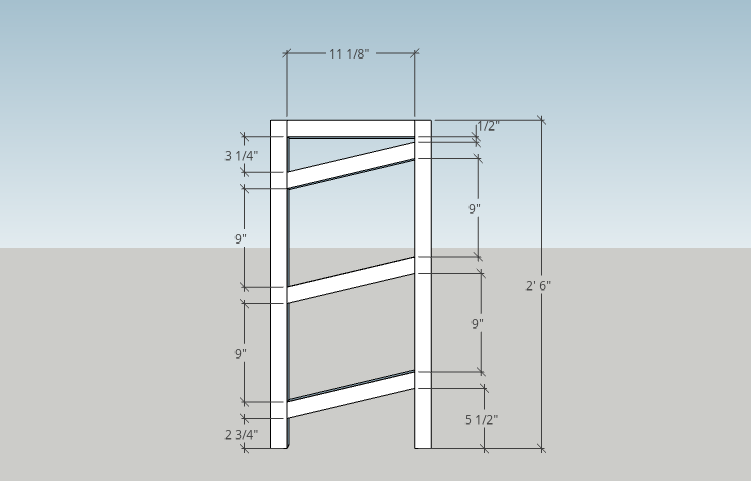
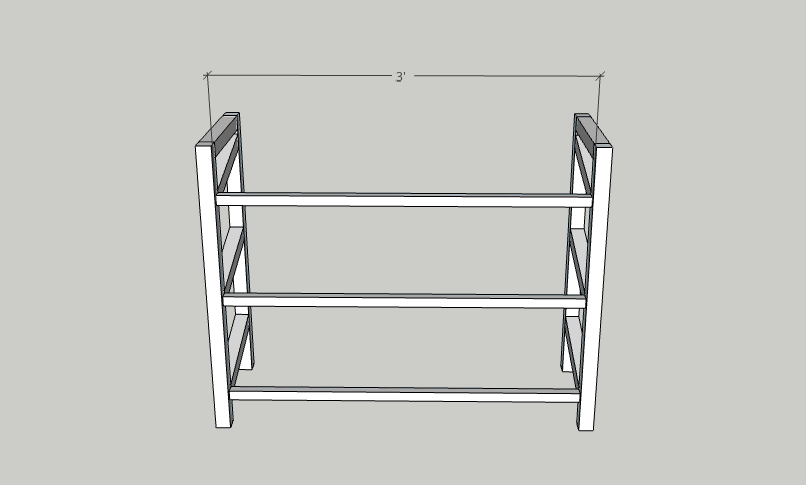
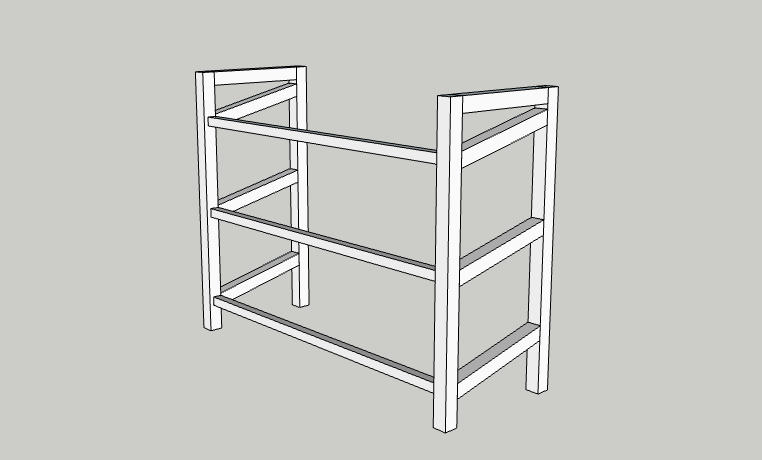
- 4 | 2 x 2 @ 2’6″ (legs)
- 2 | 2 x 2 @ 11 1/8″ (top end rungs)
- 6 | 2 x 2 @ 1′ with 10 degree parallel miter (end rungs)
- 6 | 1 x 1 @ 3′ (shelf rungs)
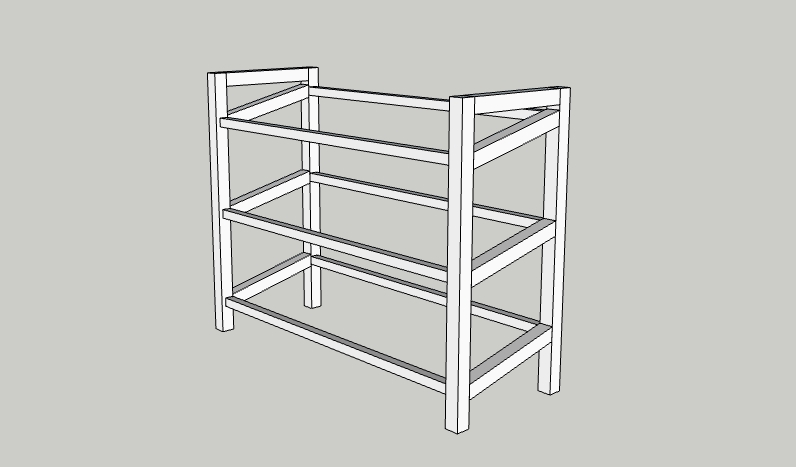
Step 1.
Assemble two sides as shown in the diagram below. Attach the top rung first with wood glue and 2 1/2″ pocket hole screws. Mark and attach the rest of the rungs as you work your way down. Place pocket holes on the bottom of the rungs to best hide them.
Build two ends.
Step 2.
Connect both ends of the shelf with the first three shelf rungs. Use wood glue and 1 1/4″ pocket hole screws. Again, place pocket holes on the bottom of the rungs to best hide them.
Clamps are your best friend for this part. However, if you don’t have clamps that span 3′ (I don’t), pull out the handy-dandy wall, hand, and foot clamps! I attached the rungs on one end and then pushed that end against a wall while I held the other end in place to attach it. Use whatever works for you!
Step 3.
Attach the next three shelf rungs with wood glue and 1 1/4″ pocket hole screws on the bottom of the rungs.
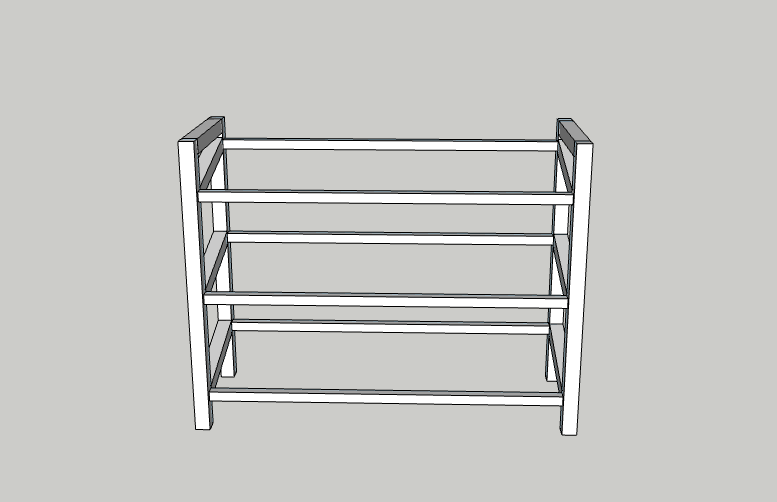
Line the shelf rungs up in the center of each of the angled end rungs for a nice, square shelf.
Sand and finish the shelf as desired. I used a custom mix of Varathane Provincial and Sun-bleached and then sealed it with semi-gloss spray on polyurethane.
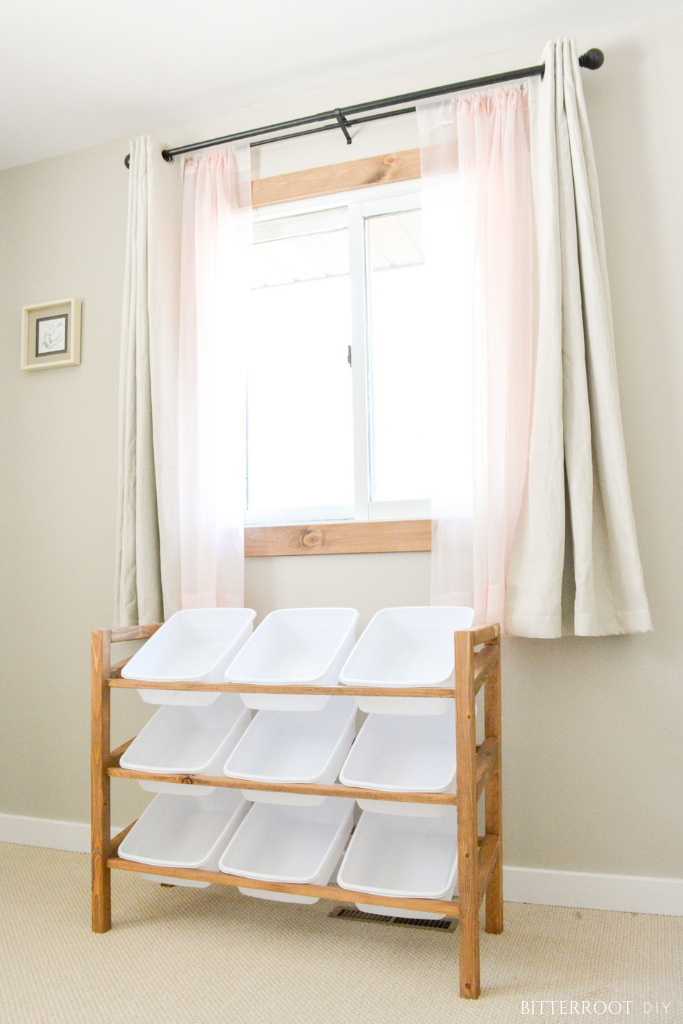
Not gonna lie, I think the biggest challenge of this project was finding baskets for the holders that didn’t break the bank. Some of my favorite bases had lids, which would have ended up as clutter. There are tons of cute baskets online and in stores, but I just used 8qt white utensils trays from Walmart. You can find them in the kitchen section, and nine of them fill this shelf perfectly.
If you have baskets or bins already, just adjust the measurements to fit those bins. That’s the best part of DIY — totally customizable!
Please let me know if you have any questions and I’ll get back to you as soon as possible!
I’d love to see it if you build from these plans! Tag me on Instagram @bitterrootdiy.
For more project ideas like this, I’d love it if you stopped by my blog. You can also find me on Pinterest. And to stay up to date with the latest shenanigans, follow me on Instagram!
I love the versatility of this build SO much. Tylynn chatted about using this storage idea in her basement and in a kid’s room, but don’t let that stop you from experimenting with other rooms that need some storage space. If you have a huge pantry, this build would make an amazing snack station. Add a couple hooks to the side and hang lunchboxes. Round up all your craft supplies and home office mess in one place. Hide wires at the bottom with a lidded storage box. Use wooden crates to add some warmth and pile in those tee shirts and accessories that are always a pain to store. (Looking at you, scarves.) Get crazy and modify the tutorial to make a tiny spice rack for your kitchen. All in all, this is a pretty easy DIY project to custom fit your own space and decor style, something I’m pretty passionate about at UDH. Thanks so much, Tylnn for another stellar build! -Sarah
Don’t forget to pin it!
More Woodworking Plans
Check out these other great projects from furniture to woodworking gift ideas. Plans include PDF instructions, measurements, and more info to help make your project a breeze!


More from Tylynn