
Disclosure: this post may contain affiliate links, which means I may make a commission if you decide to make a purchase through one of my links, at no cost to you.
This post may contain affiliate links. This won’t change your price, but may share some commission. Read my full disclosure here.
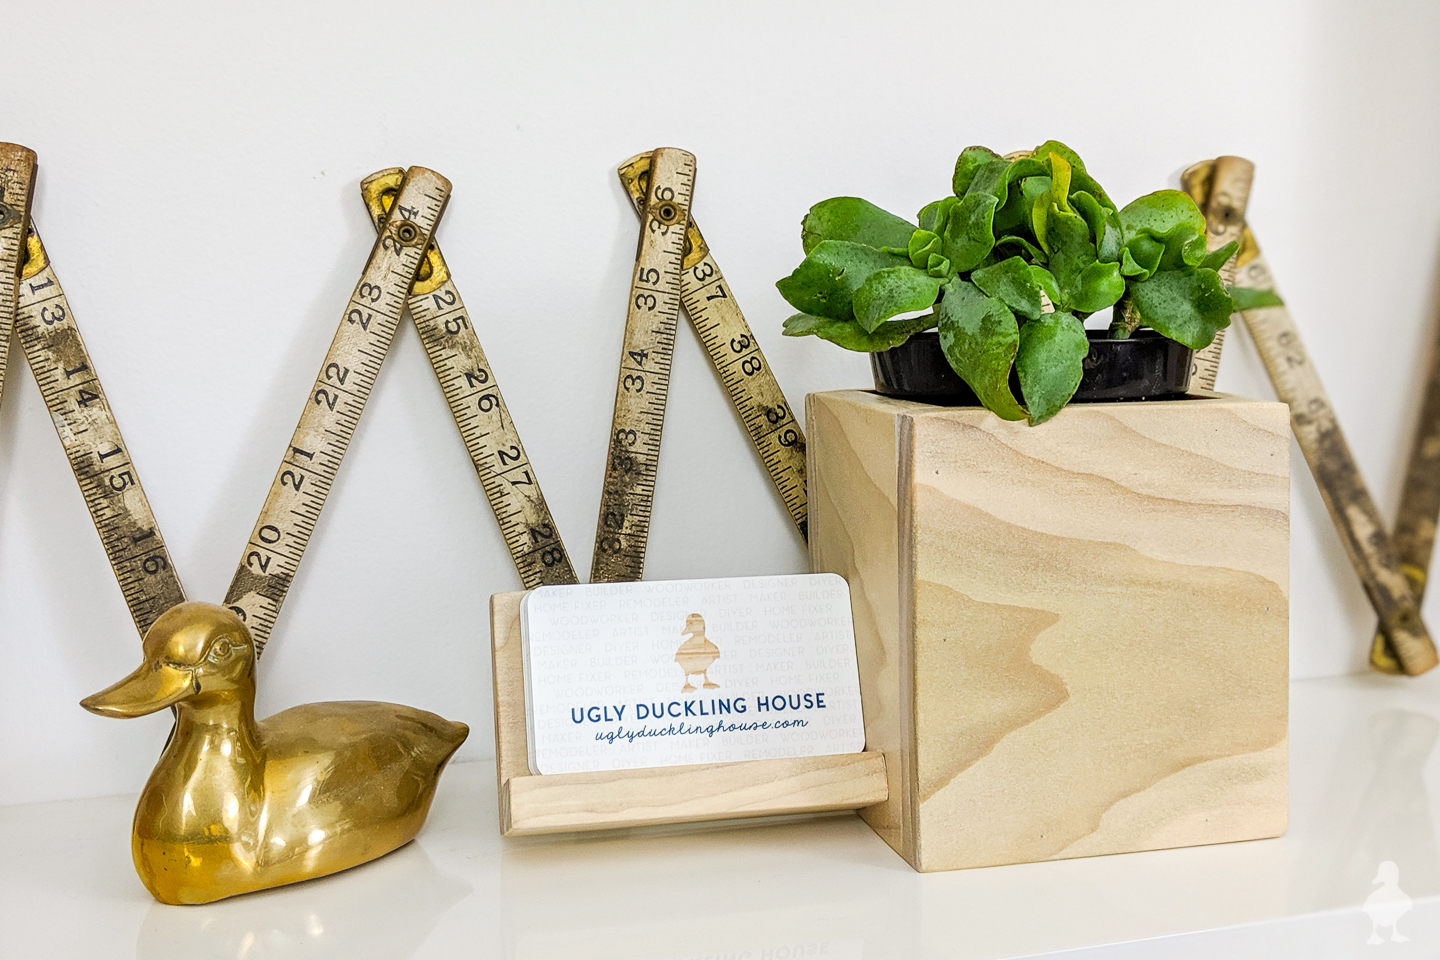
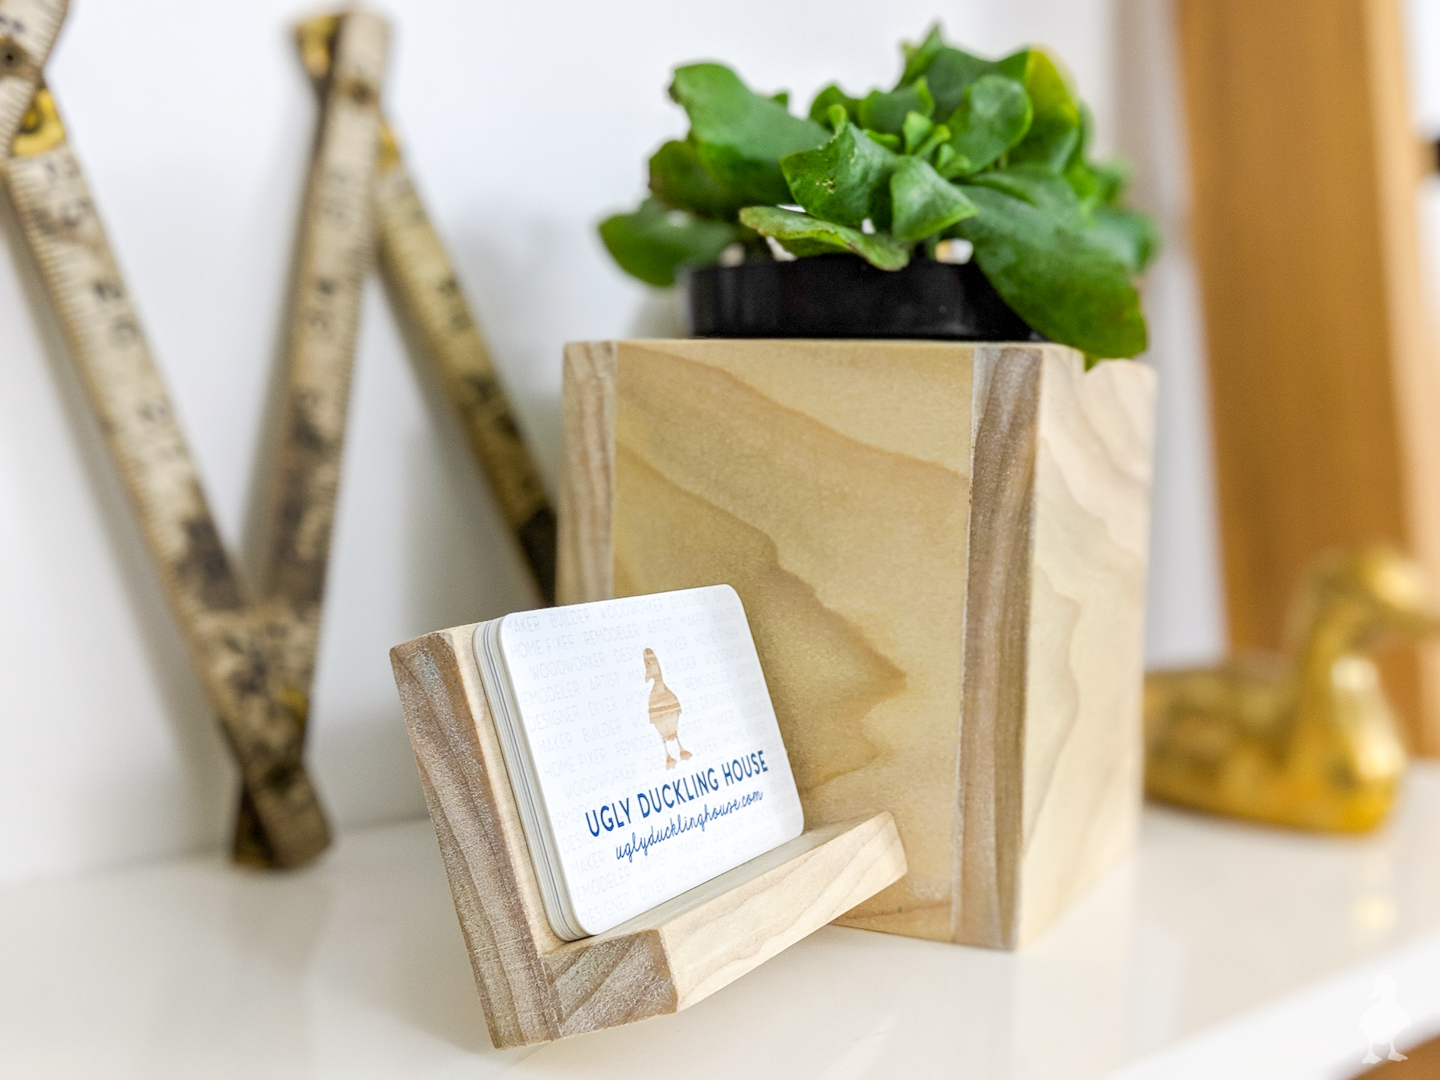
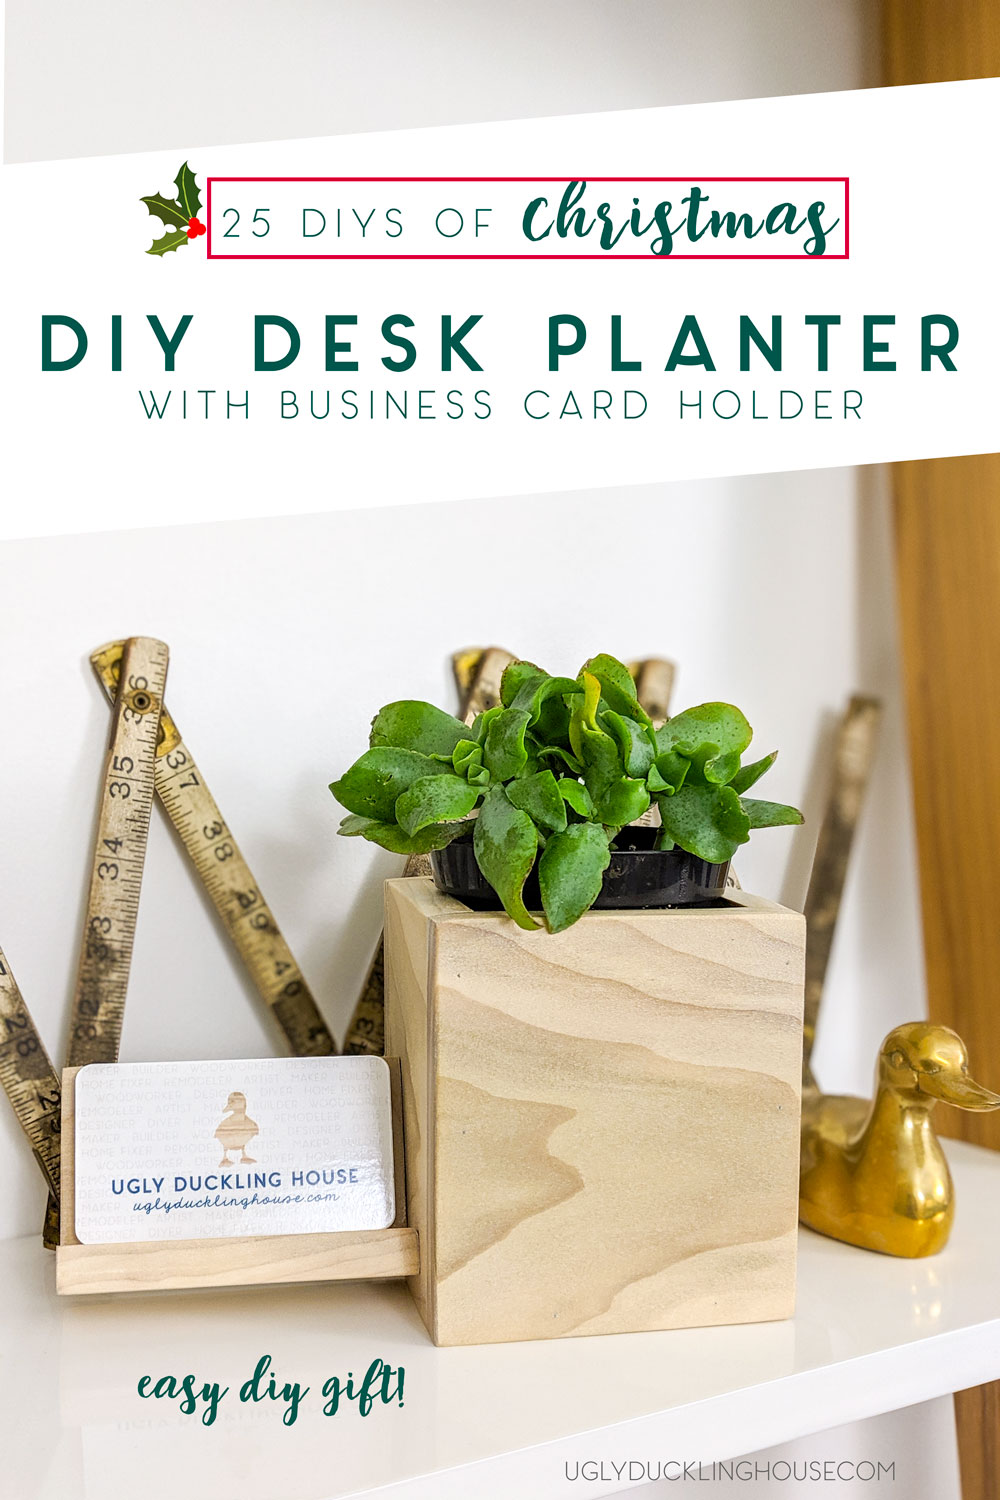
Hi friends! I’m kicking off a new SERIES today! This year, I’m posting 25 DIYs of Christmas to give you tons of inspiring holiday ideas that you can DIY: decor, recipes, gift ideas, and more. For today’s first project, I’m making a simple card holder gift that will please those hard-to-buy-for family and friends: a little planter that takes up a small amount of desk space and has a spot for keeping business cards on display!
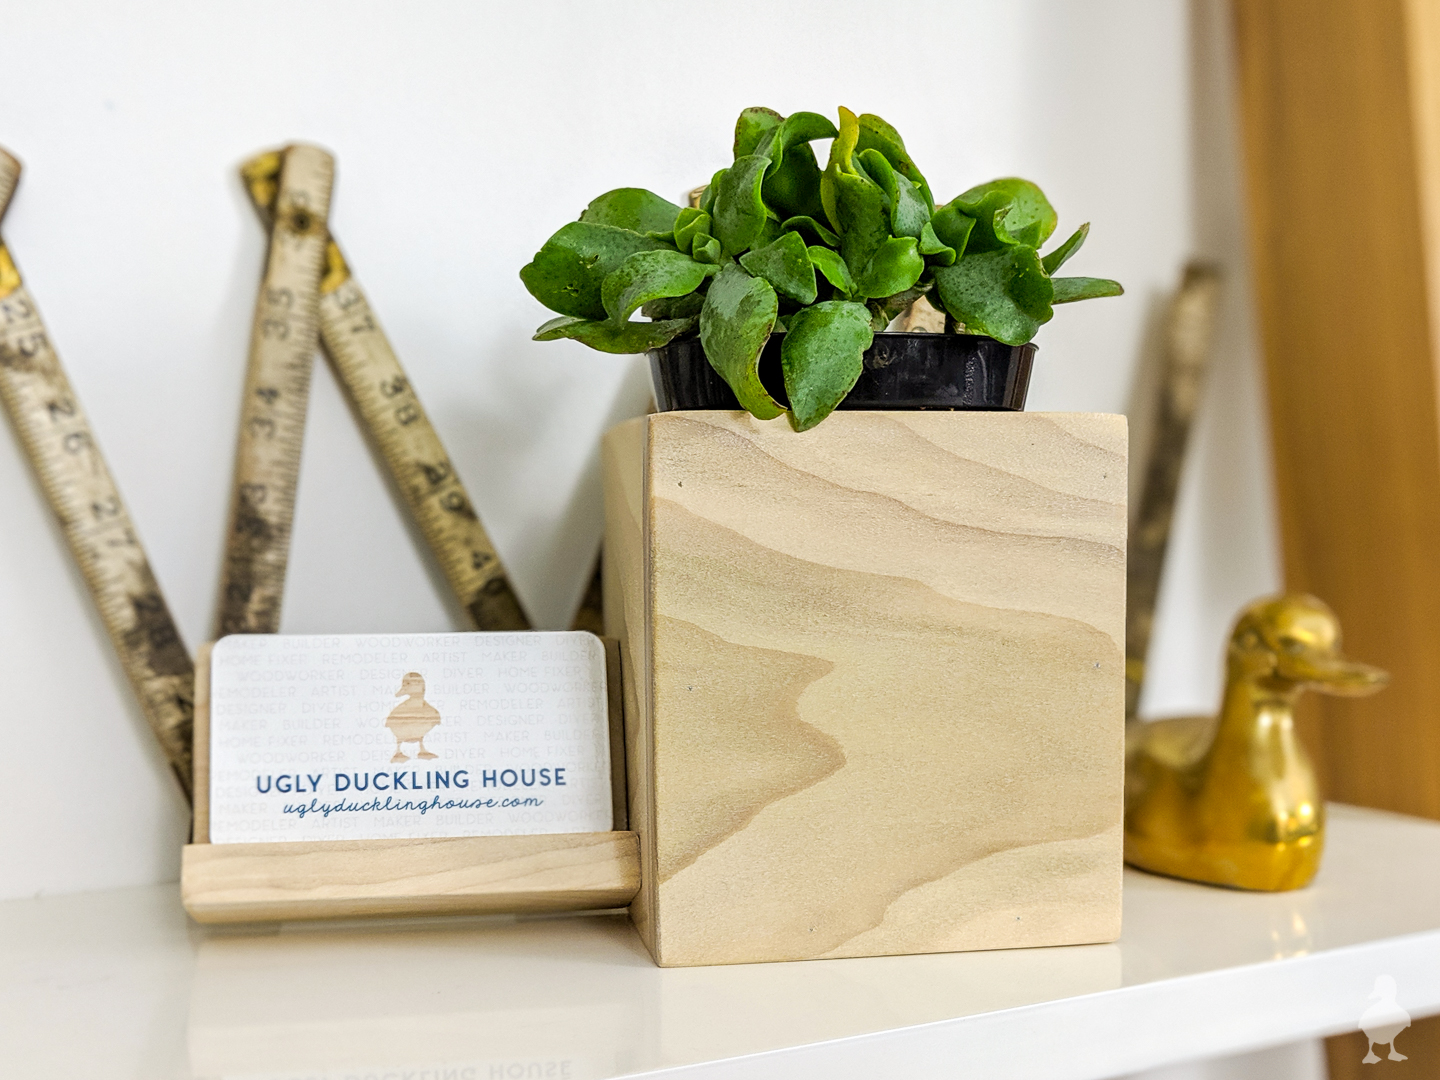
This idea is the perfect gift for business partners, a friend who just started their own creative business (they could ALWAYS use a little encouragement!), or a teacher/administrator gift. Heck, you could even gift it to yourself (or make a second one) for your own business cards.
Originally, I designed a more complex planter with fun angles and realized that it wasn’t as “easy” as I wanted this first project to be. So, I simplified so that you can make it in less time (as in, less than a day) for a truly great project as a last-minute DIY gift idea. I still really like the result! I do plan to share the other design later in the series, but I think I’ll probably nix the business card part and turn it into something else that’s equally fun (update: I turned it into a gift card holder!)
Anyway, let’s get to the instructions for how to make this. All subscribers can download FREE detailed diagrams and instructions for these plans in my Woodworking Plans Library. If this is your first time attempting a woodworking project, making something small like this is a perfect opportunity to get more familiar with basic tools and techniques. Good luck!
DIY Succulent Planter & Business Card Holder (Perfect as a Desk Accessory Gift!)
Materials & Tools for Making This Wooden Business Card Holder
- 1/2″ x 6ft x 2ft lumber (I used poplar)
- pencil
- miter saw
- nail gun
- finishing nails
- clamps
- wood glue
- wood stain
- orbital sander
- wood filler
- sandpaper (80 – 320 grit)
- painter’s tape
- Garden Seal or spar urethane
- succulent
- soil
TOOLS YOU’LL NEED

Catch the video too!
Time needed: 8 hours
This small planter makes an excellent gift for friends and family who have recently gotten a new job, have an independent side business, or for someone who loves plants! On the right side: a chic little plant to cheer up the space; on the left:, new business cards!
- Cut box pieces
Cut all 4 sides and bottom piece of the planter.

- Use scraps to make the business card holder
Since I cut the box from step 1 out of 1/2″ x 6 in poplar, I used pieces I trimmed off to help create the little lip of the business card holder piece.
- Glue, clamp, and nail
I recently got a battery-powered finish/pin nailer, and it came in super handy for this project! Normally, I wait for the glue to dry with the pieces in clamps, but using the nail gun really sped things up. Highly recommend.

- Sand
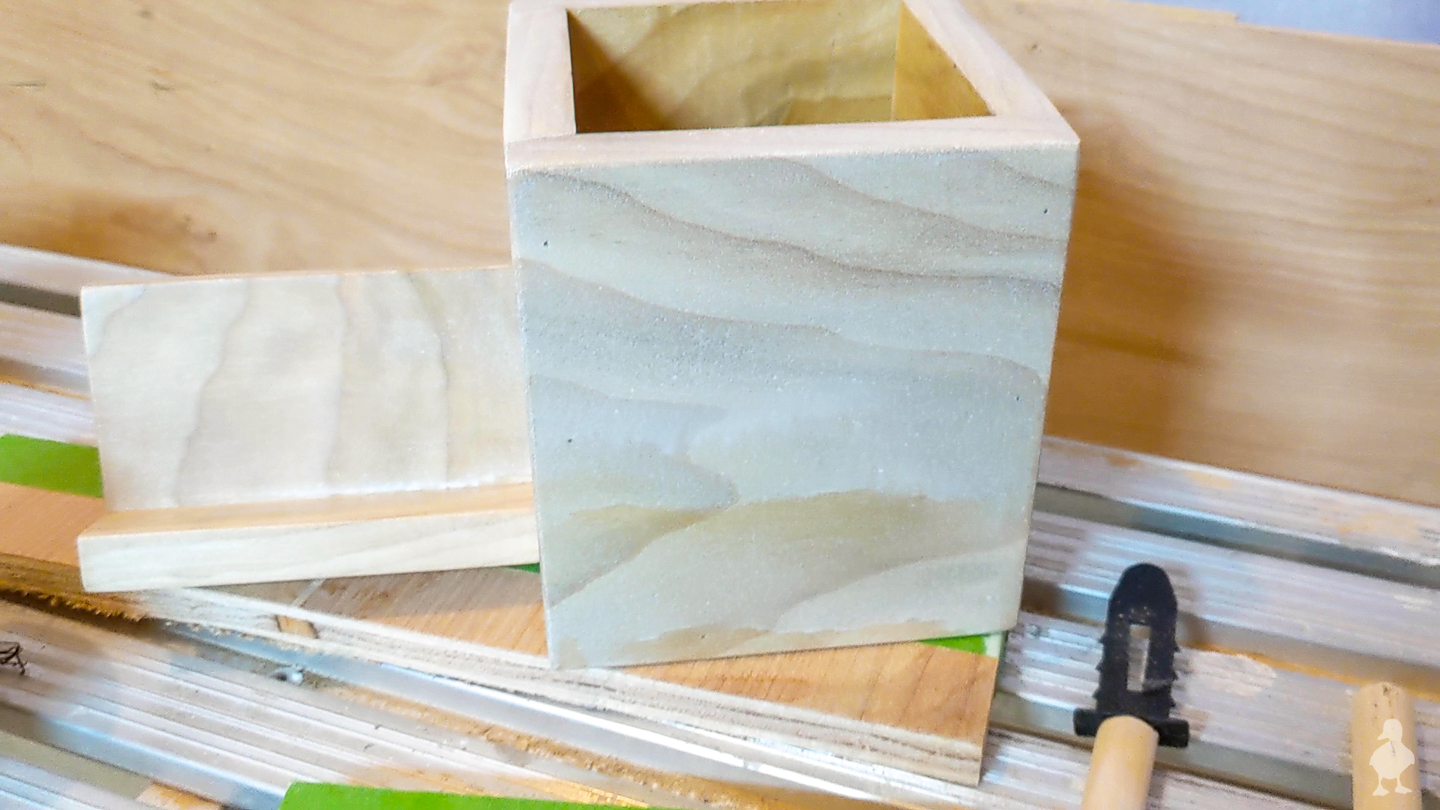
Before gluing the card holder to the box, I decided to fill any gaps with wood filler (my wood was unfortunately cupped in the middle so my pieces weren’t perfectly lining up even with clamps). I also gave everything a good sanding to prep it for stain and remove any raw edges.
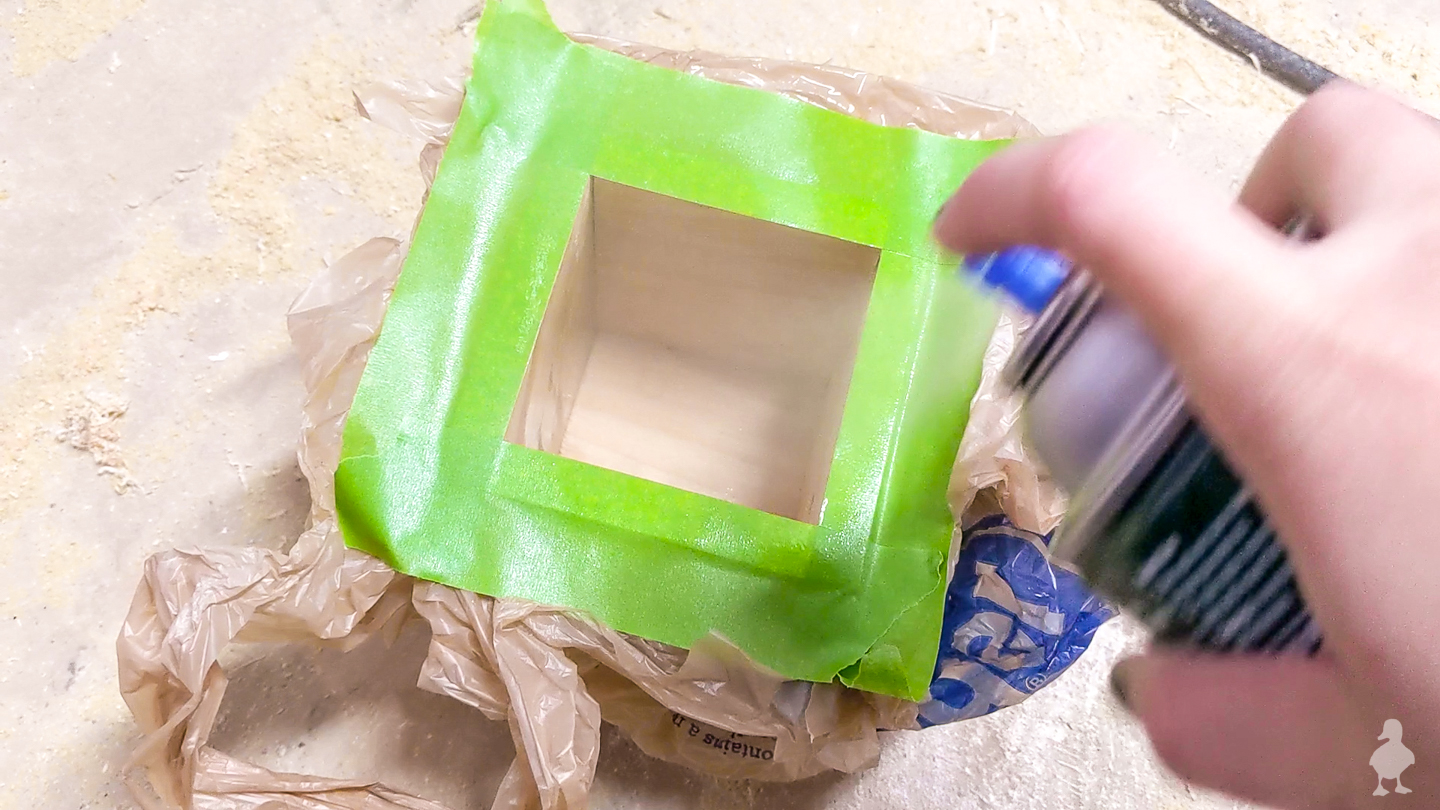
- Tape off and coat the inside of the box
I taped off the lip with painter’s tape and also wrapped the outside in a plastic back to keep the spray limited to the interior. Then, I sprayed 3 coats of spar urethane into the inside to keep moisture from becoming an issue when the plant gets watered. Even though I’m using a plastic liner and a small tray on the inside, I didn’t want to take any chances. Another great alternative is to use a product called Garden Seal (which for some reason, I didn’t give much thought until now to use, but could have been a better way — I’m going to blame our Daylight Savings time change.)

- Glue the business card holder to the box
I eyeballed this placement. I aimed for making the cardholder at a slight angle with the bottom corner touching the desktop. If you have a hard time keeping things aligned the way you want, clamp together and use a few nails to hold together until the glue dries.
- Finish and add a plant
The final stages are always the most fun, right? I LOVED the grain on this project and really wanted to show it off, but I didn’t want the planter to be stained too dark. So, I turned to a new favorite stain color of mine, Pickled Oak by Minwax. It has an almost-bleached effect to the wood and nixed any yellow in the wood. Generally, I prefer Varathane because it dries a LOT faster, but this was the perfect fit for this project, so I was willing to wait the 8 hours dry time. Since things were still drying as of taking these photos, I left the succulent in the plastic container it came in, which doesn’t quite fit the planter the right way (it snugly created a lip, which I kind of like, but I’ll later actually plant it into the container after the planter cures).


There you have it, but that’s not all! You’ll find more ideas on my blog throughout the rest of November and December 2019 (cough cough subscribe so you don’t miss any of those posts!), but you find more great gifts RIGHT NOW by checking out some of the fellow bloggers participating in today’s gift idea roundup below!
DIY GIFT IDEA ROUNDUP
- Addicted 2 DIY — DIY Wooden Headset Stand
- Ugly Duckling House — DIY Desk Planter & Business Card Holder (that’s HERE)
- My Repurposed Life — Tree Branch Log Projects
- House Becoming Home — DIY Wood Cake Stand
- Cristina @ Remodelando La Casa — House Advent Calendar
- Anikas DIY Life — Wood Tray
- DIY Huntress — Easy Concrete Planter
- My Love 2 Create — DIY Step Stool
- 100 Things To Do — Charging Station
Don’t forget to pin it!
25 DIYs of Christmas
This project is part of a series of DIY gifts, decor, and other fun inspiration that I’m calling my “25 DIYs of Christmas“! Check out the list below to see each post (step by step tutorials, recipes, videos, free patterns, and woodworking plans available for each (where applicable). Lots of these ideas have multiple versions to show you the possibilities of each DIY. Even better, you can subscribe to make sure you don’t miss a single post!


Love this scraptastic project! You know little wood things make my heart jump and this is no exception. So clever with the card holder on the side.
Thanks Jaime! My original design was hex-shaped and had the card holder mounted on the front with some clear acrylic, but it got SO complicated I just decided to strip it down and make it something you can whip together in an afternoon! It’s a perfect little scrap project!
The free plans link seems to be broken??
Thanks for letting me know! The links to the free library are now resolved. You actually caught a much bigger bug that impacted other parts of my blog (I recently did a redesign and a bunch of links were broken in the process), so THANK YOU so much for leaving your comment or I may have missed it for a while longer! It allowed me to reach out to support and get it fixed. Have a great rest of your week!
This is such a cute and simple idea for an office gift! Great job, Sarah!
Coworkers can be tough to buy for! Thanks Katie!
Sarah,
I love easy scrap wood projects like this. The addition of the biz card holder is so clever!
pinning!
gail
Thanks Gail! I loved your ideas too!
Sarah! I love this idea, I know a few people I could make this for…they will love it and it won’t cost me a thing! Soooo good!
Thanks Cara! It’s an easy scrap wood project!
Super cute–I love the combination of beauty + utility! Such a great gift idea, especially for all of the entrepreneurs in my life!
Thanks Angie! I think a small gift like this can be so important for entrepreneurs… that little show of support can make someone really feel seen!
I love this project, pretty and practical!
Thanks Mindi!