Disclosure: this post may contain affiliate links, which means I may make a commission if you decide to make a purchase through one of my links, at no cost to you.
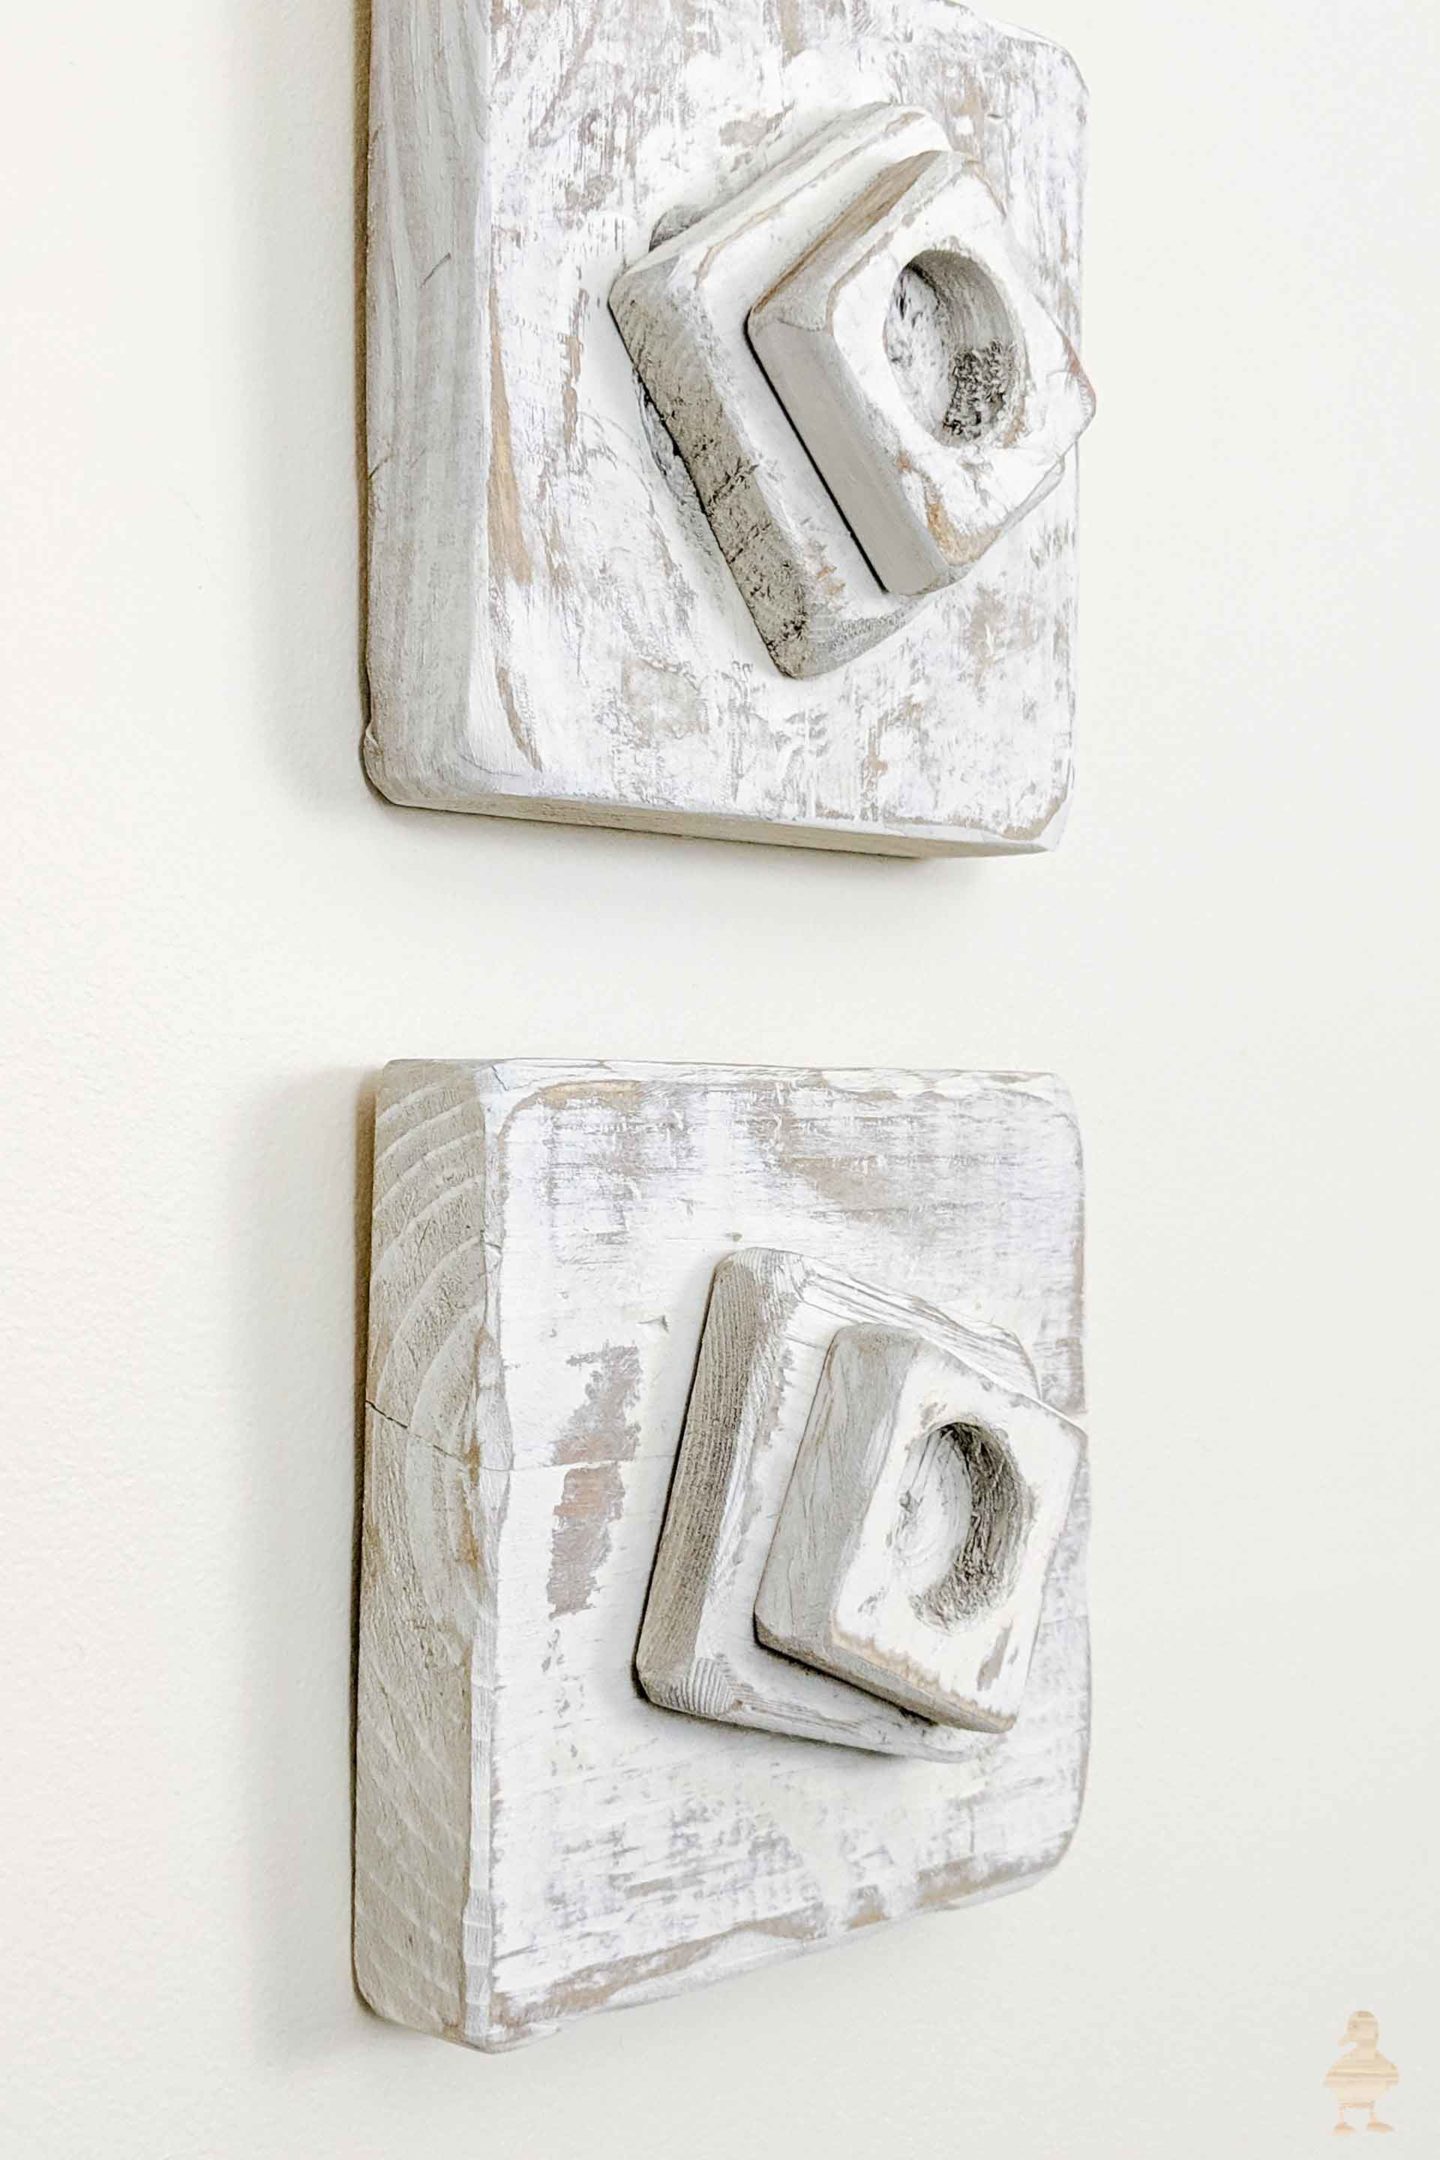
One of the walls in my living room needed some love. With a little scrap wood and paint, I created a series of
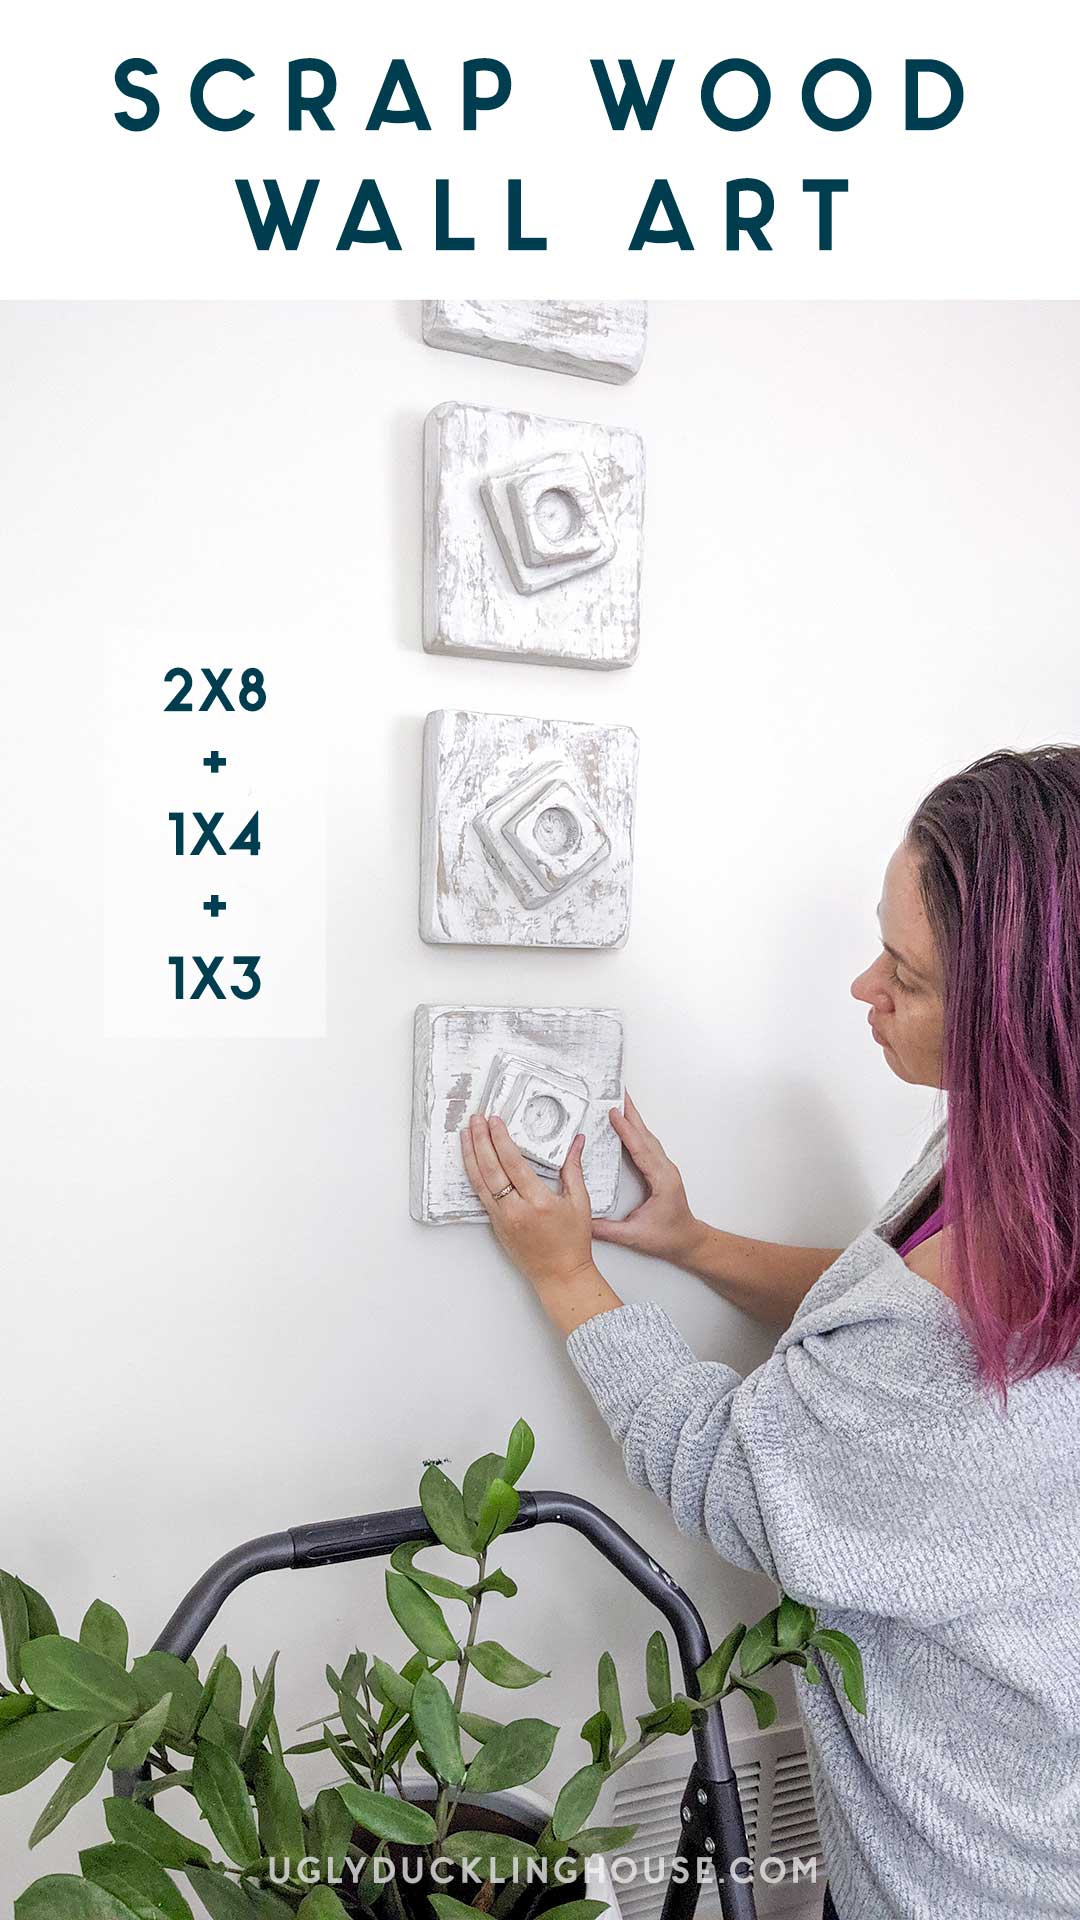
Normally, I’m not a fan of the faux “old” look with things around my home. My house gets plenty of distressing on its own, quite frankly, and without the help of a piece of particle board painted to look like it came from a 100-year-old barn.
What I do like is gathering old pieces that have history and a story and combining them with more modern-looking pieces. Still, there’s the rare exception when I see something I know I want to find, but it will take a while to hunt down. So, I’ll sometimes try to make a stand-in version that will tide me over until I can find the real deal. Have you ever done the same?
That’s exactly the scenario I found myself in for this month’s Scrap Wood Challenge, so I’m bringing this simple DIY to you with some tips on how to get that “old” look. The best part is, since it’s made from scraps, I will feel no guilt when I find the authentic pieces I’m looking for and replace it.
Scrap Wood Art Inspiration
When I saw this living room project from Cleo Rosa Interiors, I was blown away by the simple, chippy look of the stacked blocks (or whatever they are) that are used in the right corner of the pic below. Swoon. All the swoons.
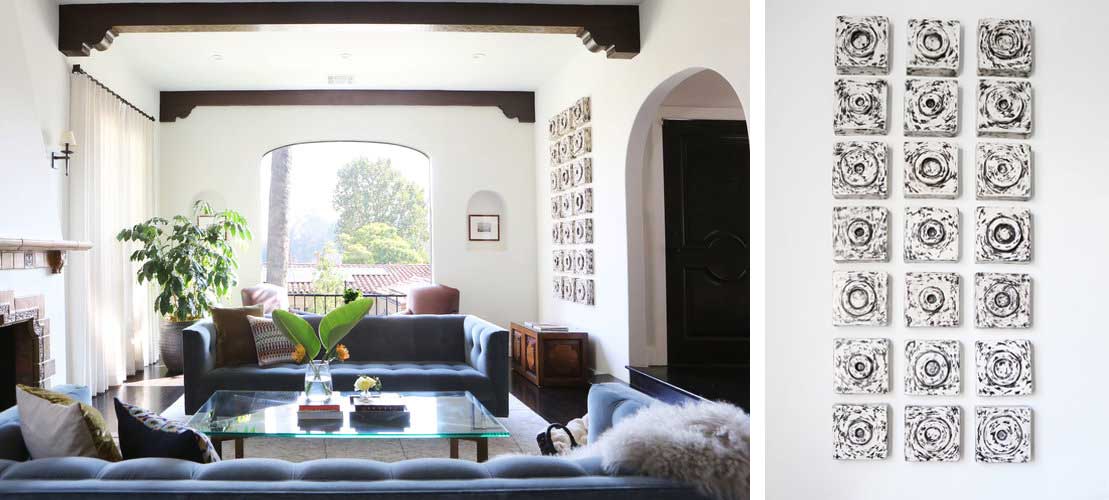
I’ve seen designers do this before — take a group of objects (usually something obsolete, like old wooden molds and forms), gather a huge collection of them, then mount them on a wall as art. I think it’s genius to find beauty in these old objects. It pays to think outside the box!
(Update: I found through the designer directly that these are ceramic
objects from Mexico and found in a small boutique in San Francisco.)
Using these images, I did my own version without being too concerned over the details. The good news about anything “rustic” is that you can pretty much get away with minimal sanding, eyeballing all of your measurements, and break all the normal rules that lead to a bad finish. In this case, that’s the goal! I wanted this to be something I could realistically do between other projects, and add to when I need more pieces (I was able to do 4 for now, but since I’m still working on the outdoor furniture set that will give me more 2×8 scraps, I’ll be able to make more very soon). If I hadn’t started this just a few hours before going out of town (ha!), I would have completed it all in one day.
Supplies and Cut List
SUPPLIES
CUTS (per piece):
- 1 – 2×8 cut to 7-1/4″ square
- 1 – 1×4 cut to 3-1/2″ square
- 1 – 1×3 cut to 2-1/2″ square
How I Made This Scrap Wood Block Art
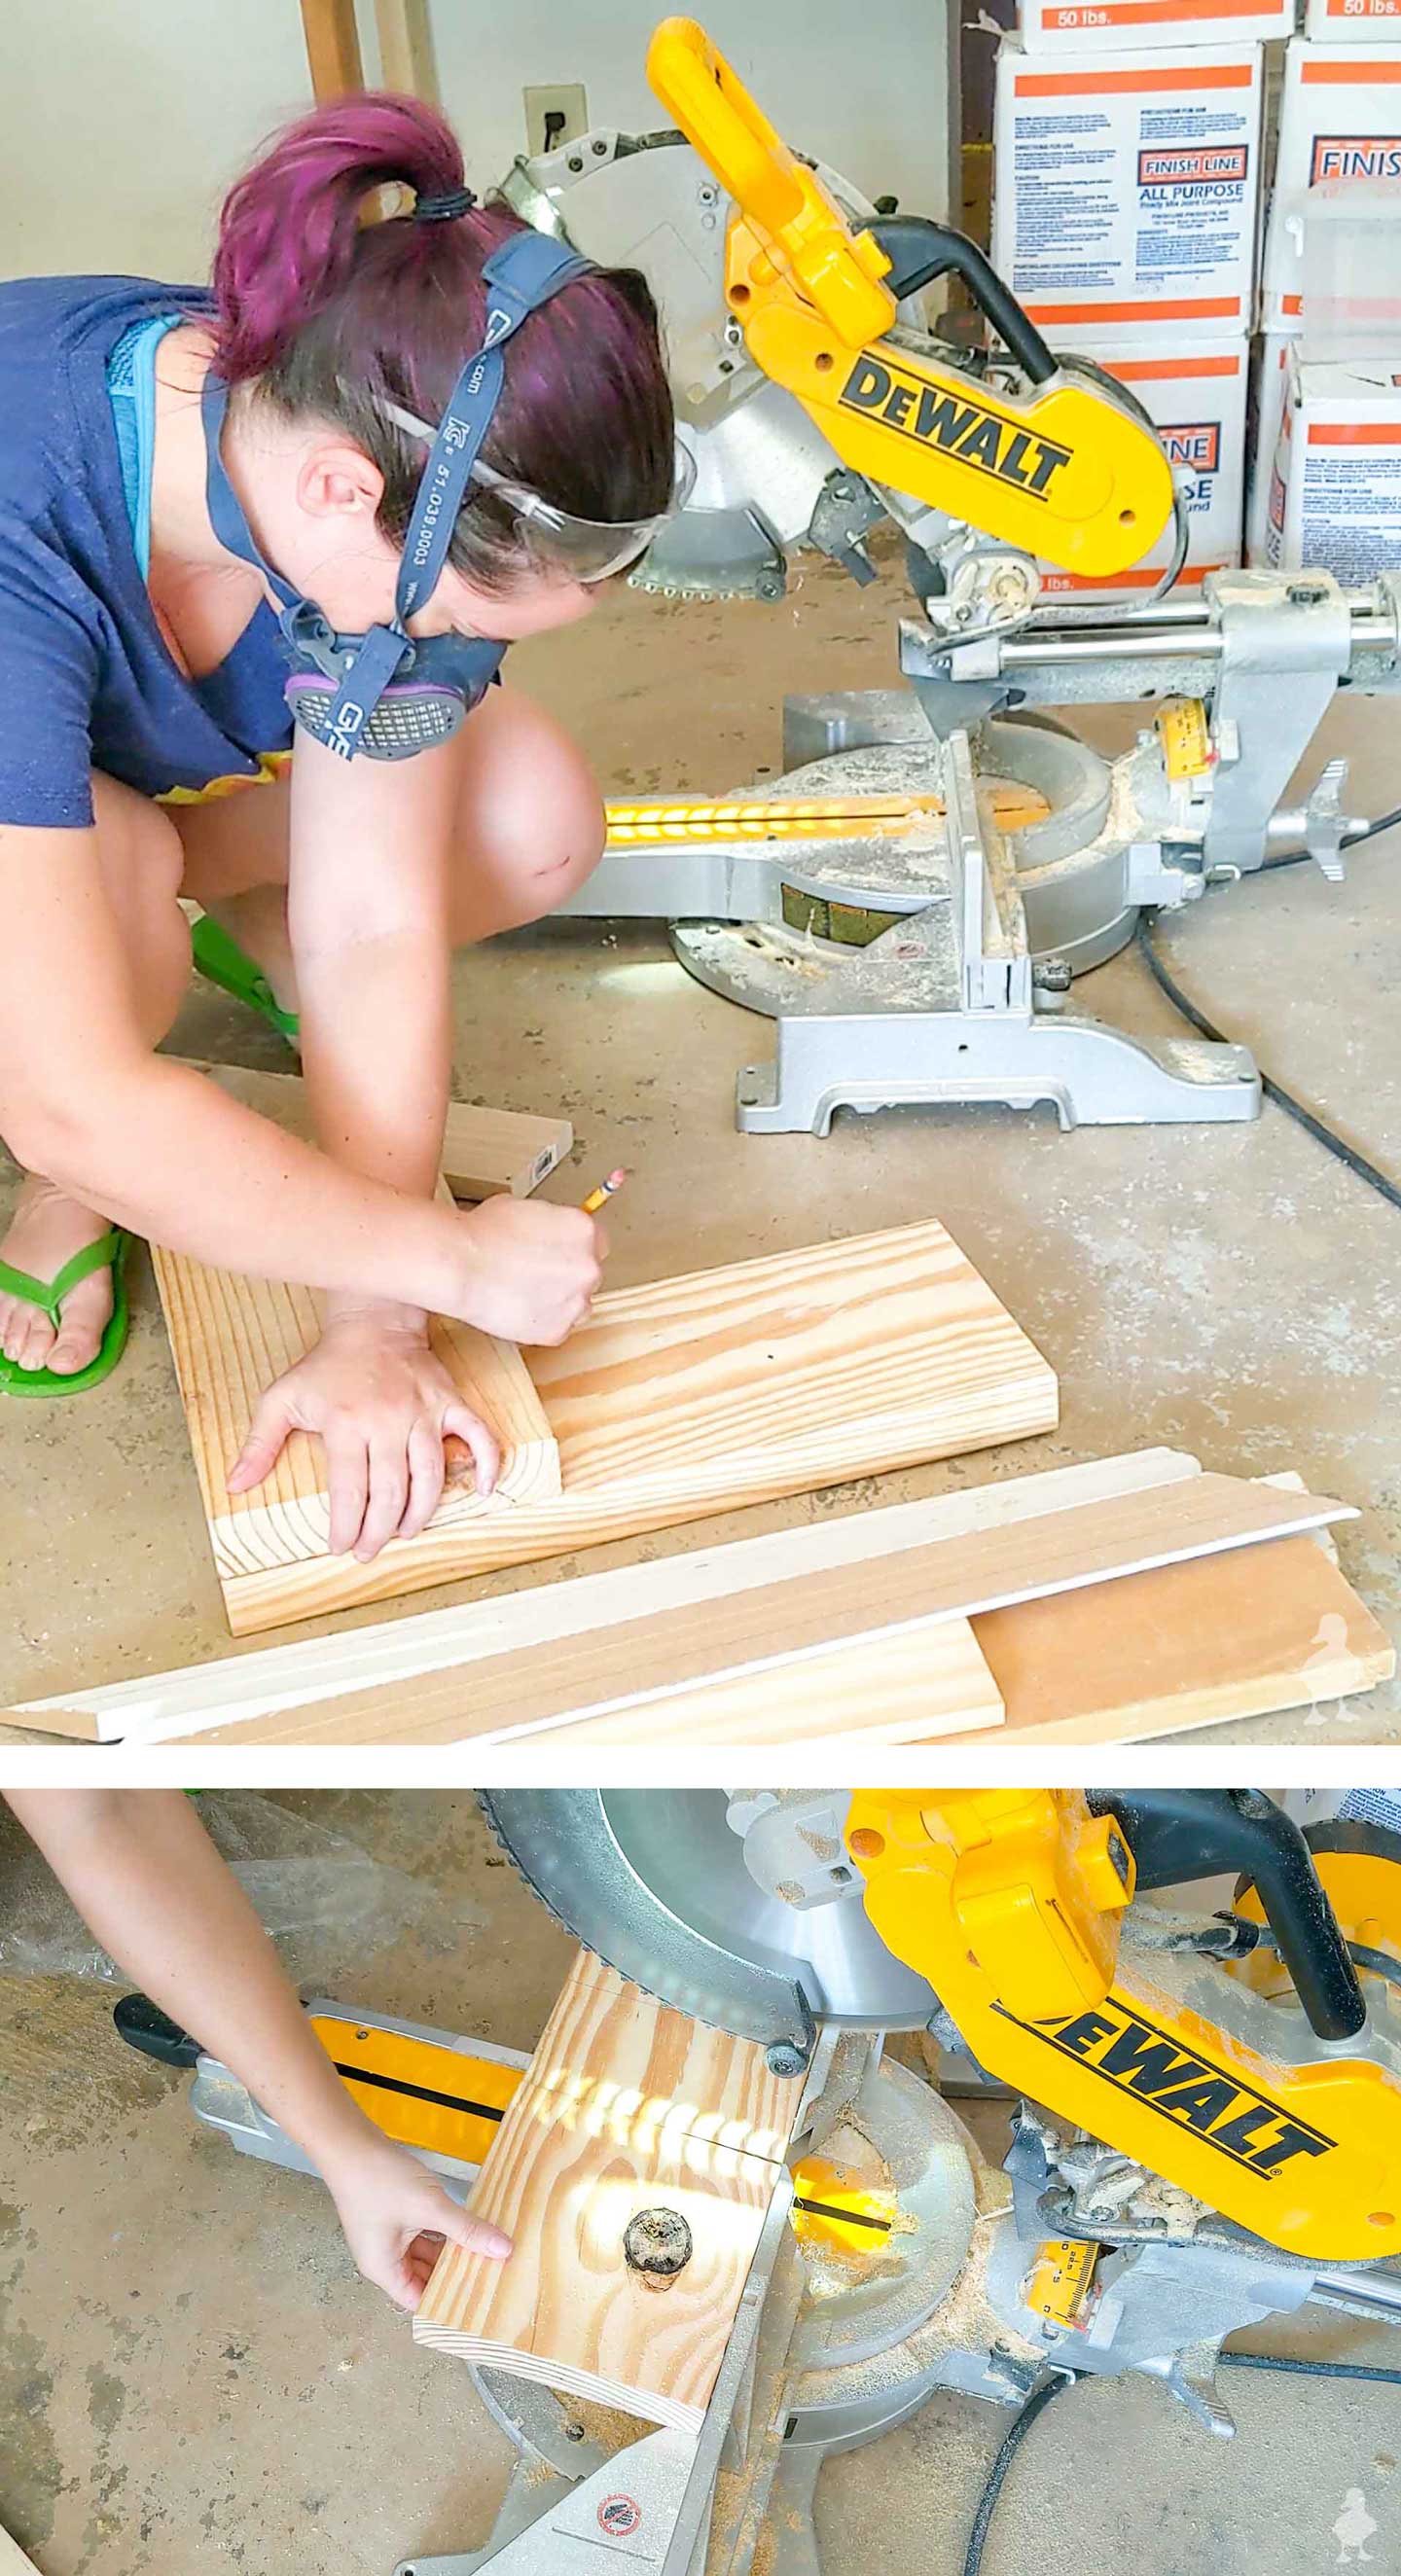
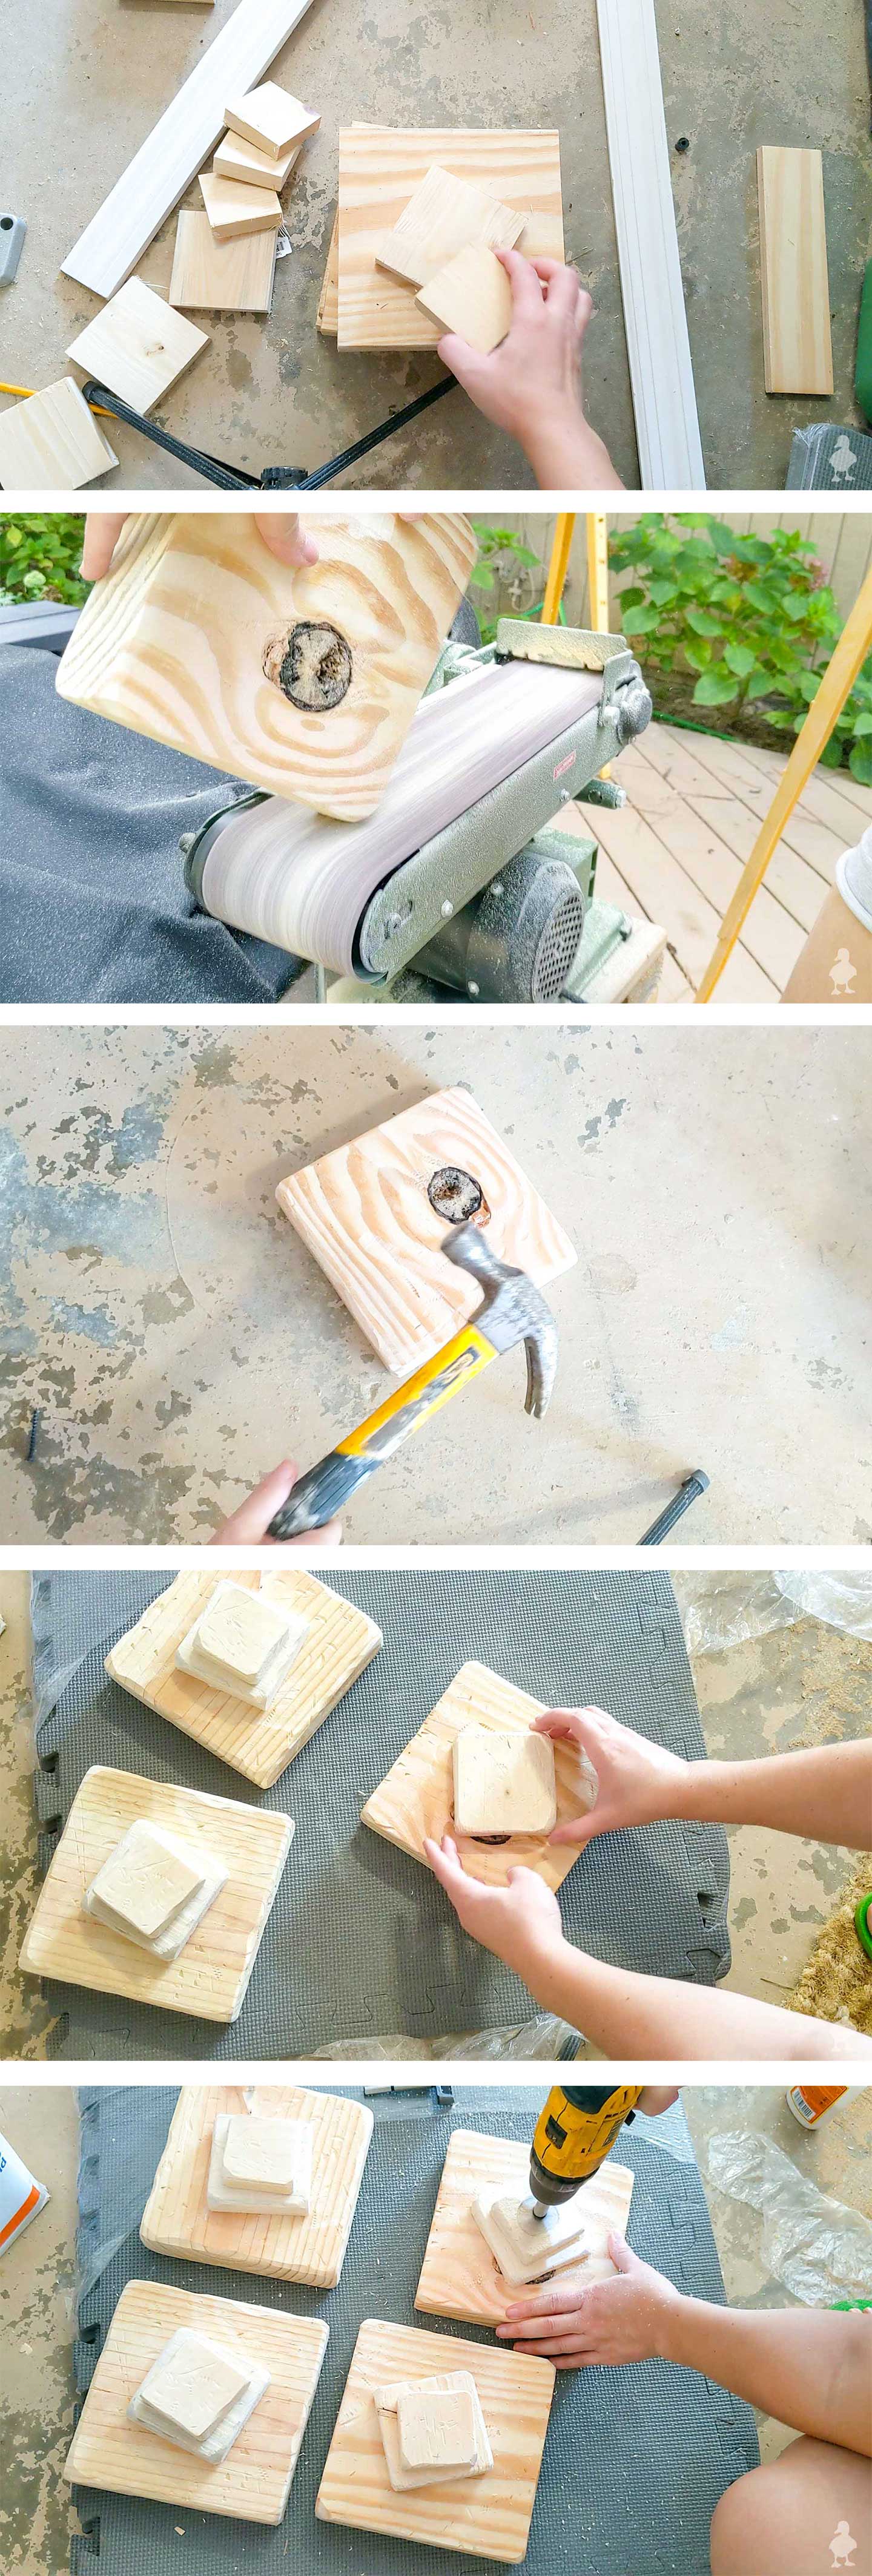
- Cut scraps into squares: I first cut the 2×8, 1×4, and 1×3 scraps into squares. Since precision wasn’t necessary here, instead of measuring and cutting, I overlapped two pieces of the same width (perpendicular to each other); this created a square for the piece underneath. I marked it with a pencil and cut along the line.
- Sand all edges: I then used my benchtop belt sander to add worn edges around all sides. Being uneven with the amount of sanding on the corners, sides, etc. made it look more naturally worn.
- Distress all pieces: Next, I added imperfections with both sides of a claw hammer (use
the claw to scratch the surface, hammer indentations, and use screwsto hammer the thread markings into each piece. I got a littletoo aggressive with one piece and it split in half! I glued it backtogether quickly , but instead of using a clamp to make the crack disappear, I allowed the glue to naturally set (which gave just a sliver of widthto the crack, and looked even more “old and worn”). - Stack and glue pieces: I then created stacks of the 2×8, 1×4, and 1×3 pieces and glued each one slightly askew so they didn’t look too perfect (or even precisely in the middle).
- Add a circle to the center: With a 1-1/2″ Forstner bit, I then drilled into the center of each piece.
How to Create a Distressed/Chippy Paint Look
Quick reminder: use a mask & other protective gear when sanding stain/paint!
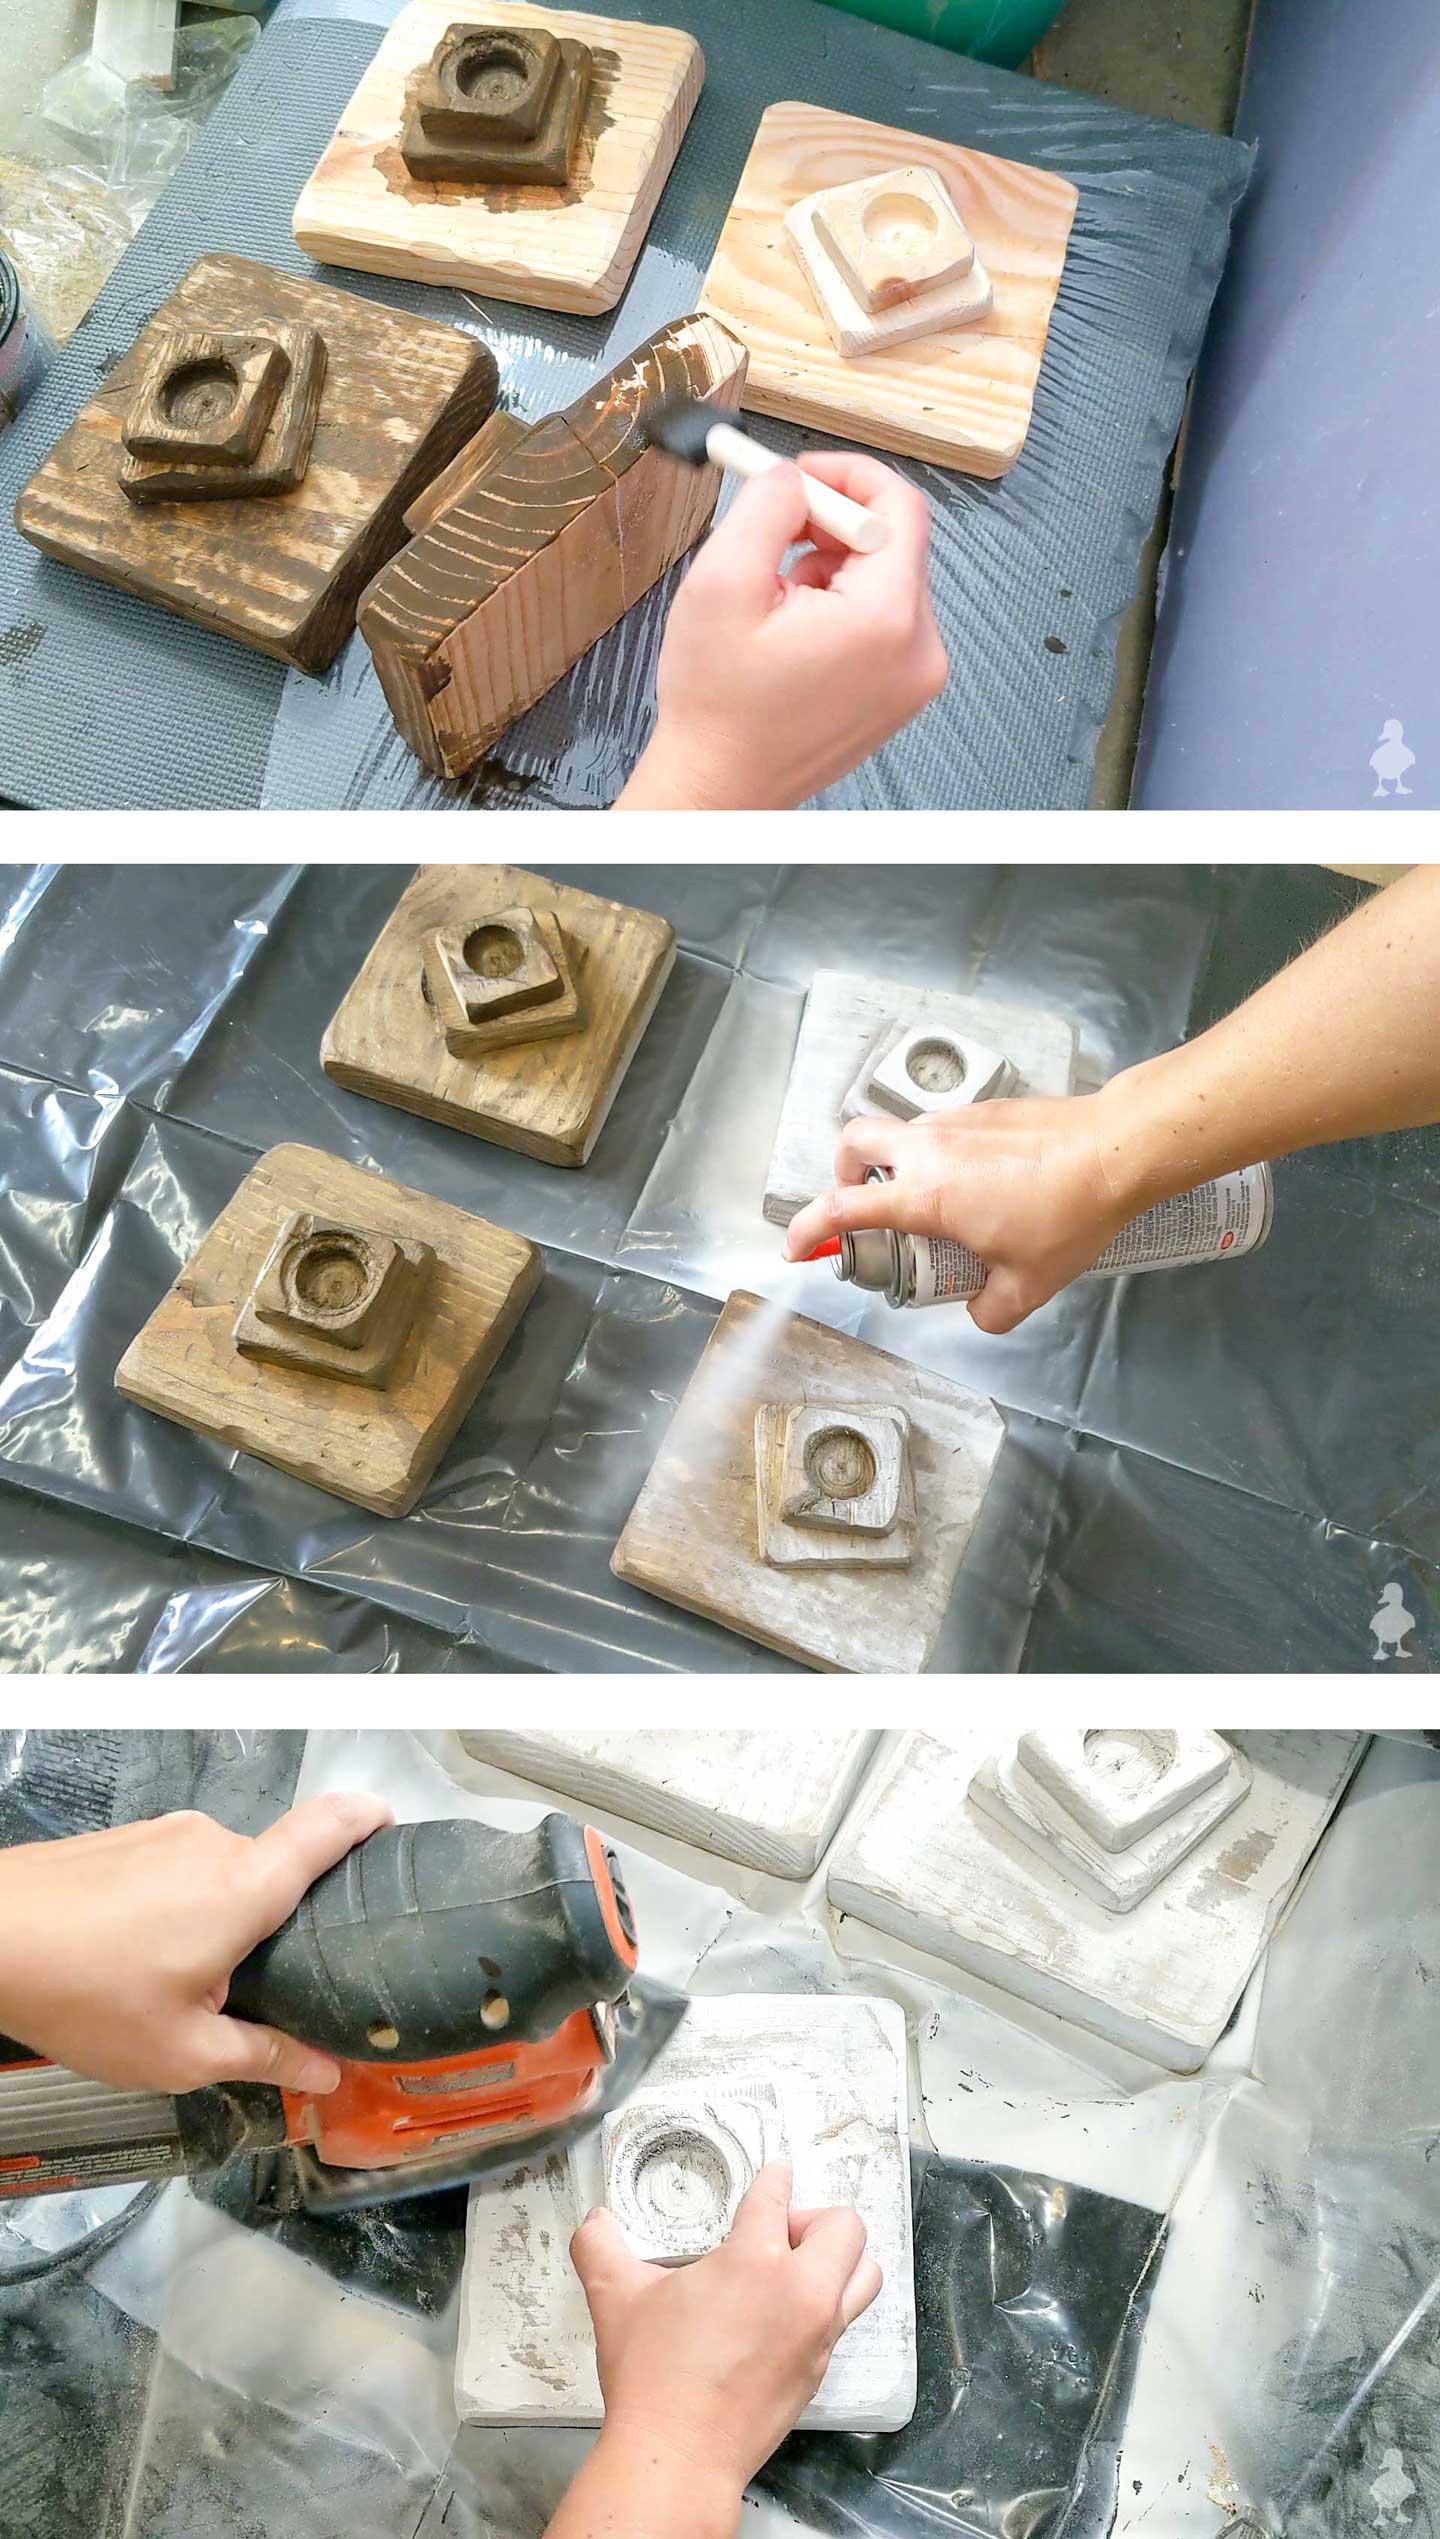
- Stain: Coat all sides with
aged wood accelerator or stain. Apply a second coat if necessary. - Paint: After drying, spray each piece down with
chalk finish spray paint (or coat with actual chalk paint). - Sand: Use 120-grit sandpaper to sand away paint to reveal parts of the stained wood underneath (don’t go too far or you’ll sand down to the bare wood again).
After wiping down the finished pieces, I then added mounting hardware to the back and hung them all on the wall in a tall column. I’ve only made 4 so far and want this grid to be hung in rows of 3, so getting the middle column and spacing out from there is the plan! Just to show you more of what I mean, I did a hyper-quick Photoshop version:
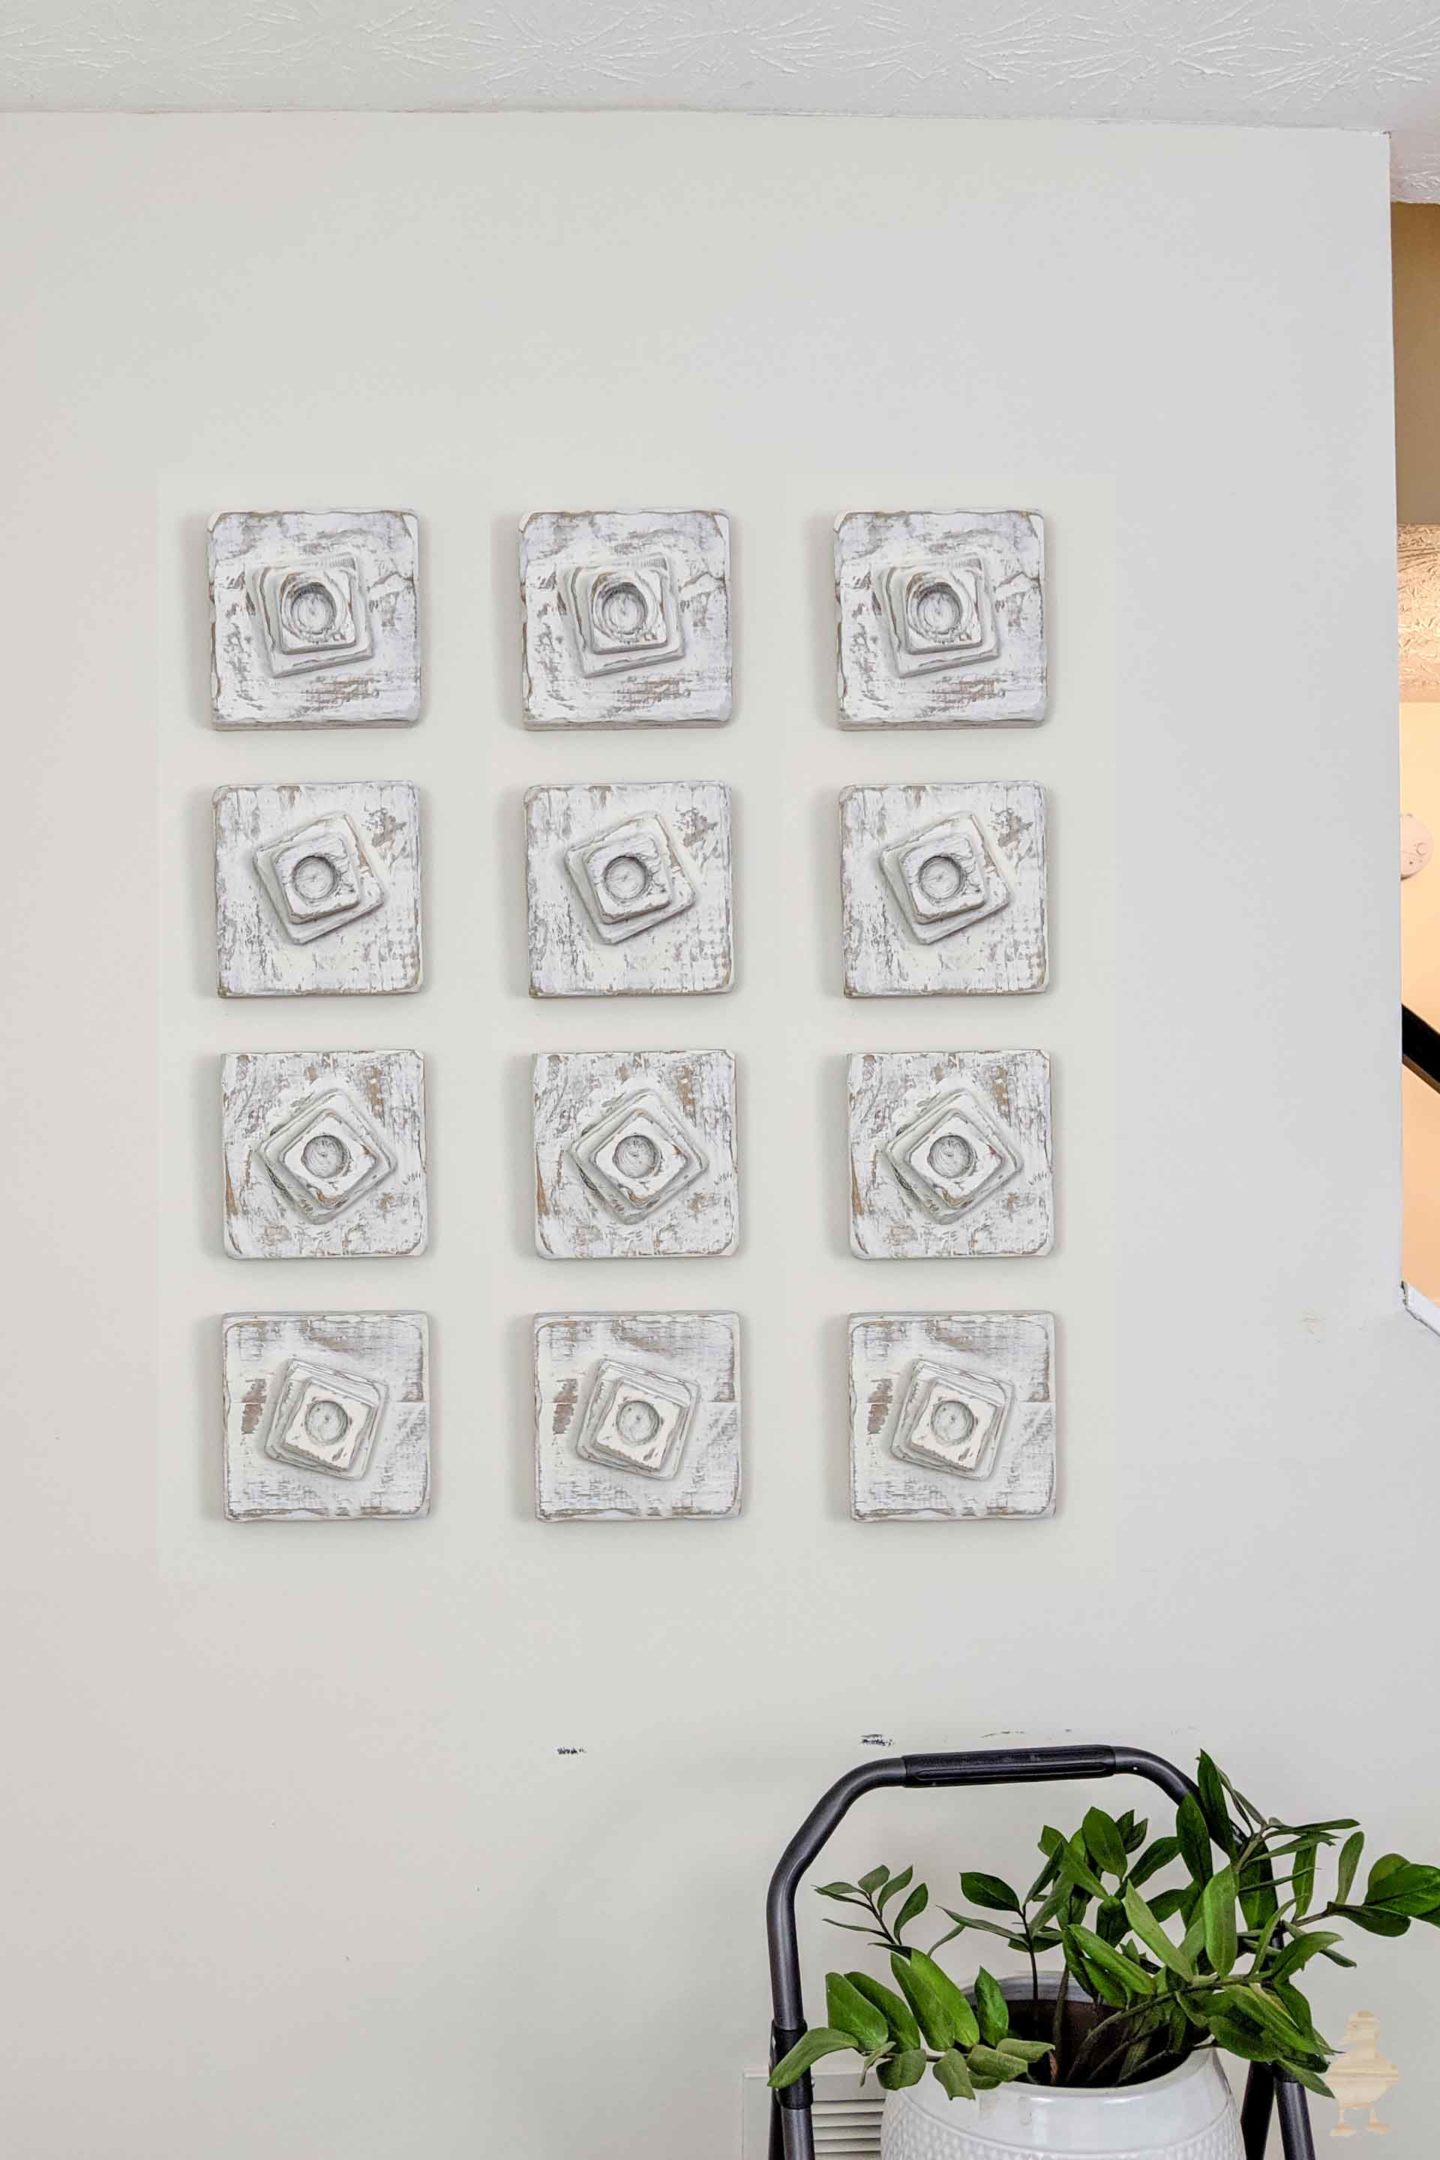
If I’m honest with myself, I kind of wish I’d done a second coat of the wood accelerator product (or perhaps an even darker stain) so that the underlying contrast that peeks out is more intense, like the inspiration art. But, I’m still happy with it, so I still plan to create at least 8 more to hang on this wall!
And, since this is a scrap wood challenge, I’m linking to a few more bloggers who took on this month’s build challenge. Be sure to check out their projects too!
- Addicted 2 DIY
- RemodelaCasa
- Jaime Costiglio
- The Created Home
- The Inspired Workshop
- My Love 2 Create
- Ugly Duckling House (that’s here!)
- Hazel and Gold Designs
- Joyful Derivatives
- House Becoming Home
Don’t forget to pin, and if you’re looking for even more scrap wood ideas, I have lots more below! There are so many on the blog now! I’ll probably be posting a roundup soon so you can see all of my favorites.
More Scrap Wood Ideas
Don’t let those cutoffs from bigger woodworking projects and home DIYs go to waste! Here are tons of ideas on how to reuse the scrap — you can make gifts, décor, and more!



Clever stacking idea Sarah, I love the texture and geometry.
Thanks Jaime! I didn’t want to spend any time cutting out circles so I figured a few stacked pieces would work instead. ;)
These are cool! I followed the process on Instagram and was super excited to see them finished. They look awesome!
Thanks Sheri! I had a LOT of people wondering what the heck they were going to be and couldn’t picture them, so I’m glad they turned out how I envisioned!
That’s amazing Sarah! I would have never thought of stacking the wood…so good! I think a need a wall of them somewhere now! Lol!
That’s a really cool gallery! I think they’re perfect the way they are.
Thanks Cristina! I think the one row leaves too negative of space on either side, but I’m really excited to have a Photoshopped pic now that confirms the effort to add more will be worth it!
Thanks so much Cara!
I love how these turned out!!! I can definitely see why the original inspired you to make these. They’re perfect on that wall!
This looks great! I love the beauty in the unexpected, and the repetition definitely makes it look like a work of art. Awesome use of scraps!
Thanks so much Angie!