Disclosure: this post may contain affiliate links, which means I may make a commission if you decide to make a purchase through one of my links, at no cost to you.
It’s time for the kitchen to be whipped into shape and fully finished! Below, I’ve jotted down some overall design and organization plans in 2018 to make my kitchen perform at its best.
Throughout most of January, I’ve been setting goals for the year and thinking about what else I’d like to accomplish (personally, professionally, friends & family, etc.). In case you missed those general thoughts, they are right here.
But when it comes to the house — or more specifically, when it comes to certain rooms in this house — I realized I have a little more going on in my life these days. And once that happened, there was a little more going on with how I wanted to use certain spaces in my home. I know this isn’t exactly a eureka moment and comes as no surprise, but it was also almost… a comfort? A pleasant realization that it was no longer about making things pretty, but really just using everything in the house?
So, I’ve been writing those thoughts down, room by room, starting with the kitchen. What could I add, or remove, or touch up, to make the most out of the room I use most? (If you’d like to see the full kitchen transformation up until now, check that out in my house tour here.)
Note: this post is sponsored by Sears Parts Direct and also contains affiliate links. For more info, see my disclosure page. Words are 100% my own.
Goals for Re-Organizing and Finishing the Kitchen

Purge, purge, purge
I’ve been meaning to do it for a while, and I suppose I have gone through this phase before, but I need to do another clean-out of items I don’t use. I love the idea of a minimalist kitchen with clean counters and no saving of items for a rainy day. There is at least one upper cabinet that is FULL of crap I simply don’t need! With the heaviness of entertaining over Christmas and New Year’s Eve, the list of “what I actually use” versus “what I will probably never use, even if I use every plate” is pretty clear in my mind. So, it’s perfect timing to get rid of it before I talk myself out.

Organize the fridge for better cooking
Do you keep your refrigerator organized with a clean, efficient system? I have been cooking more and more over the last few months (I have a delicious winter soup recipe I can’t wait to share!), and I noticed how lacking I am in this department. So, it’s time to implement a few changes, such as these tips for the right way to store food in the refrigerator. Sears Parts Direct gave me a whole list of kitchen tips about a month ago, so I’ve been reading through them and picked up a thing or two. For example, I never really thought about how the lowest spot in the fridge is the coldest and the door is the warmest, so you should plan for food storage based on that (and that’s why the crisper drawers and such are where they are, etc.)… nerdy and neat!

Get all of my appliances to match
I will have a reveal for you guys in the coming weeks of my brand new appliances. The best part about them is that they finally all MATCH! I’ve always been a little embarrassed to take a picture of my whole kitchen as a whole because some of it was stainless steel and some of it was black (I am ok with either, but having both was a little eye-twitchy to live in the space). I bought what I could afford about 7 years ago as one of my first house purchases, and the opportunity came up to finally switch things out. Full reveal coming soon!

Get the copper pots out in the open
I have a bunch of beautiful copper pots and pans that are taking up WAY too much room in one of my lower cabinets. And once I saw this photo of Ellen Pompeo’s L.A. home, I knew my answer was a beautiful, functional pot rack that would turn them into art. I have the perfect space for them above the kitchen bar area. I’m also going to be getting a handful of new torches to learn how to weld this year (braze? solder? the vocab is new so I’ll have that info for you as I publish those projects). Maybe a beautiful wood and black metal combo, inspired by something like this?

Create a bar area
I haven’t quite figured out if I want a bar spot in the kitchen or the dining room just yet, but I know I’d like a space for putting cocktail glasses out in the open when friends stop by.
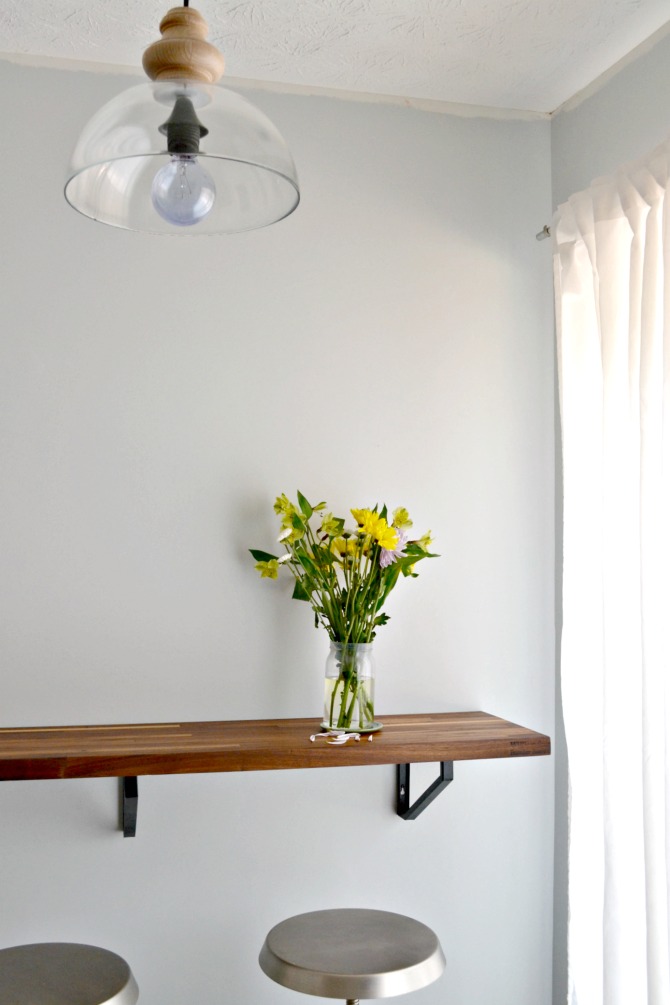
Touch up paint and figure out if I want to treat the countertops the same
I get asked about the cabinet paint and the countertops a LOT. Has the paint held up? Do you still like your butcher block?

The answer to both is yes. There are a few touch-ups needed on the lower gray cabinets where the paint has been nicked. The place that’s most affected is right above the silverware drawer, where it’s pretty obvious that I’m a little clumsy with putting forks and knives away (or just obviously my least favorite kitchen activity). I’ve still been pretty impressed that the rest of the paint has held up so well, and you can’t see a single scratch on the white uppers. In fact, I think that if I had tinted the primer for the lower cabinets to the same color as the paint, wouldn’t even know they’re nicked (because the white primer peeks through but I still don’t see the old wood cabinet color underneath). I didn’t think of it at the time of posting this, but I’ll take a new picture in the morning of it so you can see what I mean and update.
As for the butcher block, I continue to treat it with a mineral oil and wax mixture like I always have. It gives the wood a richness and beautiful color without yellowing, and the occasional treatment doesn’t really bother me (I just let it soak in overnight after the wood gets a good cleaning). However, I’ve been thinking more and more about covering it in a more permanent type of finish — not for my own needs, but because I don’t think I would trust a new homeowner to take such good care of it once I sell. I never actually use the counter as a cooking surface, so a food-safe treatment isn’t necessarily my biggest priority. It’s also not something I’m planning on doing soon, but it is on my mind and I’m in research mode. Perhaps coating it with something think like a poly would be better for a new homeowner to care for. The downside is that a poly wouldn’t really let the wood expand and contract as easily as the oil treatment does, so unless the bottom side is also sealed the same way, it could be a risk for cracking. Still thinking it over and open to your suggestions, too (if you’re knowledgeable about sealing countertops or long wood surfaces).

Do some composting
More cooking at home has led to two big changes: more recycling, and more opportunities for composting. And dishes… but I’m choosing denial for the sake of the point I’m trying to make. K has been talking about us building our own garden next to the pub shed once we finish that this spring, so that means mulching and learning to grow a little of our own food. And with the cute little composting cans that have been on the market, it seems easier than ever. Can someone tell me if they have had success with the little ones from World Market? They’re cute but I don’t want the stink, so having a tight seal is important!

Alrighty, I assumed this would be a shorter post because I was solely focusing on kitchen changes, but as usual I got carried away and it’s nearly 1500 words later. Are you planning on changing up your kitchen this year? I’d love to hear your ideas.
What I’m Loving for Kitchens Lately:


Love that you have a plan! And also really love your countertops… We are thinking of adding but your block ourselves, so seeing years is very helpful, as is hearing about their durability. One little note… I think I’d slide that coffee pot over to the center just to cover up the outlet, would be so much more pleasant to see on a daily basis even before you have coffee!
Waterlox your countertops! It’s a tung oil finish, so it soaks into the wood and is also really easy to re-treat if for some reason you scratch through the finish. But I have never had an issue with that. You can get it in a matte sheen, too. I’ve never liked the shininess of poly. The folks at Old Town Home did their countertops with Waterlox ages ago & theirs have held up well. I just wonder if it’s something you can use after you’ve already treated with a different kind of non-hardening oil.
I’m still working it out on if I can use tung oil on top (my guess is just that if I let it dry out like I have lately, then sand it down, that the oil will soak in… as long as it soaks in that should be ok). The main downside to Waterlox from what I read is that it yellows the color of the wood a little bit… and it still has to be reapplied regularly for a true water-proof finish. I suppose that for the next homeowner though they really wouldn’t notice the slight yellowing if they didn’t know what it looked like before!
It definitely does yellow the wood, but I think that if your countertop isn’t a super-blond wood, it won’t be super noticeable. I did the surface of my butcherblock desk with regular tung oil 10 years ago, and haven’t had to recoat, and I spill stuff on it all the time, no issues. It’s been really amazingly durable, and doesn’t chip like poly.
Also FYI, the posts I find on their blog have them using the same treatment I do instead of Waterlox. I just tweeted at them to get their info though, so I’ll see what they say. Thanks for the head’s up!
I’m pretty sure Wendy and Alex used the same oil/beeswax combo, as pictured above, before the Waterlox. The question is whether they had to sand down the counter before applying the new finish… Good eye! :D
Maybe it was a different blog? I just got a reply from Wendy & Alex that they still use the same combo I use: https://twitter.com/OldTownHome/status/959124916166684672
I’ve seen others use Waterlox (Chris Loves Julia did, I think, in a previous house of theirs). They have some gorgeous pictures.
Must be… I do read A LOT of design blogs :D
Chris Loves Julia just refinished their butcher block island. Used Waterlox both times. Just posted about it. Wendy and Alex were considering Waterlox for floors at their shore house.
Thanks for the follow up! I’ll check it out.
If I bought a house with beautiful butcher block counter tops and found out that the owner sealed them with something not food safe… that would probably kill the deal for me. Honestly, give buyers the benefit of the doubt and keep oiling your counters as you see fit. If you were so inclined, you could leave a bottle of the stuff for them at closing.
As for indoor compost bins, I use this one: http://a.co/e3pOegS
It’s not pretty (mine hangs inside a cupboard at the sink, opposite the garbage, but I have NEVER smelled the compost in the 3+ years I’ve used this model. It holds about half a weeks worth of stuff (if you’re an avid cook), and unless you’re putting raw meat into it I’ve gone as long as 1.5 weeks without changing it. I use compostable bags inside it, and it keeps anything that liquefies from ending up on your floor.
I didn’t realize how strongly I felt about this little guy until I started writing. Hahah. One small complaint, the lid is perforated (aeration is the key to the no smell, however counterintuitive that may be), but if you try and force the lid it WILL crack with enough force. I glued it back together with Gorilla Glue and its as good as ever, though :)
I
You know what, that’s a totally fair assessment! I didn’t really think about it like that. And it’s a lot more budget friendly to not have to refinish (plus, I honestly worry about it yellowing the beautiful wood trying to protect it).
Thanks for the recommendation on the compost bin, too. As long as it’s small and has no smell, that sounds like a win for me.
I have the white ceramic compost bucket, though I bought it at the hardware store. I use it at work primarily for apple cores. I only empty it every other week and have not noticed any smell or bug attraction. I use cheap brown lunch bags as liners, which our curbside compost can take as well.
We have an open 5L container on the counter for food scraps. So long as it’s emptied every day or two into the compost or worm farm then there’s no problem with smells. I found sealed containers far stinkier!
Thanks for letting me know about your experience! I guess I better make sure I’ve got a good spot for all of that composting if I’m going to be taking regular trips to dump it out. Off to pick a spot in the yard (and do you have a dog? I’m wondering how mine will fare with something stinky and therefore interesting in their sniffing territory).
We do have a dog and she does occasionally dig out something “tasty”. Usually corn cobs! We don’t compost meat or bones (it’s generally not reccomended anyway) and with a bit of training I’m sure we could discourage her. Our pike is literally a pike with no barrier save a small hedge . But there are many semi enclosed designs!
So much helpful info! Thanks Tara!
Were you planning on adding knobs or pulls to the cabinets? I thought I remembered it from your mood board but maybe I’m remembering wrong.
Yes, that’s on my to-do list as well! I have the hardware, just never seemed to find the time to get it done. I’m hoping with these other tasks being addressed that I’ll find the spark of energy to finally put myself to task. Good memory!
My other thought was maybe you decided to not do them anymore. Can’t wait to see the final look!
I’ll admit I did consider it, but after going so long without handles I do see the merits in adding them. I just found a solution for the caulking problem I had years ago, so I’m hoping I stay on a roll with that long-overdue progress. :)
I agree with handles being useful. Right now my handles are smack dab in the middle of the cabinet door. I’m short so it’s hard to reach up that high to use them so end up not using them. I can’t wait to start work on my own kitchen remodel. I’m hoping to do butcher block counters as well so looking forward to your update whenever you change the surface
Thank you for sharing! Here’s my kitchen project for this year: I have fluorescent lights in our kitchen- the old 70’s style office fluorescent light bars. Well, I am finally going to switch it out to LED lighting instead. Not only will it be brighter than before, and cost less to light, but it will finally kill that incessant low level hum that I sometimes hear when the fluorescent bulbs go bad. Wish me luck!
Good luck!
Super late to comment here, but I’m just catching up on my blog reading from the last couple of months. So I have had this compost bin from World Market (in red) for something like 5 years and it’s held up great! https://www.worldmarket.com/product/ceramic-compost-bucket-white.do?sortby=ourPicks&from=fn
I recommend going ceramic over metal as the finish on the metal ones will peel after a while an then the bin will start to rust. I empty mine about once a week into my curbside compost pickup container. Sometimes I’m lazy and either don’t cook a lot or just forget to empty it for a couple of weeks and that’s when things start to smell. As long as you keep a filter in the top (I hand wash those things when they get funky, so don’t feel like you have to buy new ones all the time) and NEVER put meat in there, you should be fine. Good luck!
Thanks so much for the tips, Ryan! Definitely writing these down!
Your kitchen looks so good!
Thank you!!
I’ve been using your kitchen cabinet painting experience to help guide me for painting my 1995 pickled oak kitchen cabinets. I’m going with white (Behr Billowy Down) for my upper cabinets & gray-ish (Valspar Toranado). You know imitation is the highest form of flattery.
My cabinets did not have hardware. I’m considering adding it. I’m curious why you didn’t add the hardware? I see in your blog your hardware selection. Is there something I should know/consider?
To be honest, Anne, I’m just lazy and skip from project to project. So it’s simply that I didn’t circle back around to putting the hardware on before I got distracted with another project. The hardware is literally sitting in one of the cabinets waiting for me to install. Just the nature of DIY, I guess? There is no reason whatsoever (that I know of) not to add it, and I still plan to put it on soon! I’ve been redoing a few things in the kitchen like recaulking and such, so I’m hoping this will be the time I actually take a minute and put it all on!
Thank you for your response. I asked about the hardware before I read the full thread. I didn’t realize someone else had already asked it. Hey—your answers are consistent! I read through more of your blogs. Thank you for providing information about your DIY-ing.
Haha, no problem! It’s natural to be curious about this stuff and we’re all pressed for time, so I figure that if I usually don’t look at the comment thread before asking a question, it would be unreasonable for me to expect readers to do it, and it simply makes for better interaction to treat you how I would if we were talking in person: directly answer your question, even if someone else asked me a similar question the week prior (since normally, that conversation would have been long gone!). After eight years of blogging, it’s second nature and I actually didn’t even think about being asked before. Thanks for reading, and have a great week!