
Disclosure: this post may contain affiliate links, which means I may make a commission if you decide to make a purchase through one of my links, at no cost to you.
This post may contain affiliate links. This won’t change your price, but may share some commission. Read my full disclosure here.
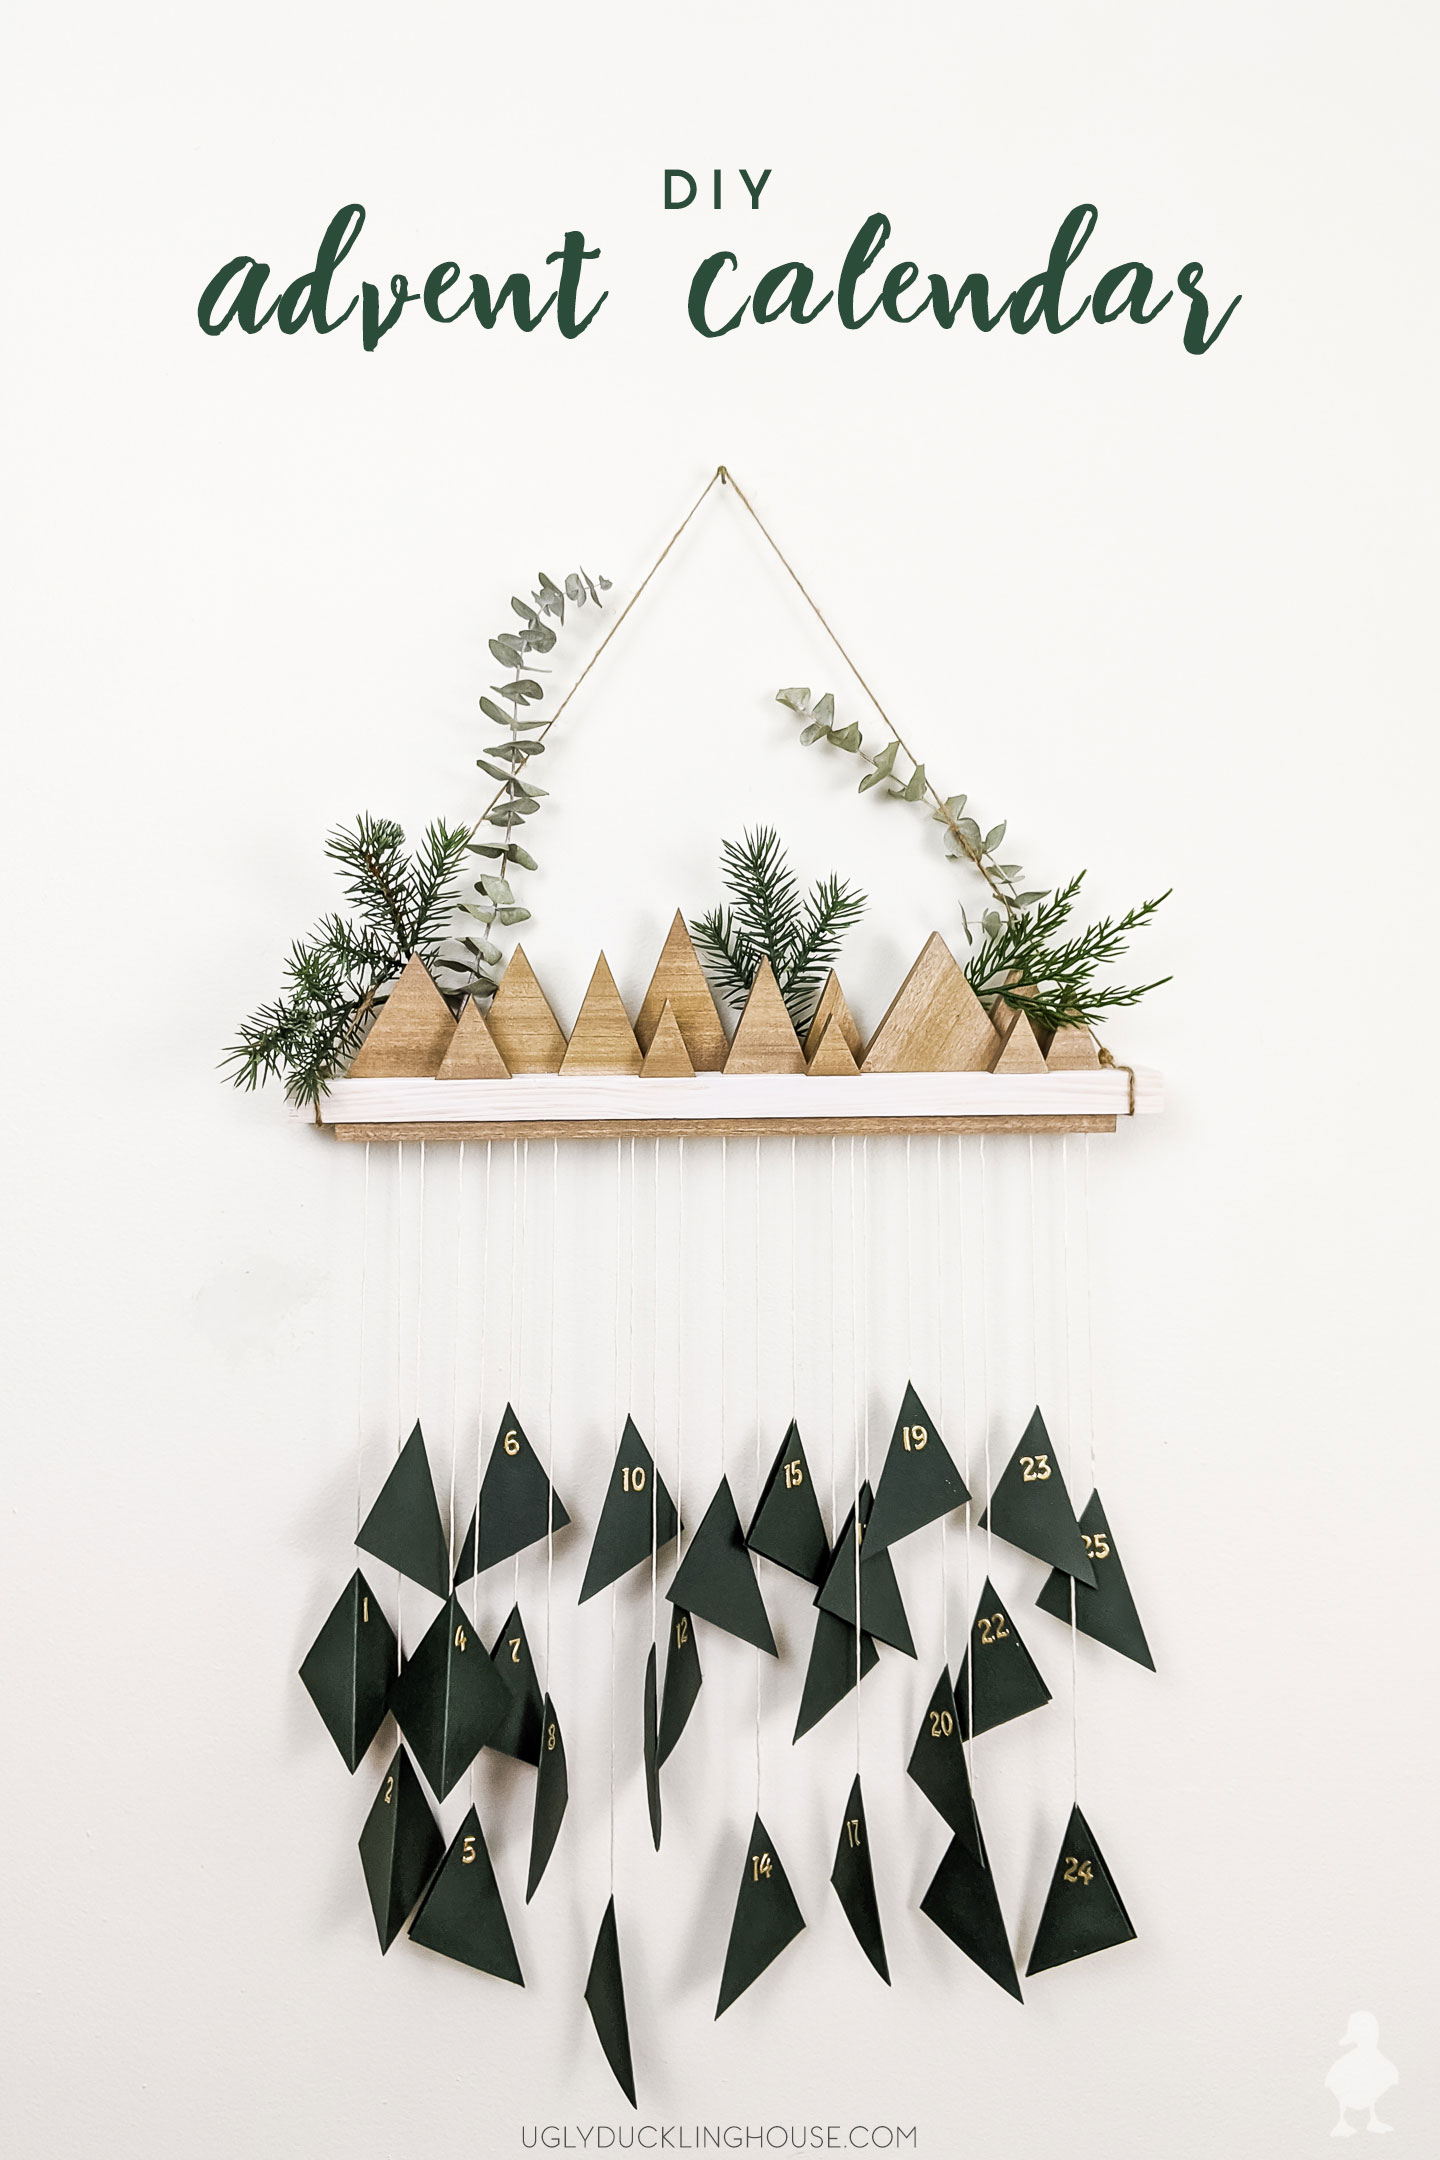
This boho-inspired hanging advent calendar is made from scrap wood and random craft supplies I had on hand, making it totally FREE!
Soooo, I know that in the blog world, I’m supposed to put this advent calendar / Christmas countdown idea up well in advance for you to make one yourself. But: what if you didn’t get the idea until December 1st?
That’s kind of the situation I found myself in. So, I figured, I’ll just make one anyway for my #25DIYsofChristmas roundup, and play a little catch-up to share this a couple of days late. If you haven’t created an advent calendar but still want to, all you have to do is grab some scrap wood and a few other objects you might have around the house and make it! I don’t think anyone but you and I will know that you weren’t ready on December 1st, OK?
Also, if you love advent calendars, I have to give a shout out to The Merrythought. They are masters of boho advent calendars and inspired me for mine!
Materials & Tools
- miter saw
- sander
- sandpaper
- safety gear (glasses, hearing protection, breathing mask)
- stain
- paint
- dril
- scrapbook paper
- utility knife
- straight edge
- string
- gold stickers
- washi tape
- scrap wood
- square wood dowel
How to make this boho hanging advent calendar for Christmas

Time needed: 1 day
This easy hanging advent/countdown calendar can be whipped up in less than a day! It was FREE by using scrap wood and found materials from my craft stash, so there’s no reason not to make one for the holiday season!
- Cut or locate 1×2 scrap wood
I actually can’t remember what I cut this piece in my garage for, but I found a 1×2 piece of whitewood cut to 16.5″, so I used that as my base (no worries if I later figure out what it was meant to go with; I can always pick up more whitewood!).
- Drill holes on either end for string & paint
I drilled a hole on each end through the 1×2; I decided to eyeball this to be about a half inch from each end (no need for perfection unless that makes you happy). I also gave it a quick swipe of paint and set to dry.
- Cut 2-1/2″ paper squares and fold
I found some beautiful dark green cardstock in my craft room and cut 2-1/2″ squares with a utility/craft knife. It’s best to be precise here. Score diagonally down the middle and fold.
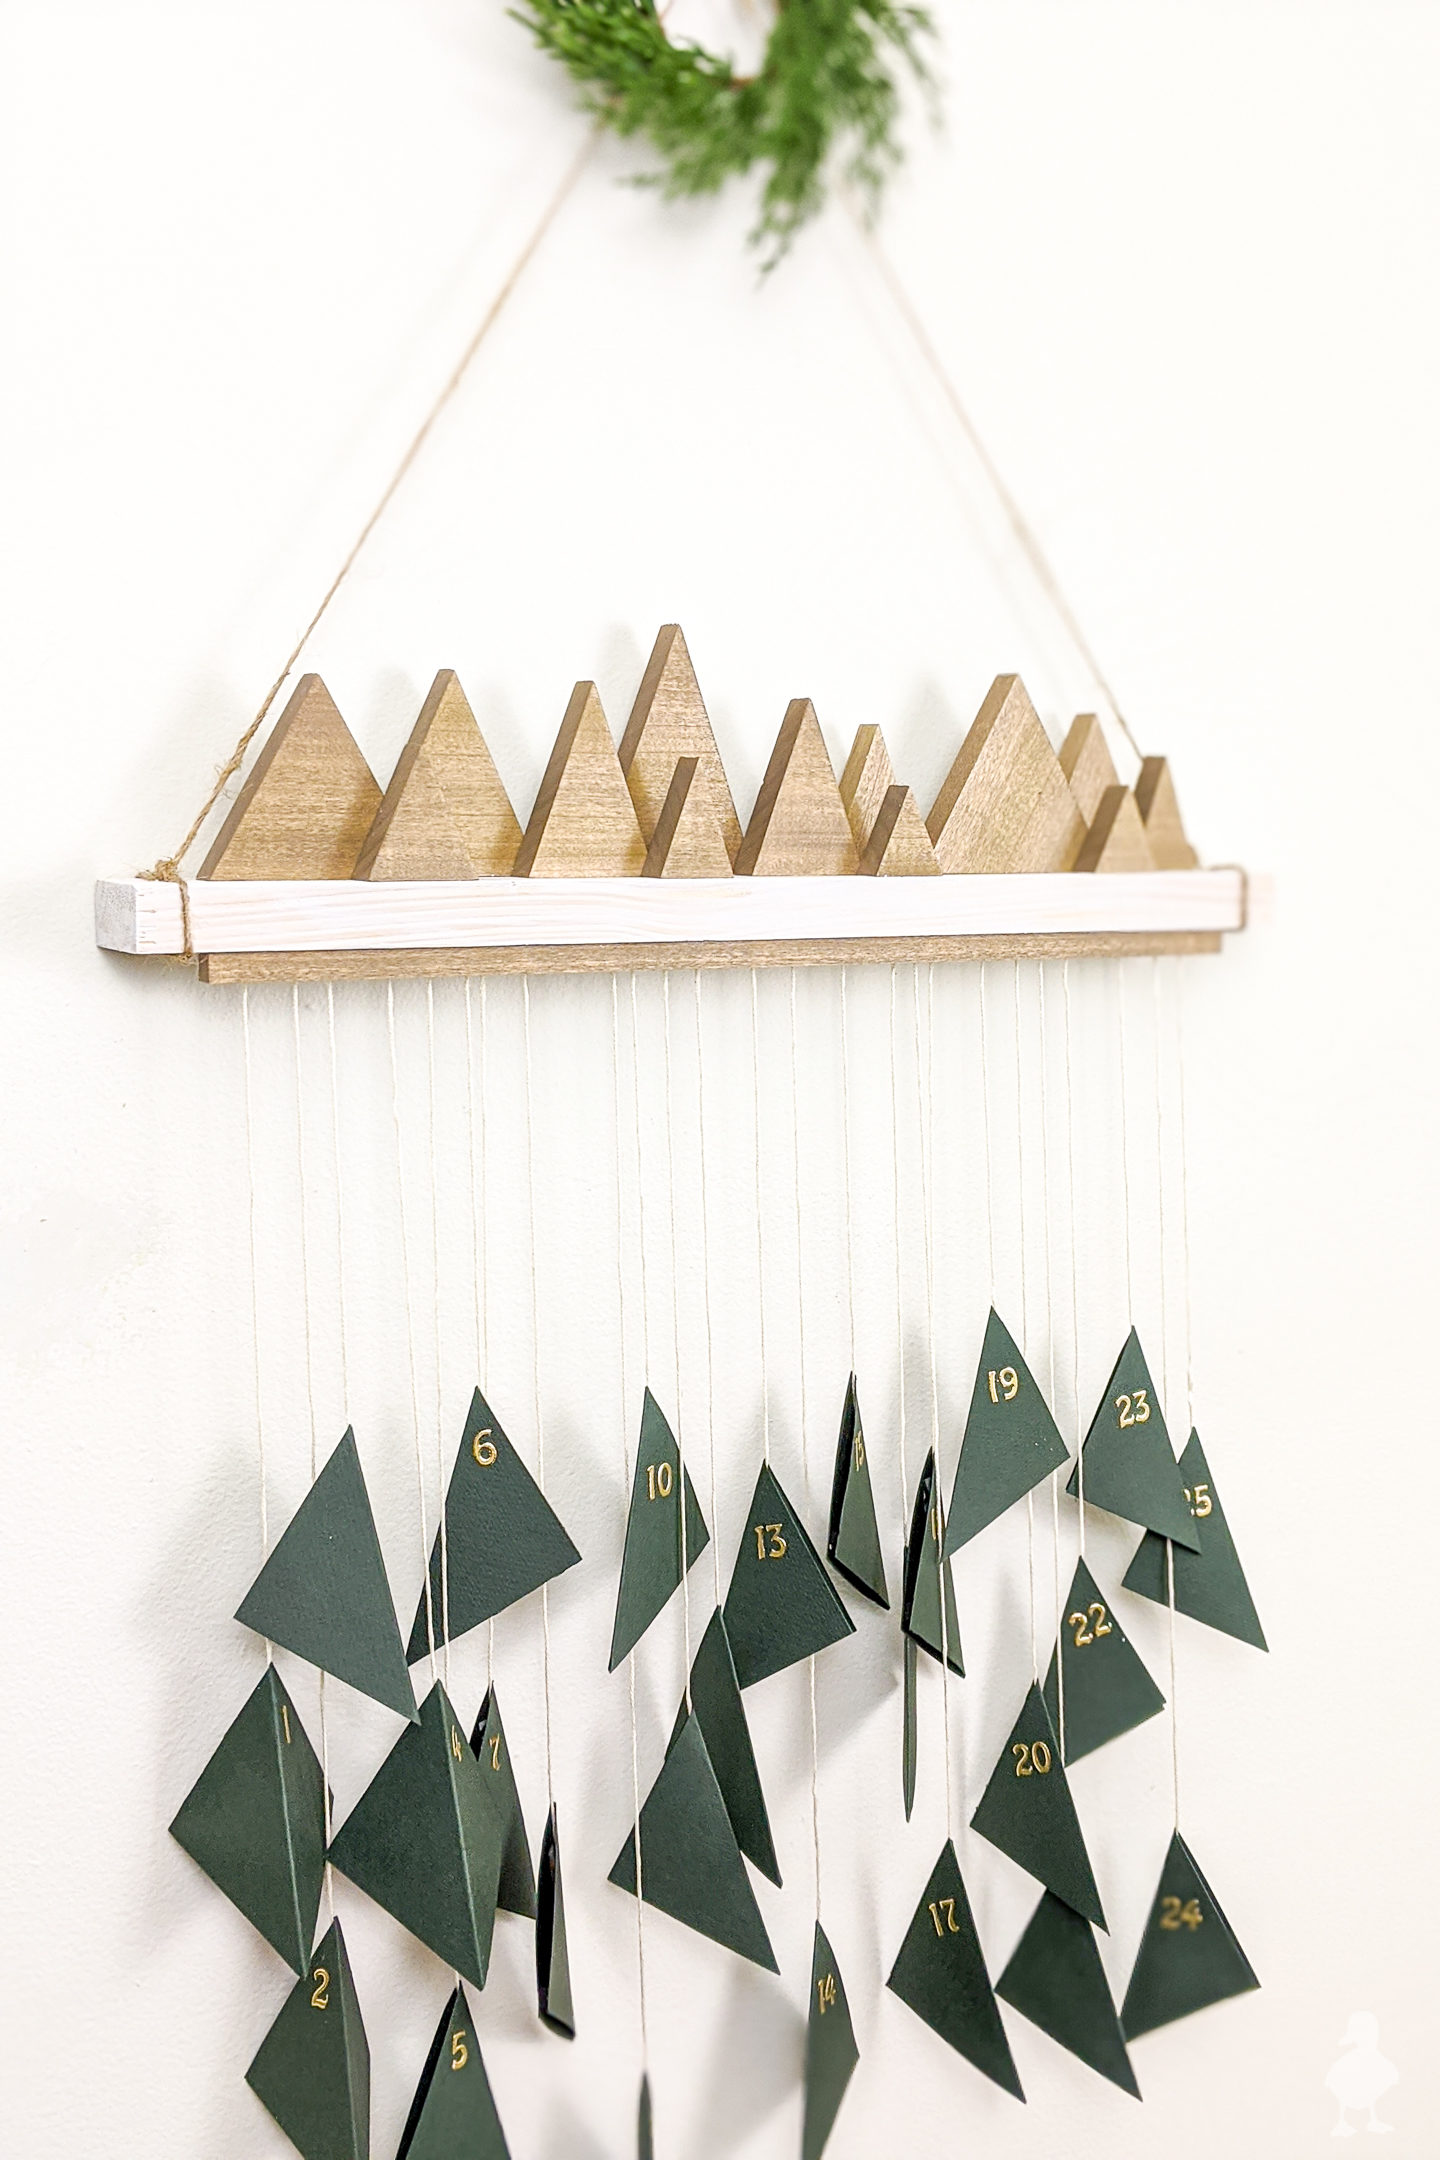
- Cut triangle “trees” from scrap wood
I had some 1/2″ poplar from another project and used the scrap to make triangles. Again, perfection wasn’t really my “thing” here, but I tried to make them all isosceles in shape (hopefully most of you remember math class — I tried to make two sides relatively even in length and that allowed the bottom to be nice and flat with a tree-like peak). Each tree is cut to 30-, 25-, or 20-degree angles and just a few inches in height (I eyeballed it so they varied in size). Note: I found the best way to make small cuts is to use some scrap pieces glued together to make a “jig” that will help steady the cut. It helps to keep the pieces from flying and felt safer to me. If you’re not confident on the miter saw, I would recommend cutting some trees using a scroll saw instead!

- Glue triangle trees to board & hang
After staining (I used Varathane Flagtstone), I added the trees in a staggered fashion to the board with wood glue. Then, I threaded some string through both of the previously-drilled holes with enough slack that it could hang on a hook.

- Hang paper on string
After adding number stickers to each piece of paper (1-25), I then connected them to more string and shut them closed with double-sided sticky dots (from my scrapbooking paper stash in my craft room). To attach these, I had planned to use a staple gun on the back of a square dowel to hang them all in a v-shape, but they weren’t securing well enough, so I used some simple washi tape (all hidden by the dowel!).

- Attach 25 good deeds/activities/etc.
I know there are lots of options with what to write on small scrolls or tape to the backside of the paper (family Christmas activities like putting up the tree and filling stockings, daily quotes about Christmas, Bible verses, etc.). My personal favorite is to create 25 good deeds to do during the holiday season (volunteering, buy or make an eco-friendly gift for someone, buy a coffee for the person in line behind you, etc.).
- Dress up & enjoy
As a final, totally unnecessary step, I added some greenery because I thought it would look fun and better match my other decor (I’ll be sharing that soon too).


As you open the triangles, they still look dimensional, so I’m looking forward to having them all diamond-y by the end of the month.
I’ve also been told this looks like mountains, which is also fun (if you love mountains, call them mountains, fine by me!). I also wound up with 20+ surplus triangles (I cut WAY more than I needed, ha!) so I think I’ll reuse these cuts for a new project. Maybe “modern tree” fridge magnets?
Phew! Just a few projects in, and I’m already feeling the CRUNCH to get them all done before the 25th! I hope I make it, but if I don’t, I’m still excited about how creative this is making me feel and how many more projects this is turning out to be. It’s still a lot more holiday than I’ve ever done in any year prior, so I’m calling it a win no matter what. I’m going to keep plugging away until I get to 25, but hopefully it’s all done by Christmas day and not by New Years! ? Speaking of, the next project I’m sharing will be one that can fit either holiday! Working on that as soon as this one goes live (so you may be seeing TWO today just so I can feel like I’m not falling behind). In the meantime, check out ALL the projects for the 2019 holiday rush below, just in case you missed any… and please share your favorites!
25 DIYs of Christmas
This project is part of a series of DIY gifts, decor, and other fun inspiration that I’m calling my “25 DIYs of Christmas“! Check out the list below to see each post (step by step tutorials, recipes, videos, free patterns, and woodworking plans available for each (where applicable). Lots of these ideas have multiple versions to show you the possibilities of each DIY. Even better, you can subscribe to make sure you don’t miss a single post!


I really love the projects you’re sharing! Thanks!
Thanks Amanda! Got a few more coming before Christmas!